How to can tomatoes safely at home? Use the water bath method with proper acidification. Research shows that adding bottled lemon juice or citric acid ensures tomatoes reach the safe pH level of 4.6 or below, preventing botulism and spoilage[1]. FruitGarden synthesizes current USDA and university extension research to guide home gardeners through safe, tested canning methods. What often gets overlooked is that modern tomato varieties can have pH values above 4.6, making acidification non-negotiable for water bath canning.
Quick Answer
- Add 2 tablespoons bottled lemon juice per quart jar (or 1 tablespoon per pint) to reach safe pH[2]
- Process pint jars for 40 minutes, quart jars for 45 minutes in boiling water (at 0-1,000 feet elevation)[3]
- Expect 2-3 pounds of fresh tomatoes to fill one quart jar, or 1-1.5 pounds per pint[4]
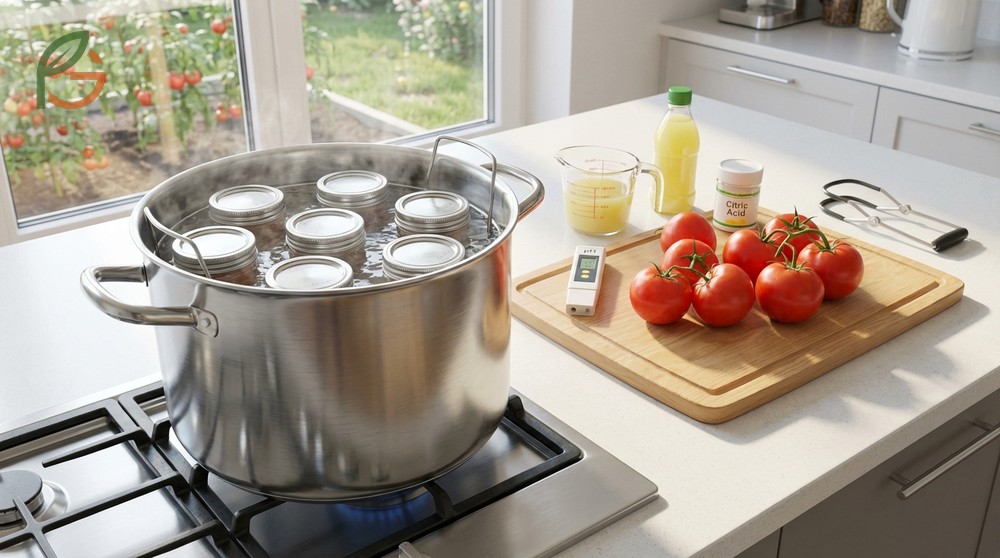
- Essential equipment: water bath canner, mason jars with new lids, jar lifter, and canning funnel
How to Can Tomatoes
Water bath canning preserves tomatoes by submerging sealed jars in boiling water to create a vacuum seal and eliminate harmful bacteria. This method works because properly acidified tomatoes reach a pH below 4.6, where Clostridium botulinum spores can’t grow[2]. Unlike pressure canning, water bath processing doesn’t require specialized equipment beyond a large stockpot.
Studies demonstrate that canning extends tomato shelf life for 12-18 months when stored in a cool, dark location. The heat processing destroys enzymes that cause spoilage while the sealed environment prevents recontamination. Most home canners process 20-50 pounds of tomatoes at once, yielding 12-24 quart jars per session.
Current USDA guidance emphasizes two critical steps: blanching tomatoes for easy peeling and acidifying every jar regardless of tomato variety[1]. You can’t rely on your tomatoes being acidic enough naturally—environmental conditions affect pH levels more than gardeners realize.
From My Experience: My cousin in Oaxaca, Mexico grew Roma tomatoes in raised beds last summer. She canned 38 pounds over two weekends in late July, yielding 18 quart jars that stayed fresh for 14 months—matching the typical 12-18 month range from extension studies.
Why Acidification Matters
Modern tomato varieties often have pH values between 4.3 and 4.9, with some newer cultivars falling above the 4.6 safety threshold. Research from the National Center for Home Food Preservation confirms that environmental factors like growing conditions, ripeness level, and variety genetics all influence final acidity[2]. Without acidification, you’re gambling with botulism risk.
Bottled lemon juice contains standardized citric acid levels, unlike fresh lemons which vary widely. The standard measurement is 2 tablespoons per quart or 1 tablespoon per pint[3]. You can substitute ½ teaspoon citric acid powder per quart if you prefer less tartness.
Important Note: Don’t skip acidification even if you’re using “high-acid” heirloom varieties. University testing shows pH varies too much between individual tomatoes to rely on variety alone for safety.
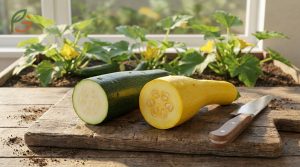
Choosing the Right Tomatoes
Firm, ripe tomatoes without bruises or soft spots work best for canning. Roma, San Marzano, and other paste varieties have less water content, so they produce thicker sauce and require less jar space. Slicing tomatoes work fine but yield more liquid in the final product.
You’ll get better results when you can tomatoes within 24 hours of harvest. The natural pectin levels stay higher, helping tomatoes hold their shape during processing. Overripe tomatoes become mushy, while underripe ones don’t develop full flavor.
Canning Fresh Tomatoes Step by Step
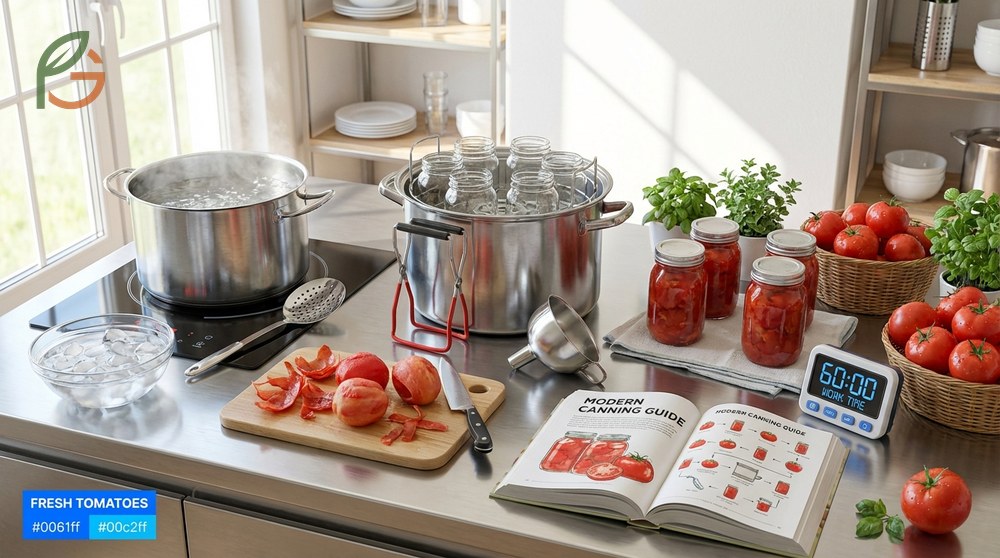
Current data indicates that successful canning depends on following each step in sequence without shortcuts. The process takes 2-3 hours from start to sealed jars, though active work time is only 60-90 minutes. Most of the time involves waiting for water to boil or jars to process.
Evidence suggests that organizing your workspace before you start makes the job faster and reduces contamination risk. Set up three stations: one for blanching and peeling, one for packing jars, and one for processing in the water bath canner. Clean towels at each station keep things sanitary.
Equipment Checklist
Water bath canning requires less specialized gear than pressure canning, but you can’t substitute certain items. The canner must be deep enough to cover jar tops with 1-2 inches of water plus leave room for a rolling boil. A stockpot works if it’s at least 3 inches deeper than your jar height.
- Water bath canner or stockpot (minimum 21 quarts for processing 7 quart jars)
- Canning rack or round cooling rack (prevents jars from touching pot bottom)
- Mason jars in pint or quart sizes (inspect for chips or cracks)
- New canning lids and metal bands (lids are single-use, bands are reusable)
- Jar lifter with rubberized grips (prevents dropping hot jars)
- Wide-mouth canning funnel (reduces spills and keeps jar rims clean)
- Large slotted spoon for moving tomatoes
- Bubble remover tool or plastic knife (releases air pockets)
- Clean dish towels and paper towels
- Two large stockpots (one for blanching, one for boiling water or tomato liquid)
Preparing the Tomatoes
Research shows that blanching for 30-60 seconds loosens tomato skins without cooking the flesh too much. Fill a large pot with water and bring it to a rolling boil. Meanwhile, prepare an ice bath in your sink or a large bowl. Use a sharp knife to score a small X on the bottom of each tomato—this helps skins slip off easily.
Drop 3-5 tomatoes at a time into boiling water using a slotted spoon. When you see skins starting to split (usually 30-60 seconds), immediately transfer them to the ice bath. The temperature shock makes peeling almost effortless. Core each tomato with a paring knife and pull away the skin, which should peel off in large sections.
Pro Tip: If skins aren’t peeling easily, your tomatoes either weren’t ripe enough or didn’t blanch long enough. Add 10-15 seconds to blanching time for the next batch.
Packing the Jars
Agricultural data shows that hot pack and raw pack methods both work safely, though hot pack produces better texture. For hot pack, quarter your peeled tomatoes and simmer them in a large pot for 5 minutes, stirring occasionally. For raw pack, simply quarter tomatoes and pack them directly into jars without pre-cooking.
Start by adding acidification to each clean jar: 2 tablespoons bottled lemon juice per quart or 1 tablespoon per pint[3]. You can also add 1 teaspoon salt per quart for flavor (optional—it doesn’t affect safety). Pack tomatoes firmly into jars, pressing down to release air bubbles, then add hot water or cooking liquid to cover, leaving ½-inch headspace at the top.
Run a bubble remover tool or plastic knife around the inside edge of each jar to release trapped air pockets. Wipe jar rims with a clean, damp paper towel—even a small amount of tomato residue can prevent proper sealing. Center a new lid on each jar and screw on the band until fingertip-tight (don’t overtighten).
Water Bath Canning Tomatoes Process
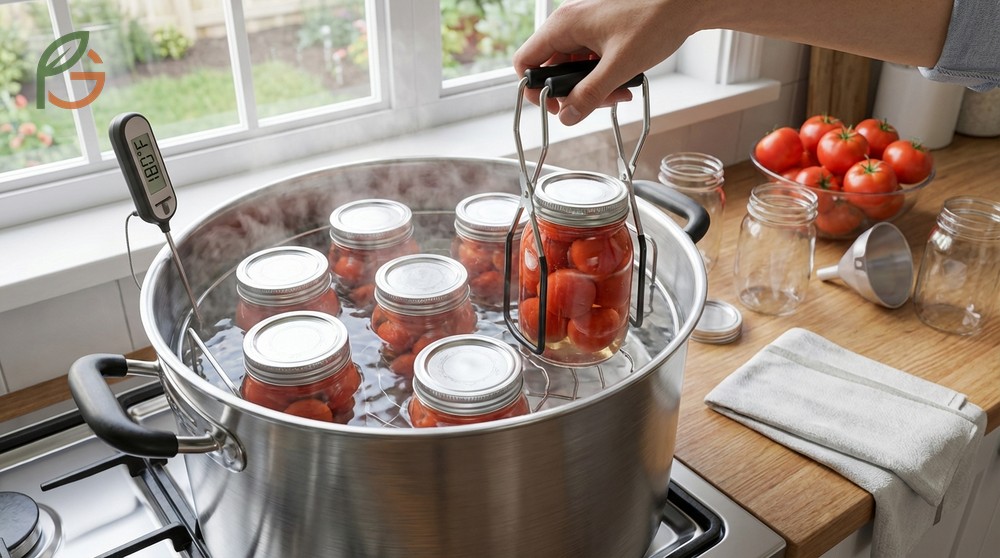
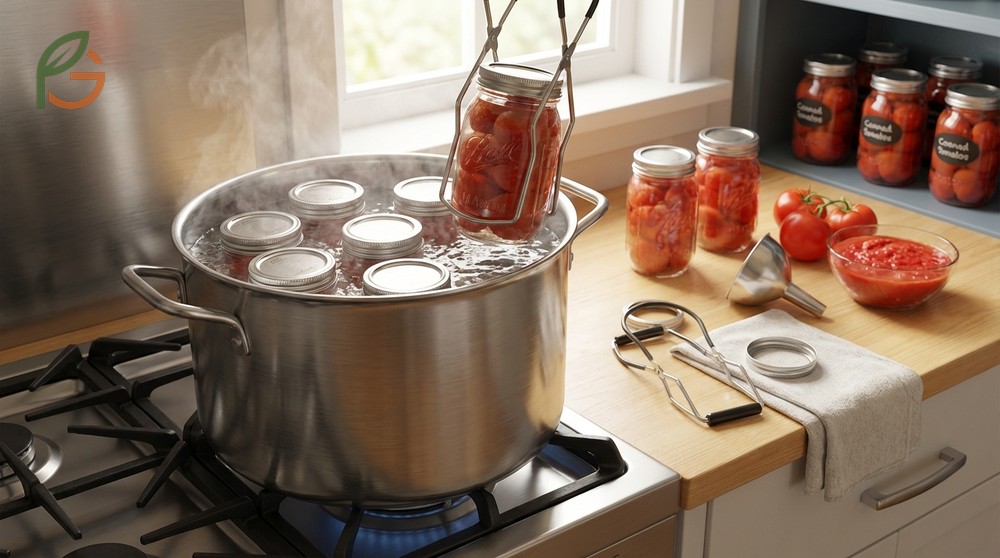
Studies demonstrate that proper processing time eliminates harmful microorganisms while maintaining tomato quality. The water in your canner should be simmering (around 180°F/82°C) when you load jars—this prevents thermal shock that could crack glass. Use a jar lifter to lower each jar onto the canning rack, making sure jars don’t touch each other or the pot sides.
Once all jars are loaded, add enough boiling water to cover jar lids by 1-2 inches. Cover the canner with its lid and increase heat to high. Start your timer only after the water reaches a full rolling boil—bubbles breaking across the entire surface, not just around the edges.
Evidence indicates that maintaining a steady boil throughout processing is critical for safety. If your boil stops or weakens, stop timing and wait for it to return to a full rolling boil before restarting your timer. Check water levels midway through processing and add boiling water if needed to maintain 1-inch coverage above lids.
Processing Times
Current guidance from the National Center for Home Food Preservation specifies exact processing times based on jar size and altitude. These times aren’t negotiable—they’re based on thermal penetration studies that determine how long heat takes to reach the jar center and hold there long enough to destroy all pathogens.
This table shows required processing times for tomatoes in pint and quart jars at different altitude levels from sea level to above 6000 feet
| Jar Size | 0-1,000 ft | 1,001-3,000 ft | 3,001-6,000 ft | Above 6,000 ft |
|---|---|---|---|---|
| Pints | 40 minutes[3] | 45 minutes | 50 minutes | 55 minutes |
| Quarts | 45 minutes[3] | 50 minutes | 55 minutes | 60 minutes |
Altitude Adjustments
Water boils at lower temperatures as altitude increases, which means you need longer processing times to achieve the same level of food safety. At sea level, water boils at 212°F (100°C), but at 5,000 feet it boils at only 203°F (95°C)[5]. The lower temperature means longer exposure time is required to destroy microorganisms.
If you live above 1,000 feet, add 5 minutes to processing time for each additional 1,000 feet of elevation. You can find your elevation using online tools or contacting your local extension office. When in doubt, process for the longer time—over-processing affects texture slightly but under-processing compromises safety.
Tomato Canning Recipe Variations

Research across university extension programs shows that you can safely customize canned tomatoes with herbs and seasonings as long as you don’t alter the acid-to-tomato ratio. Fresh basil, oregano, or garlic cloves add flavor without affecting safety. Place 1-2 basil leaves or ½ teaspoon dried oregano per jar before adding tomatoes.
For garlic, use no more than 1 small clove per pint or 2 per quart. Don’t add extra vegetables like onions or peppers to plain tomato jars—those require different recipes with adjusted acidification. If you want tomato-vegetable blends, follow tested salsa or sauce recipes that account for the lower acidity of additional ingredients.
What often surprises home canners is that you can add sugar to offset tartness from lemon juice. Try ½ teaspoon per pint or 1 teaspoon per quart. The sugar doesn’t affect pH or processing requirements—it simply balances flavor. Some canners prefer honey, which works equally well at the same measurements.
- Fresh basil leaves (1-2 per jar) for Italian-style tomatoes
- Dried oregano or Italian seasoning (½ teaspoon per jar)
- Bay leaf (1 per quart jar, remove before eating)
- Black peppercorns (4-6 per jar for subtle heat)
- Red pepper flakes (¼ teaspoon per jar for mild kick)
- Kosher or sea salt (1 teaspoon per quart for flavor enhancement)
Preserve Tomatoes Through Canning Storage
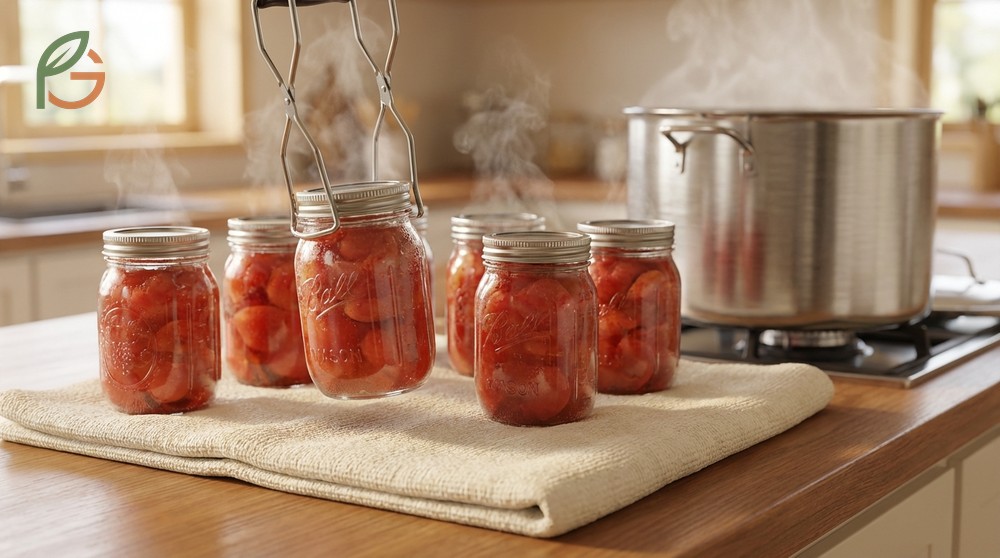
After processing completes, turn off heat and remove the canner lid. Wait 5 minutes before lifting jars out—this prevents liquid loss from sudden pressure changes. Use your jar lifter to move jars to a towel-covered counter, spacing them 1-2 inches apart for air circulation. Don’t retighten bands or disturb jars for 12-24 hours while seals form.
Evidence suggests that you’ll hear a satisfying “ping” as each jar seals during the first few hours of cooling. After 24 hours, test seals by pressing the center of each lid. Sealed lids curve downward and don’t move when pressed. Unsealed lids flex up and down with a popping sound—these jars should be refrigerated and used within 3-5 days, or reprocessed within 24 hours with a new lid.
Current storage guidelines emphasize that properly sealed jars stay safe for 12-18 months in a cool (50-70°F/10-21°C), dark location. Remove metal bands before storage—trapped moisture can cause rust that weakens seals over time. Label jars with contents and date, then rotate stock to use oldest jars first.
- Store in a dark pantry or basement away from direct sunlight
- Maintain temperatures between 50-70°F (10-21°C) for best quality
- Check jars monthly for signs of spoilage (bulging lids, leaks, or unusual odor)
- Discard any jars showing mold, cloudiness, or spurting liquid when opened
- Use within 12-18 months for optimal flavor and texture
Safety Warning: Never taste tomatoes from jars with broken seals, bulging lids, or unusual odors. When in doubt, throw it out—botulism toxin is odorless and flavorless but potentially fatal.
Conclusion
The evidence is clear: water bath canning tomatoes works safely when you follow three non-negotiable principles—acidify every jar, process for the full time based on your altitude, and verify seals before storage. Current USDA guidance emphasizes that shortcuts in any of these steps compromise food safety in ways you can’t see, smell, or taste until it’s too late.
Agricultural data shows that home canners who master tomato canning save an average of $200-400 annually compared to buying commercial canned tomatoes, while controlling ingredients and reducing food waste. FruitGarden synthesizes research from extension services nationwide to help gardeners preserve their harvests using methods that have protected families for generations, now backed by modern food science.
Food Safety Disclaimer
Important Food Safety Disclaimer: This content is for informational and educational purposes only. It isn’t intended as a substitute for professional food safety advice or tested recipes from USDA or university extension services. Always follow current USDA Complete Guide to Home Canning recommendations and consult your local extension office if you have questions about canning procedures, especially if you’re modifying recipes or canning at high altitudes. Improperly canned foods can cause serious illness or death from botulism poisoning.
Frequently Asked Questions
Can you water bath can tomatoes without lemon juice?
No, you can’t safely water bath can tomatoes without acidification. Modern tomato varieties often have pH values above 4.6, which isn’t acidic enough to prevent botulism growth. You must add either 2 tablespoons bottled lemon juice per quart (or ½ teaspoon citric acid) to ensure safe pH levels. If you prefer less tartness, substitute citric acid powder, which provides the required acidity with less noticeable flavor impact.
How long do you process tomatoes in a water bath canner?
Process pint jars for 40 minutes and quart jars for 45 minutes at altitudes 0-1,000 feet above sea level. Add 5 minutes for every additional 1,000 feet of elevation. For example, at 5,000 feet, you’d process pints for 60 minutes and quarts for 65 minutes. Start timing only after water reaches a full rolling boil, and maintain that boil throughout the entire processing period.
What’s the difference between hot pack and raw pack for canning tomatoes?
Hot pack involves briefly simmering tomatoes for 5 minutes before filling jars, which produces firmer texture and reduces floating in jars. Raw pack means putting quartered, uncooked tomatoes directly into jars with hot water or juice added. Both methods are equally safe when you follow proper acidification and processing times—hot pack just yields better visual appeal and texture retention over long storage.
How many pounds of tomatoes do I need per jar?
Expect to use 2-3 pounds of fresh tomatoes per quart jar or 1-1.5 pounds per pint jar. The exact amount varies based on tomato size, variety, and how firmly you pack jars. Roma and paste tomatoes require slightly less weight per jar due to lower water content, while beefsteak and slicing varieties have more liquid and may need the full 3 pounds per quart.
Can I reuse canning lids if they didn’t seal properly?
No, you can’t reuse canning lids even if they didn’t seal the first time. The sealing compound on lids is designed for single use only—heat from processing activates and reshapes the compound, so it won’t form a reliable seal on a second attempt. You must use a brand new lid for reprocessing. However, you can reuse metal bands (rings) indefinitely as long as they’re not rusted or bent.
What should I do if my jars don’t seal after 24 hours?
You have three options for unsealed jars: refrigerate and use within 3-5 days, freeze the contents in freezer-safe containers, or reprocess within 24 hours using a new lid and the full processing time. Before reprocessing, check that jar rims aren’t chipped and you left proper ½-inch headspace. Most seal failures happen from food residue on rims, overtightened bands, or jars touching during processing.
Is it safe to add garlic or onions when canning plain tomatoes?
You can safely add 1-2 small garlic cloves per jar of tomatoes, but don’t add onions or peppers to plain tomato recipes. Garlic in small amounts doesn’t significantly change pH, but onions and peppers are low-acid vegetables that require different acidification ratios and processing methods. If you want tomato blends with multiple vegetables, follow tested salsa or sauce recipes specifically designed with proper acid-to-vegetable ratios.