
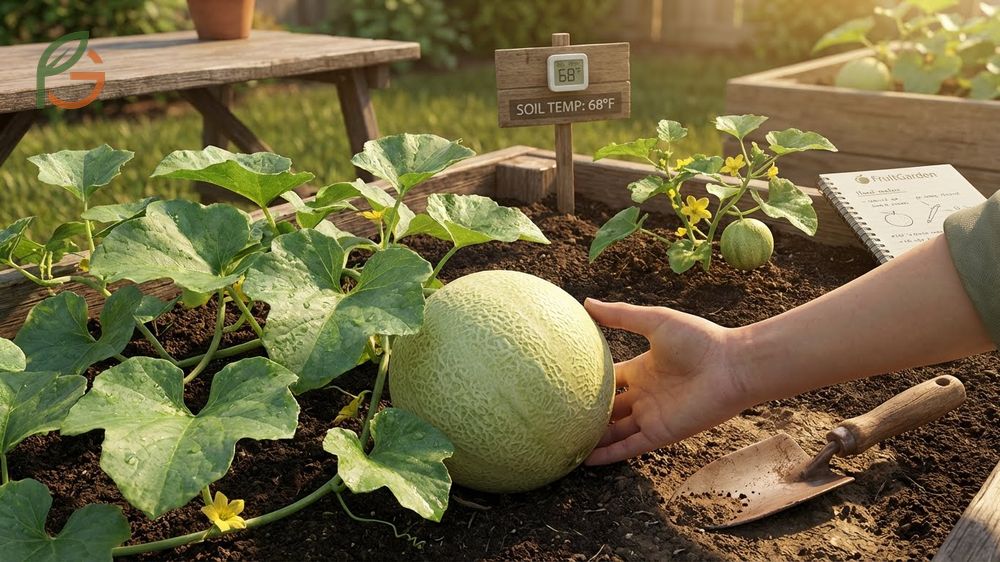
How to grow honeydew starts with planting seeds 1-1.5 inches deep in warm soil and providing consistent moisture until fruits develop. Research shows these melons need soil temperatures of at least 65°F (18°C) and 80-90 days to reach maturity[1]. You’ll get the sweetest melons when you reduce watering during the final ripening stage. FruitGarden synthesizes current agricultural research to help you grow perfect honeydews in your backyard.
Quick Answer
- Plant seeds 1-1.5 inches deep when soil reaches 65°F (18°C) or warmer[1]
- Space plants 4-6 feet apart in mounds or rows for proper vine growth
- Water deeply 1-2 inches per week during growth, then reduce before harvest[1]
- Harvest after 80-90 days when blossom end softens and skin turns creamy yellow[2]
How to Grow Honeydew
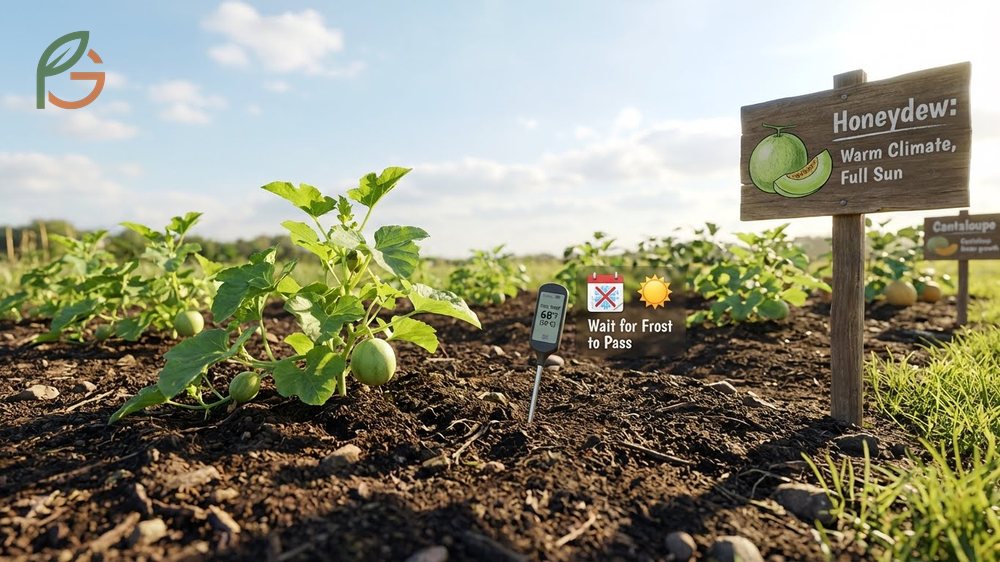
Research shows honeydew melons thrive in warm climates with full sun exposure and well-drained soil[1]. These winter melons require 2-4 weeks longer growing seasons than cantaloupes, making transplants a better choice in cooler regions. You’ll need to wait until all frost danger passes and soil warms to at least 65°F (18°C) before planting.
Most gardeners don’t realize that honeydews are more temperature-sensitive than other melons. Soil temperatures below 50°F (10°C) slow growth significantly and can damage young plants. If you’re in USDA zones 4-6, starting seeds indoors 3-4 weeks before your last frost date gives you a head start on the season.
The plants produce large vines that spread 4-6 feet in all directions. Each vine develops both male and female flowers that need pollination to set fruit. Studies demonstrate that providing consistent conditions during the 80-90 day growing period leads to better fruit development and sweeter flavor.
Choosing the Right Location
Current agricultural guidance emphasizes selecting sites with at least 8 hours of direct sunlight daily. Honeydews won’t tolerate shade or cool, damp conditions. Sandy or light-textured soils that warm quickly in spring work best because they reduce the risk of soil-borne diseases.
Avoid planting in areas where you’ve grown cucumbers, squash, or other melons in the past two years. This crop rotation prevents pest and disease buildup in the soil. Good air circulation around plants also reduces humidity and keeps foliage dry.
Soil Preparation
Honeydews prefer pH levels between 6.5-7.5 and soil rich in organic matter[3]. Work 2-3 inches of compost or well-rotted manure into the top 6-8 inches of soil before planting. This improves drainage and provides nutrients throughout the growing season.
Consider using black plastic mulch to warm soil faster and conserve moisture. The plastic also suppresses weeds and keeps developing fruits clean. You can install drip irrigation lines under the plastic for efficient watering.
Important Note: Don’t add fresh manure or high-nitrogen fertilizers right before planting. Excess nitrogen promotes leafy growth at the expense of fruit development and can delay harvest by 1-2 weeks.
How to Plant Honeydew Melon
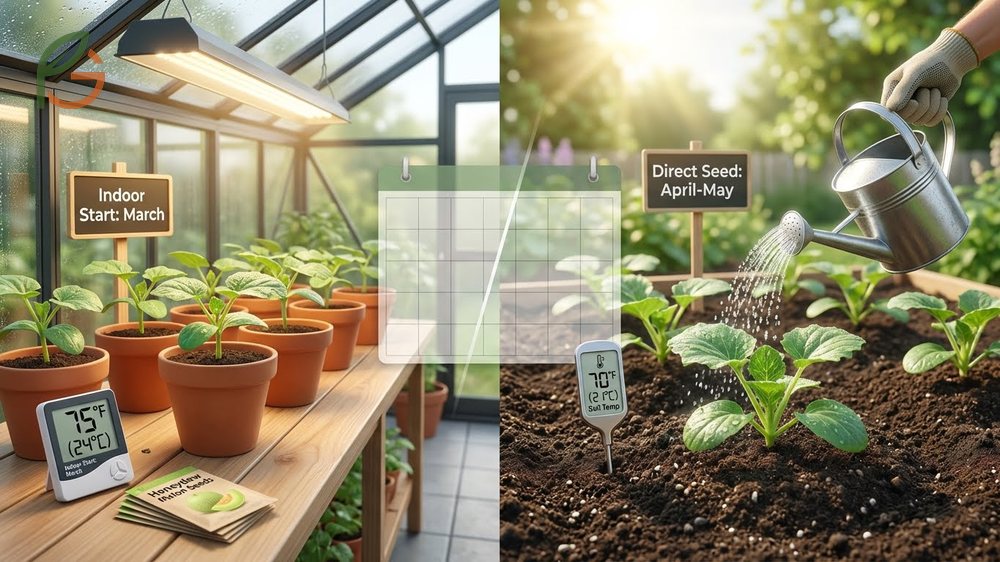
You’ve got two main options: starting seeds indoors for earlier harvests or direct-seeding outdoors in warm climates. Indoor-started transplants mature about 2 weeks before direct-seeded plants[1]. This timing advantage matters if you’re working with shorter growing seasons.
Whichever method you choose, don’t rush the planting date. Melon seeds won’t germinate well in cool soil, and transplants can suffer permanent damage from cold stress. Wait until nighttime temperatures stay consistently above 50°F (10°C).
Seed Starting Indoors
Start seeds 3-4 weeks before your last expected frost date. Plant 2-3 seeds per 3-4 inch peat pot at ½ inch depth, keeping soil between 80-90°F (27-32°C) for best germination[3]. Seeds typically sprout in 4-10 days with proper heat and moisture.
Once seedlings emerge, lower temperatures to 70-75°F (21-24°C) and reduce watering slightly. Thin to one strong plant per pot when the first true leaves appear. Transplants should have 2-3 mature leaves and well-developed roots before moving outdoors.
Hardening off is critical for transplant success. Gradually expose plants to outdoor conditions over 7-10 days, starting with 1-2 hours of morning sun and increasing daily. Transplant on an overcast day to minimize shock, and handle roots carefully—they’re extremely sensitive to disturbance.
Direct Seeding Outdoors
Plant 4-6 seeds in mounds spaced 4-6 feet apart, or space seeds 1 foot apart in rows 5 feet apart[1]. Sow seeds 1-1.5 inches deep and cover with loose soil. Water gently to avoid washing seeds away.
Thin seedlings to 2-3 plants per mound when they develop two true leaves. Use scissors instead of pulling to avoid disturbing remaining plants’ roots. The plants you remove won’t transplant successfully, so compost them or use as mulch.
From My Experience: My cousin in Guadalajara, Mexico direct-seeded honeydews in late April 2024. Seeds germinated in 5 days versus the typical 7-10 day range, achieving 85% success rate by using black plastic mulch to boost soil temperature to 75°F (24°C).
Trellis for Honeydew Melon
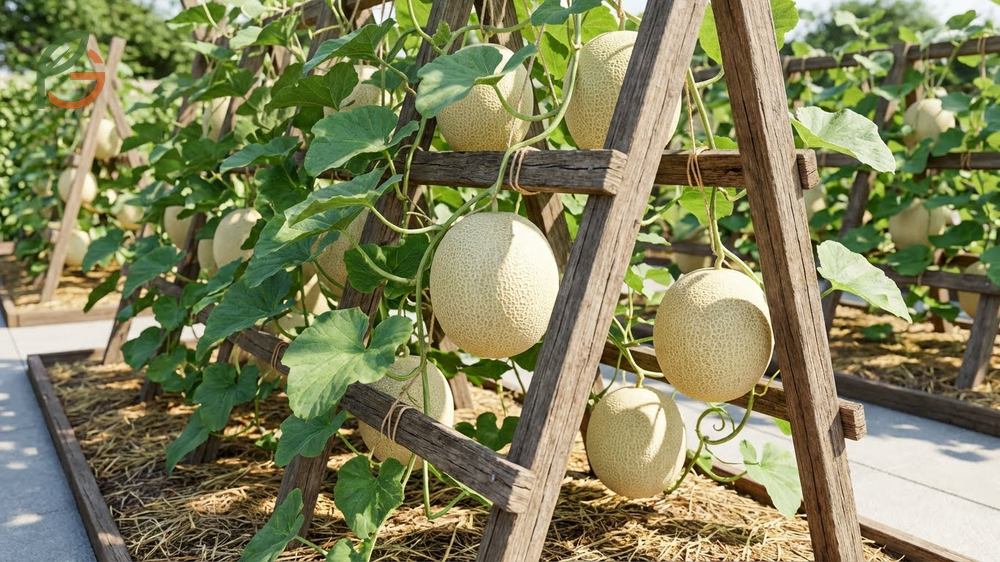
Growing honeydews vertically saves space and improves plant health. Vertical growing allows better airflow that keeps foliage dry and reduces disease pressure. You can plant at closer spacings—as tight as 1-2 feet apart—when using sturdy trellises[3].
Install trellises that can support 100+ pounds of weight. Each honeydew fruit weighs 4-8 pounds at maturity, and vines produce multiple fruits. A-frame structures, cattle panels, or strong wooden fences work well. Make sure supports are at least 6 feet tall to accommodate full vine length.
You’ll need to create individual slings for each developing fruit. Use old t-shirts, pantyhose, or commercial melon slings tied to the trellis. Check slings weekly and adjust as fruits grow. This support prevents stems from breaking under the weight and keeps fruits from dropping prematurely.
- Reduces soil contact that can cause fruit rot and disease
- Makes harvesting easier on your back and knees
- Improves sunlight exposure for better ripening
- Allows you to grow 2-3 times more plants in the same space
- Keeps fruits cleaner and easier to inspect for pests
Trellis Tip: Train vines onto supports when they’re 12-18 inches long. Gently weave stems through trellis openings or tie loosely with soft cloth strips. Don’t force mature vines onto trellises—they’ll break.
Watering Honeydew Plants
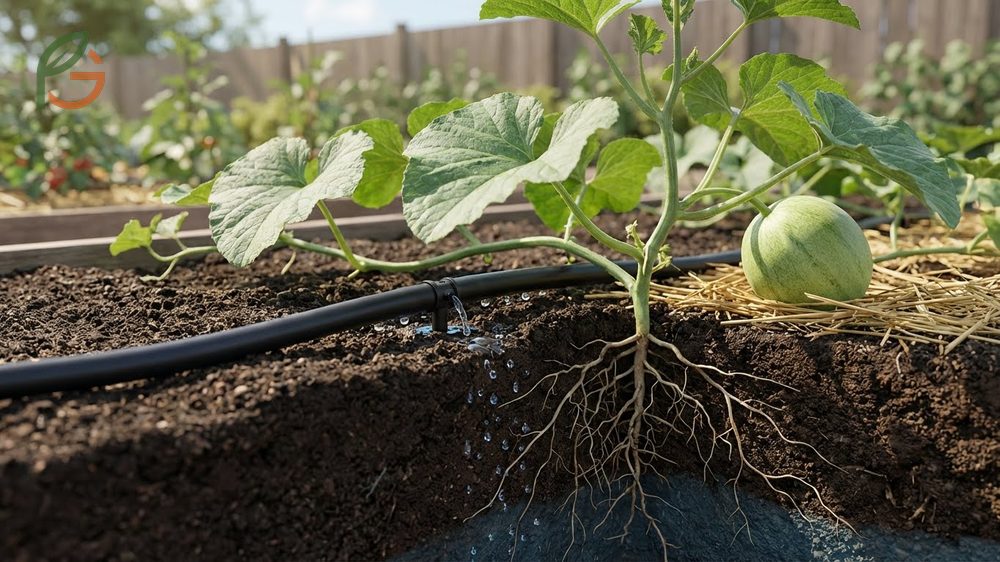
Honeydews need consistent moisture to develop properly. Water deeply but infrequently, providing 1-2 inches per week depending on temperature and rainfall[1]. Deep watering encourages roots to grow 12-18 inches down, making plants more drought-resistant. Shallow, frequent watering creates weak root systems vulnerable to stress.
Use drip irrigation or soaker hoses if possible. These methods keep foliage dry and deliver water directly to roots. Wet leaves are more prone to fungal diseases like powdery mildew and downy mildew. If you must use overhead sprinklers, water early in the morning so leaves dry before evening.
Research shows that reducing irrigation during the final 1-2 weeks before harvest concentrates sugars and improves flavor[4]. Don’t let plants wilt, but cut back to about half your normal watering amount. This stress signals the plant to focus energy on ripening rather than growth.
Honeydew Growing Stages
Understanding water needs at each stage helps you avoid problems. During early growth (weeks 1-4), plants focus on establishing roots and developing vines. Water 2-3 times per week to keep the top 6 inches of soil consistently damp but not waterlogged.
The flowering and pollination stage (weeks 4-6) requires increased moisture. Water deeply once or twice weekly, adjusting based on weather. Water stress during flowering reduces fruit set and can cause flowers to drop. You’ll see both male flowers (on thin stems) and female flowers (with tiny fruits at the base) during this period.
During fruit development (weeks 6-10), melons need regular deep watering to size up properly. Provide 1-2 inches weekly through deep soakings. As fruits approach tennis ball size, they’re less vulnerable to drought stress. The ripening stage (final 1-2 weeks) benefits from reduced watering to enhance sweetness.
- Germination to seedling: Keep soil evenly moist, water daily or every other day
- Vine growth: Water deeply 2-3 times per week, 1-1.5 inches total
- Flowering: Maintain consistent moisture, don’t allow wilting
- Fruit sizing: Water deeply 1-2 times per week, 1.5-2 inches total
- Final ripening: Reduce to 0.5-1 inch per week for sweeter fruit
Companion Planting Honeydew
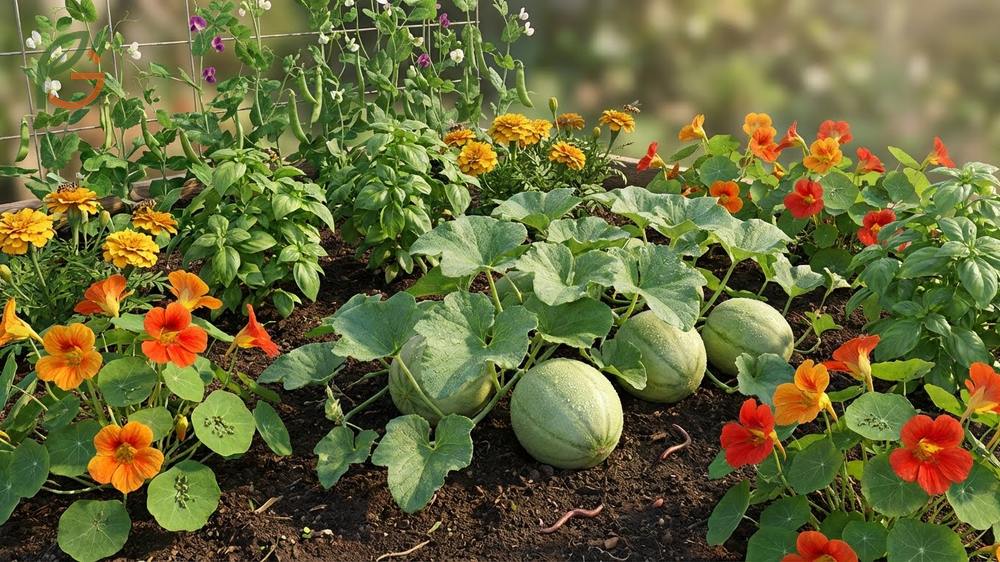
Strategic companion planting helps honeydews thrive by attracting beneficial insects and deterring pests. Nasturtiums planted near melon beds act as trap crops for aphids, drawing these pests away from your honeydews. Basil and marigolds repel aphids and whiteflies while attracting pollinators.
Legumes like beans and peas fix nitrogen in the soil, providing natural fertilizer for heavy-feeding melons. Plant these companions on the north side of melon beds so they don’t shade the vines. Radishes make good companion plants because they mature quickly and break up compacted soil before melons spread.
Avoid planting potatoes near honeydews—both compete for nutrients and attract similar pests. Don’t grow cucumbers, squash, or other cucurbits adjacent to honeydews either. These relatives share diseases and pests, increasing risk for all plants. Keep brassicas like broccoli and cabbage at least 10 feet away since they require different pH levels and nutrients.
| Good Companions | Benefits | Avoid Planting With |
|---|---|---|
| Nasturtiums, Marigolds | Repel aphids and whiteflies | Potatoes |
| Basil, Oregano | Attract pollinators, improve flavor | Other cucurbits (squash, cucumbers) |
| Beans, Peas | Fix nitrogen, improve soil | Brassicas (broccoli, cabbage) |
| Radishes, Lettuce | Quick harvest, break up soil | Fennel |
Pests on Honeydew Plants
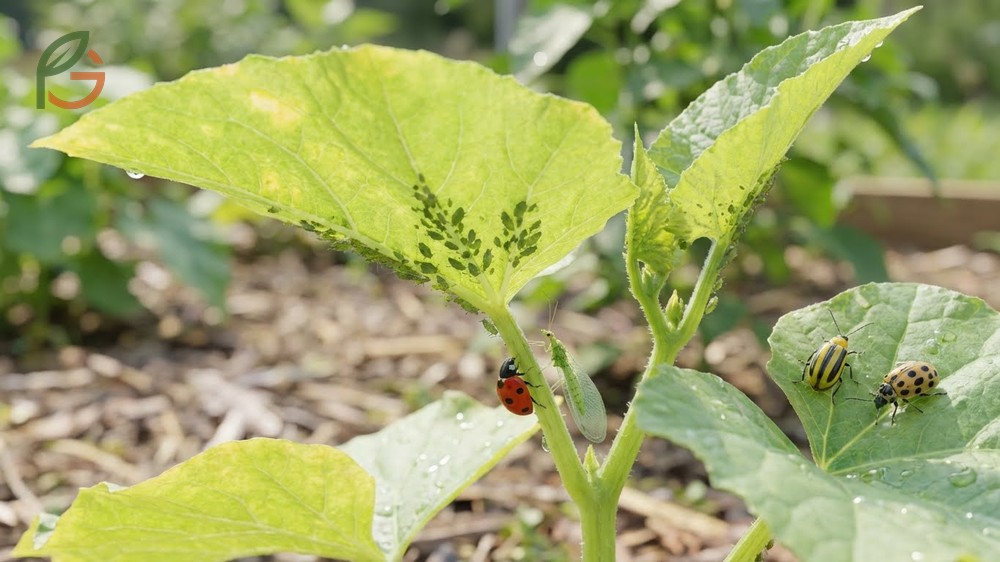
Aphids are the most common pest problem on honeydews. These tiny insects cluster on new growth and undersides of leaves, sucking sap and potentially spreading viral diseases. Early detection is critical—check plants twice weekly for signs of infestation. Current guidance emphasizes natural predators like ladybugs and lacewings for control[5].
Cucumber beetles (striped or spotted) feed on leaves, flowers, and fruits while also transmitting bacterial wilt disease. These beetles appear when plants first emerge and remain throughout the season. Row covers work well early on, but you must remove them when flowers appear for pollination. Hand-picking beetles in early morning when they’re sluggish reduces populations without chemicals.
Squash vine borers tunnel into stems, causing sudden wilting that looks like drought stress. Check stem bases for sawdust-like frass and small entry holes. If you catch infestations early, you can slit stems lengthwise, remove borers, and cover damaged stems with soil to encourage new root growth.
- Install yellow sticky traps to monitor aphid and whitefly populations
- Use row covers during early growth, removing when flowering begins
- Plant flowering herbs to attract beneficial insects that eat pests
- Apply insecticidal soap or neem oil for soft-bodied pests when needed
- Rotate crops annually to disrupt pest life cycles
- Remove and destroy heavily infested plants to protect others
Pest Warning: Don’t spray broad-spectrum insecticides during flowering. These kill bees and other pollinators essential for fruit set. If treatment is necessary, apply late evening after pollinators have left.
When to Harvest Honeydew
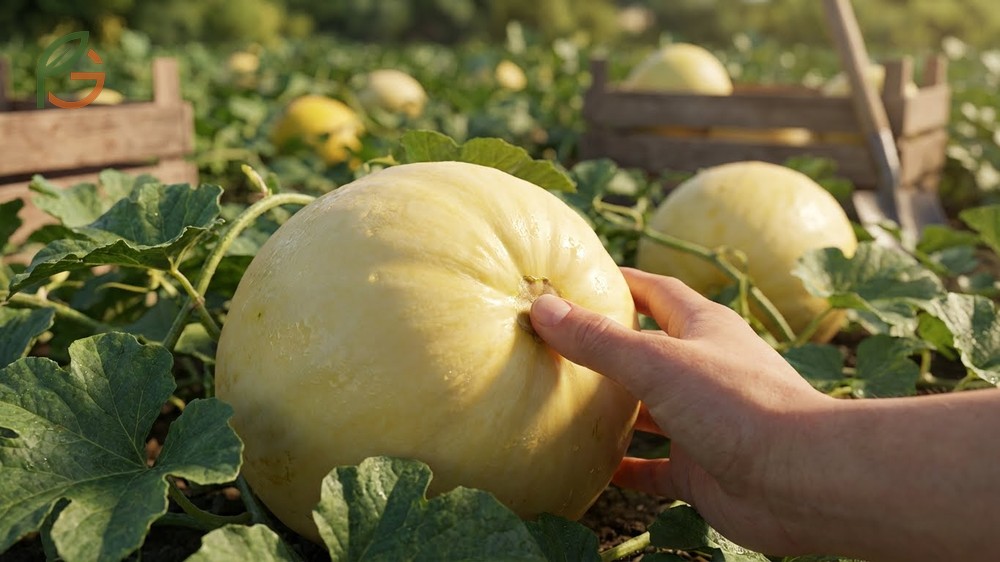
Unlike cantaloupes, honeydews don’t slip from the vine when ripe. The best indicator of ripeness is a slight softening of the blossom end (opposite the stem) when you press gently[2]. You’ll also notice the skin color changes from bright green to creamy yellow or light gold. Ripe honeydews develop a subtle sweet aroma near the blossom end.
Most varieties mature 80-90 days after planting. Check fruits daily once they approach full size (6-8 inches in diameter). The skin takes on a waxy, matte finish at maturity. Gently lift fruits—they should feel heavy for their size, indicating high water and sugar content.
Use pruning shears or a sharp knife to cut stems, leaving 1-2 inches attached to the fruit. Don’t twist or pull melons off vines, which damages both fruit and plant. Handle harvested melons carefully to avoid bruising. Store at 45-50°F (7-10°C) for 2-3 weeks[2].
If frost threatens before fruits ripen, harvest any melons that have started changing color. These will continue ripening indoors at room temperature over 5-7 days, though flavor won’t match vine-ripened fruit. Don’t harvest completely green melons—they won’t ripen properly off the vine.
- Blossom end yields slightly when pressed but isn’t mushy
- Skin color shifts from green to creamy yellow or light gold
- Surface feels slightly sticky and has a matte, waxy appearance
- Fruit smells sweet when you sniff near the blossom end
- Melons feel heavy and dense compared to immature fruits
- Stem connection shows slight cracking or browning
Conclusion
The evidence is clear: how to grow honeydew successfully comes down to providing warm soil, consistent moisture, and proper support throughout the 80-90 day growing season. Start seeds when soil reaches 65°F (18°C), water deeply but infrequently, and reduce irrigation during final ripening to maximize sweetness. Whether you’re growing on trellises to save space or letting vines sprawl across garden beds, these melons reward patient gardeners with incredibly sweet fruit.
Current agricultural guidance emphasizes preventive pest management through companion planting and regular monitoring rather than reactive chemical treatments. By following research-based practices from FruitGarden, you’ll harvest juicy honeydews that far surpass anything available at grocery stores.
Frequently Asked Questions
How long does it take to grow honeydew from seed?
Honeydews typically mature in 80-90 days from planting to harvest. Indoor-started transplants can reduce this time by about 2 weeks compared to direct-seeded plants. The exact timing depends on your variety, temperature, and growing conditions throughout the season.
Can you grow honeydew melons vertically on a fence?
Yes, honeydews grow successfully on sturdy fences or trellises that can support 100+ pounds. You’ll need to create individual slings from fabric or netting to support each fruit as it develops. Vertical growing saves space and improves air circulation, reducing disease problems.
How much water do honeydew plants need per week?
Provide 1-2 inches of water per week through deep, infrequent soakings. During early growth, water 2-3 times weekly to keep soil consistently moist. As fruits ripen, reduce watering to about 0.5-1 inch per week to concentrate sugars and improve flavor.
What temperature kills honeydew plants?
Honeydews die when exposed to frost or temperatures below 32°F (0°C). Soil temperatures below 50°F (10°C) slow growth significantly and can cause permanent damage to young plants. Wait until nighttime temperatures stay consistently above 50°F before planting outdoors.
How do you know when honeydew is ripe on the vine?
Check for a slight softening at the blossom end when you press gently, color change from green to creamy yellow, and a subtle sweet aroma. Unlike cantaloupes, honeydews don’t separate from vines when ripe—you must cut them with shears or a knife.
What are the best companion plants for honeydew melons?
Nasturtiums, marigolds, and basil work best as honeydew companions. These plants repel aphids and whiteflies while attracting beneficial pollinators. Legumes like beans and peas also make good neighbors because they fix nitrogen in the soil naturally.
How many honeydew melons grow per plant?
Each healthy honeydew plant produces 3-5 fruits on average. For larger melons with better flavor, many gardeners thin to 2-3 fruits per plant once they reach tennis ball size. This focuses the plant’s energy on fewer fruits that grow bigger and sweeter.