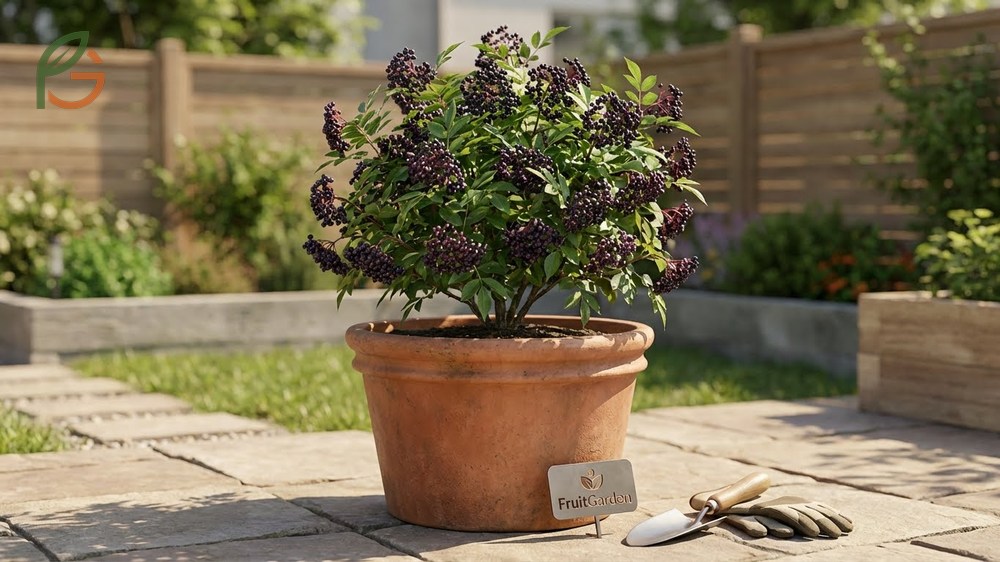
Growing elderberry in pots works brilliantly for patios and small spaces when you choose the right container and variety. Research shows that compact cultivars thrive in 20-24 inch containers, producing abundant berries while staying manageable at 6-10 feet tall[1][2]. At FruitGarden, we’ve synthesized current horticultural research to help small-space gardeners successfully grow these nutrient-rich berries in containers.
Quick Answer
- Choose containers at least 20 gallons or 24 inches wide by 20 inches deep for healthy root development[1][2]
- Select compact varieties like Black Beauty (6 feet) or Lemony Lace (3-5 feet) that don’t outgrow their space[3]
- Provide full sun to partial shade with consistent moisture—container soil dries faster than garden beds[2]
- Prune annually in late winter, keeping about 5 productive canes per container for optimal fruiting[4]
Growing Elderberry in Pots
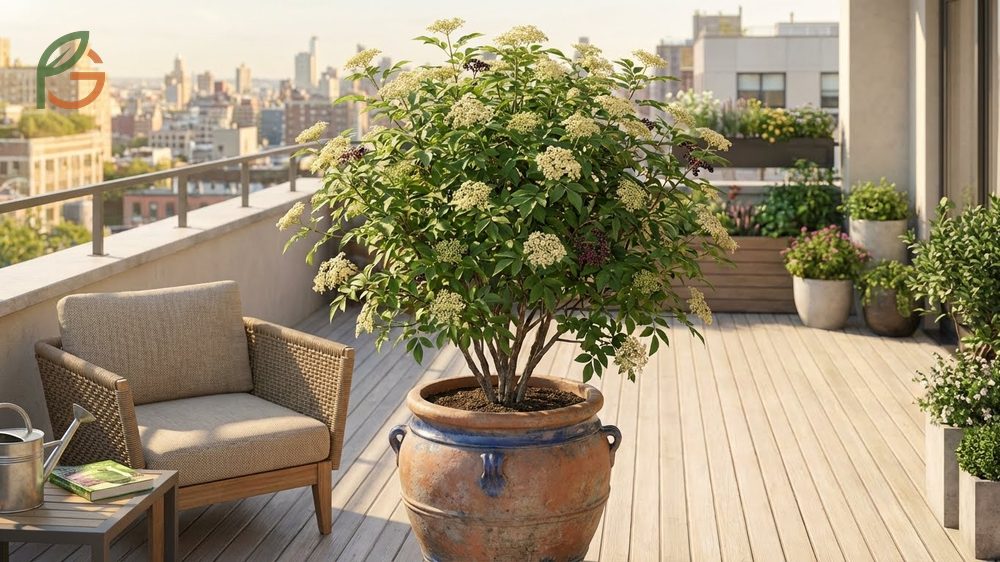
Elderberries adapt remarkably well to container life despite their natural tendency to spread into thickets. Studies demonstrate that confined root systems actually help control plant size, keeping shrubs at 6-10 feet instead of the 10-15 feet typical in-ground plants reach[4][5]. This makes them perfect for balconies, patios, and urban gardens where space comes at a premium.
Container growing offers unexpected advantages beyond space savings. You’ll have complete control over soil quality, which matters since elderberries prefer rich, moisture-retentive growing media. Moving pots also lets you optimize sun exposure throughout the season or protect plants from harsh weather.
From My Experience: My cousin in Guadalajara, Mexico grew elderberries in large ceramic pots in May 2024. Her two Black Lace shrubs reached 7 feet in their first season versus the typical 4-5 foot growth, thanks to twice-weekly deep watering during the dry months.
Why Elderberries Work in Containers
Research shows elderberries don’t need deep root systems like fruit trees—they’re shallow-rooted shrubs that spread horizontally. This growth pattern translates perfectly to wide, shallow containers. Their natural vigor means they’ll produce fruit even with restricted roots, though yields will be 30-40% less than in-ground plants.
Most varieties are self-pollinating, so you can grow a single plant and still get berries. However, planting two different cultivars within 50 feet of each other significantly improves fruit set and berry size[2].
Choosing the Right Pot Size
Don’t skimp on container dimensions—elderberries need room to thrive. The minimum practical size is 20 gallons or 24 inches wide by 20 inches deep[1][2]. Allow at least one foot of space between the root ball and container walls to accommodate several years of growth.
Larger containers produce bigger, healthier plants but come with a catch—they’re extremely heavy when filled with moist soil. Consider containers on wheeled plant caddies if you’ll need to move them seasonally. Material matters less than size, though plastic retains moisture better than terracotta in hot climates.
Container Elderberry Growing
Success with container elderberries starts with the right growing medium and watering strategy. These moisture-loving shrubs can’t tolerate dry soil, but they’ll quickly develop root rot if drainage is poor. Getting this balance right is the single most important factor in container culture.
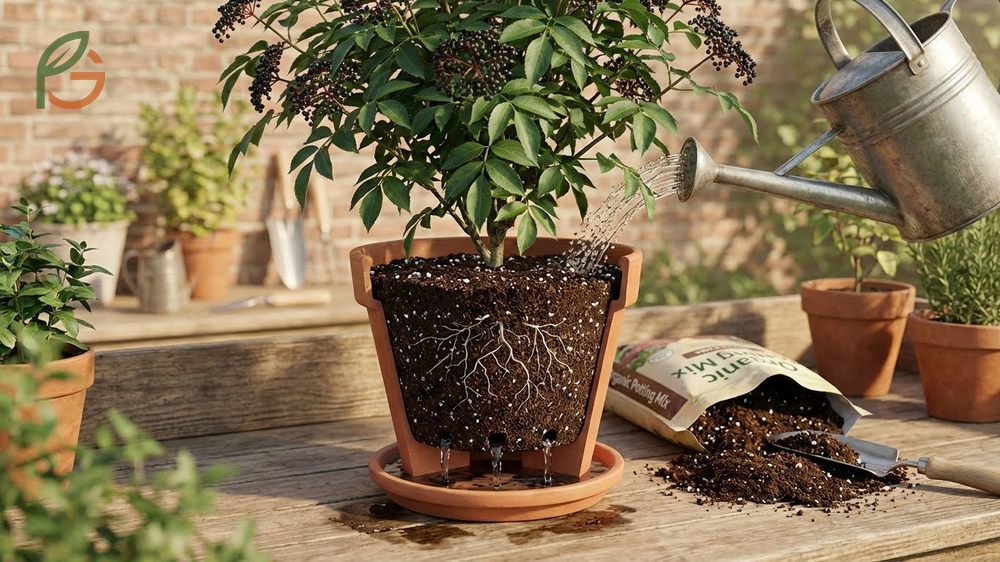
Soil Mix and Drainage
Use a high-quality potting mix enriched with compost—never garden soil, which compacts in containers and harbors diseases. The ideal blend drains freely while holding moisture, typically achieved with equal parts potting soil, compost, and perlite. Adding 2-3 inches of organic matter like aged manure boosts nutrients and water retention[4].
Your container must have multiple drainage holes in the bottom—at least three for 20-gallon pots. Layer an inch of small stones or broken pottery shards at the base before adding soil. This prevents drainage holes from clogging over time and creates an air gap that reduces waterlogging risk.
Important note: Test drainage every few months by watering thoroughly and watching for runoff. If water doesn’t drain within 10 minutes, the soil has likely compacted and needs replacement to prevent root rot.
Watering Requirements
Elderberries are notoriously thirsty, and container-grown plants dry out faster than their in-ground counterparts. Check the top inch of soil daily during growing season—if it’s dry, water deeply until it runs from drainage holes. This typically means watering every 1-2 days in summer, less frequently in cooler months[2].
Drip irrigation systems solve the consistency problem if you can’t water daily. Set emitters to deliver slow, deep moisture that reaches the entire root zone. Mulch the soil surface with 1-2 inches of organic material like shredded bark or compost to reduce evaporation and maintain even moisture levels.
- Leaves wilting or drooping during the hottest part of the day
- Leaf edges turning brown or crispy despite regular watering
- Reduced berry size or fruit dropping prematurely
- Soil pulling away from container edges when dry
- Top 2 inches of soil completely dry to the touch
Best Varieties for Pots
Not all elderberry cultivars suit container growing equally well. You’ll want varieties that stay naturally compact and produce fruit on younger wood. Certain European and American types have been specifically selected for smaller gardens and respond beautifully to container culture.
Compact Cultivars
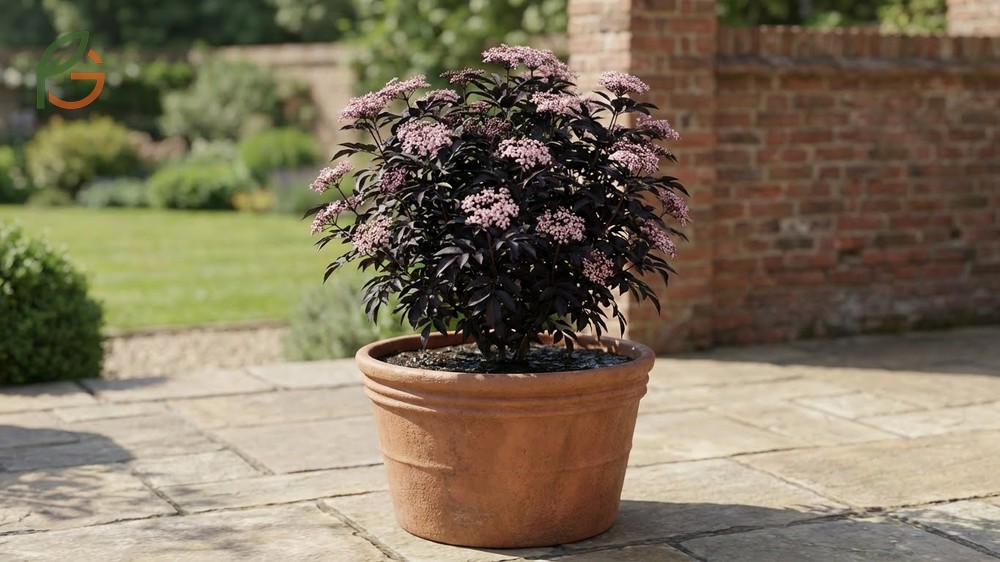
Black Beauty reaches just 6 feet at maturity with striking dark purple foliage and pink-tinted flowers[3]. This European variety thrives in Zones 4-7 and tolerates wetter soil than most cultivars. Its compact size makes it ideal for even 15-gallon containers if you’re really tight on space.
Lemony Lace offers the smallest option at 3-5 feet tall with chartreuse, finely cut foliage that adds ornamental value beyond berries[3]. It’s perfect for Zones 3-7 and works well on balconies where larger varieties would overwhelm the space. Note that some experts caution against eating red elderberries, so check berry color before harvesting.
This table compares five compact elderberry varieties by mature height, hardiness zones, and key container-growing characteristics
| Variety | Height | Zones | Best For |
|---|---|---|---|
| Black Beauty | 6 ft[3] | 4-7 | Wet soil tolerance, dark foliage |
| Black Lace | 8 ft[3] | 4-7 | Easy pruning, ornamental value |
| Instant Karma | 6-8 ft[3] | 4-7 | Variegated foliage, pollination partner |
| Lemony Lace | 3-5 ft[3] | 3-7 | Smallest size, balconies, patios |
| Golden Tower | 5-8 ft | 4-7 | Yellow foliage, vertical growth |
- Wyldewood and Bob Gordon produce heavily on 1-2 year old wood, making them excellent for annual pruning cycles[1]
- Instant Karma pairs well with Black Lace or Black Beauty as a pollination partner for better fruit set
- American elderberry (Sambucus canadensis) tolerates partial to full shade better than European types
- York variety produces the largest berries but can reach 12 feet, requiring aggressive pruning in containers
- Nova reaches only 6 feet tall with excellent fruit production and easy harvesting height
Potted Elderberry Care
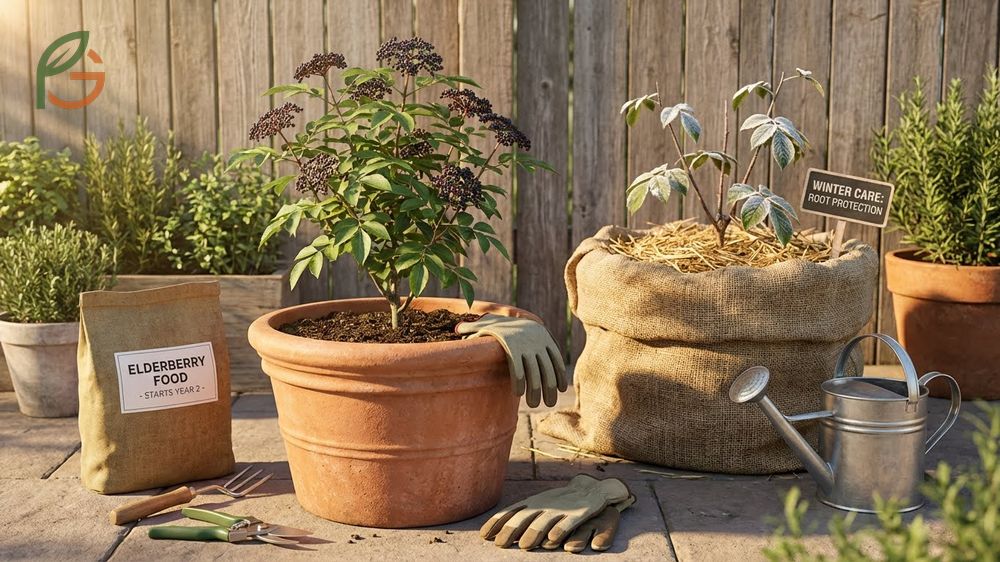
Container elderberries need more intensive care than in-ground plants since they can’t search for nutrients and moisture beyond their pot. A consistent feeding and pruning schedule keeps plants productive and prevents them from outgrowing their space. Winter protection becomes critical too, since exposed roots are more vulnerable to freezing.
Fertilizing Schedule
Start fertilizing in the second year—first-year plants need to establish roots rather than push foliage growth. Apply balanced 10-10-10 NPK fertilizer in early spring just as buds swell[4][6]. Follow package directions for containerized plants, which typically require half the amount used for in-ground specimens.
Elderberries are nitrogen-hungry, so you might need supplemental feeding every 4-6 weeks during active growth. Watch for excessive leafy growth with few flowers—that’s a sign to reduce nitrogen by half. Alternatively, work 2-3 inches of well-composted manure into the top layer of soil each spring for slow-release nutrition.
Fertilizer tip: If leaves turn yellow while veins stay green, your plant likely needs more nitrogen. Increase feeding frequency or switch to a high-nitrogen formula temporarily until color returns.
Annual Pruning
Prune heavily in late winter or early spring while plants are still dormant. Remove all third-year canes completely since they produce poorly and decline rapidly. Leave about 5 total canes—a mix of first and second-year growth—to maintain manageable size while maximizing fruit production[4].
Second-year canes produce the heaviest berry clusters, while first-year canes offer lighter but still worthwhile crops. Cut any dead, damaged, or crossing branches regardless of age. Don’t be afraid to prune aggressively—elderberries respond with vigorous new growth and actually fruit better when kept compact through regular cutting.
- Identify third-year canes by their darker, rougher bark and remove them at ground level
- Select the 5 healthiest, most vigorous canes from first and second-year growth to keep
- Cut remaining canes completely rather than shortening them—partial cuts stimulate unwanted suckers
- Remove any suckers growing at the base throughout the season to prevent overcrowding
- Sterilize pruning shears between cuts with rubbing alcohol to prevent disease spread
Winter Protection
Container roots freeze faster than in-ground roots since they’re exposed on all sides. Add a 2-inch mulch layer over the soil surface in late fall, then wrap the entire container in burlap or old blankets[2]. Move pots against a south-facing wall or into an unheated garage when temperatures drop below 20°F (-7°C) for extended periods.
Most elderberries grow best in Zones 3-8, all of which experience some winter freezing. The plants themselves are cold-hardy, but container-grown roots need extra insulation. Water thoroughly before the ground freezes—moist soil retains heat better than dry soil and prevents root desiccation during winter.
Common Challenges and Solutions
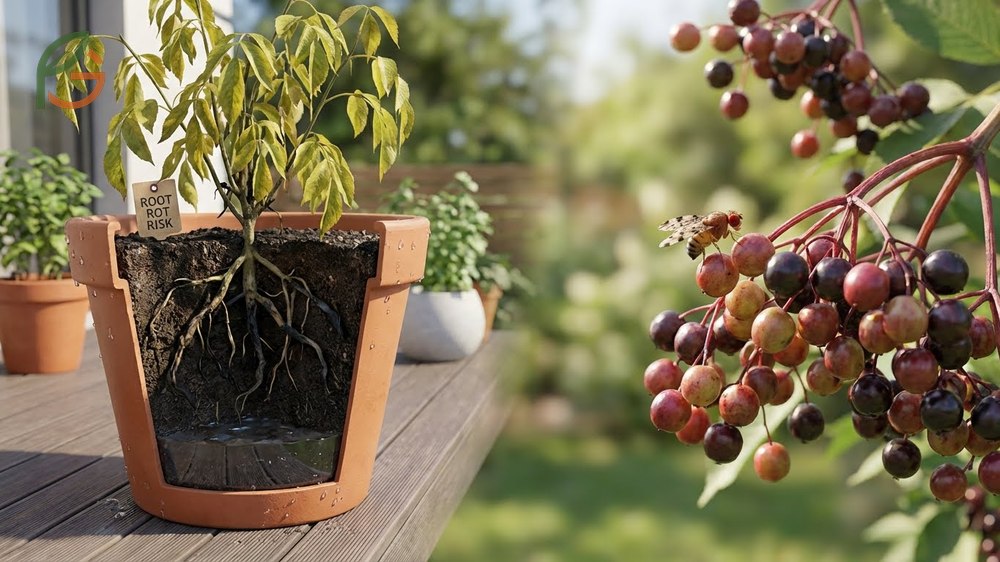
Container elderberries face specific problems that rarely affect in-ground plants. Root rot tops the list, caused by poor drainage or overwatering in confined spaces. Yellow leaves with black or brown root lesions signal this issue—unfortunately, affected plants can’t be saved and must be replaced[2].
Spotted wing drosophila (SWD) targets elderberries just like other soft fruits, laying eggs directly into ripening berries. These Asian fruit flies complete their lifecycle in 5 days, making organic control challenging. Cooling harvested berries immediately brings larvae out onto container walls, making them easier to spot before processing fruit.
Eriophyid mites overwinter two-thirds of the way up canes and cause distorted new growth in spring. Complete dormant-season pruning to ground level eliminates overwintering mites, though this conflicts with harvesting cuttings for propagation. Mark infected plants and cut them separately, burning or removing pruned canes rather than composting them.
- Wilting despite moist soil—check for root rot; improve drainage before replanting
- Leaves turning yellow—increase nitrogen fertilizer or feeding frequency
- Few flowers or berries—plant needs more sun or a pollination partner nearby
- Plant becoming top-heavy and tipping—stake main canes or move to heavier ceramic pot
- Soil pulling away from pot sides—rehydrate by soaking entire container in water for 30 minutes
Verticillium wilt causes yellowing foliage, stunted growth, and sudden branch death. New canes wilt quickly despite adequate water. Destroy infected plants immediately since this soil-borne fungus persists for years. Always use fresh potting mix when replanting, and choose resistant varieties if wilt has been an issue in your area.
Conclusion
The evidence is clear: growing elderberry in pots succeeds beautifully when you provide adequate container size, consistent moisture, and annual pruning. These resilient shrubs adapt to confined spaces while still producing nutritious berries that rival in-ground yields for home use. Compact varieties like Black Beauty and Lemony Lace make container culture even easier with their naturally smaller growth habits.
Current horticultural guidance emphasizes choosing containers at least 20 gallons with excellent drainage as the foundation for success. FruitGarden continues to synthesize the latest research on small-space fruit production, helping urban gardeners maximize their harvests regardless of yard size.
Frequently Asked Questions
How big of a container do I need for elderberry?
Can elderberry survive winter in pots?
Yes, elderberries survive winter in containers with proper protection. Wrap pots in burlap or blankets and add 2 inches of mulch to insulate roots from freezing[2]. Move containers against south-facing walls or into unheated garages during extended periods below 20°F (-7°C).
What’s the best elderberry variety for small containers?
Lemony Lace is the most compact option at 3-5 feet tall, perfect for balconies and tight spaces[3]. Black Beauty reaches only 6 feet while offering excellent berry production and attractive dark foliage. Both thrive in Zones 4-7 and adapt well to container culture.
How often should I water elderberry in pots?
Water container elderberries every 1-2 days during summer when the top inch of soil feels dry[2]. These moisture-loving shrubs dry out faster in containers than in-ground plants. Drip irrigation systems work well if you can’t water daily, and mulching reduces evaporation significantly.
Do I need two elderberry plants for pollination?
Most elderberries are self-pollinating and will produce berries as single plants. However, planting two different varieties within 50 feet of each other dramatically improves fruit set and berry size[2]. Consider pairing Black Lace with Instant Karma for optimal cross-pollination.
When should I prune elderberry in containers?
Prune elderberries in late winter or early spring while they’re still dormant. Remove all third-year canes completely and keep about 5 total first and second-year canes per container[4]. This aggressive pruning controls size while maximizing berry production on younger, more productive wood.
What fertilizer is best for potted elderberries?
Use balanced 10-10-10 NPK fertilizer starting in the second year, applied in early spring as buds swell[4][6]. Follow package directions for containerized plants, typically using half the amount recommended for in-ground shrubs. Supplement every 4-6 weeks during active growth since elderberries are nitrogen-hungry.