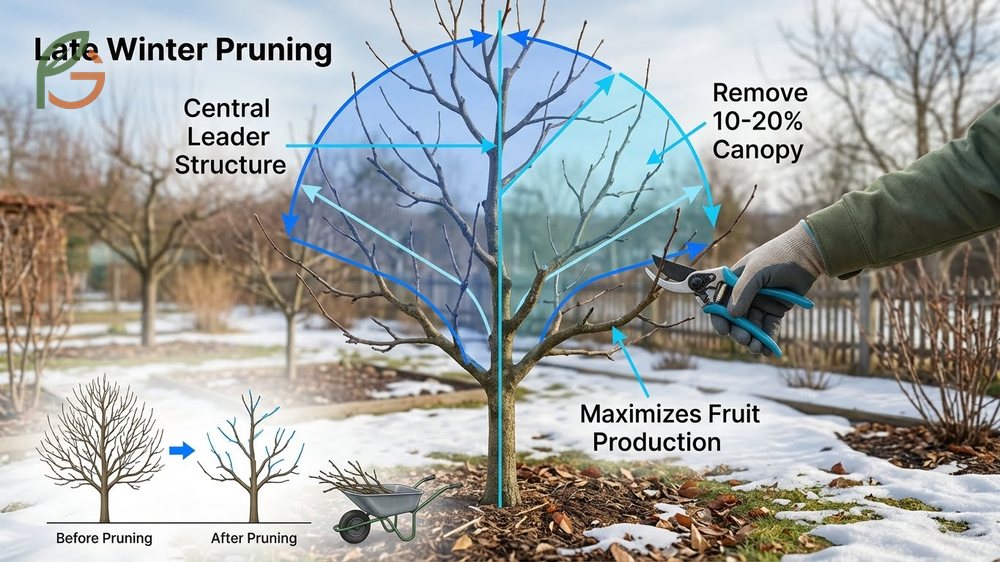
How to prune a pear tree requires understanding the right timing, techniques, and tree structure. Research shows that proper pruning during late winter (November through early March) promotes vigorous spring growth and maximizes fruit production[1]. Studies demonstrate that removing 10-20% of the canopy annually[2] while maintaining a central leader shape creates optimal light penetration and fruit production. FruitGarden synthesizes current horticultural research to help you master these essential pruning techniques.
Quick Answer
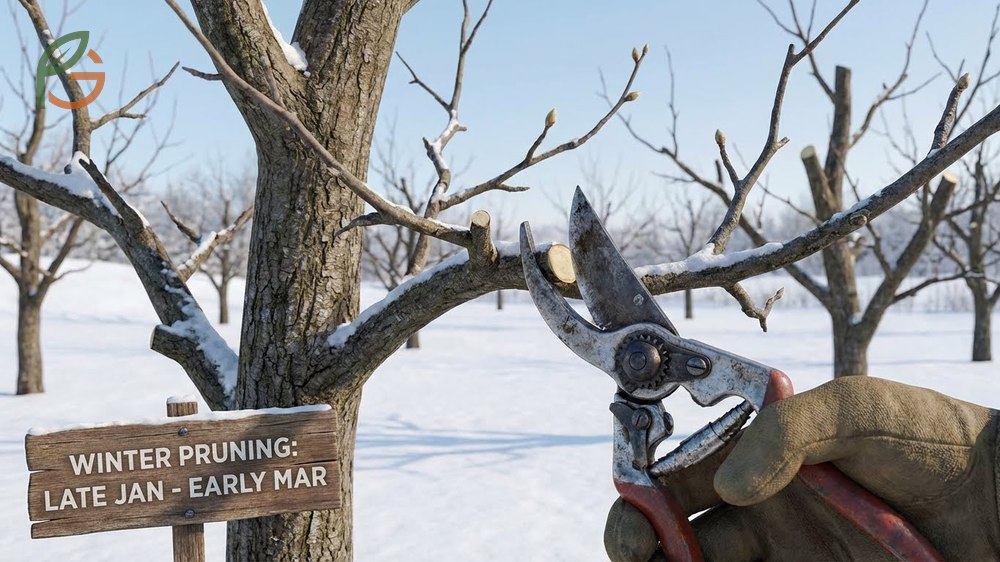
- Best pruning window: Late January to early March[3] before bud swell during dormancy
- Remove 10-20% of growth annually[2] to maintain vigor without over-stressing the tree
- Target water sprouts, crossing branches, and inward-growing shoots first for better air circulation
- Use sharp, disinfected tools—dip blades in 70% alcohol[4] between cuts to prevent disease spread
How to Prune a Pear Tree
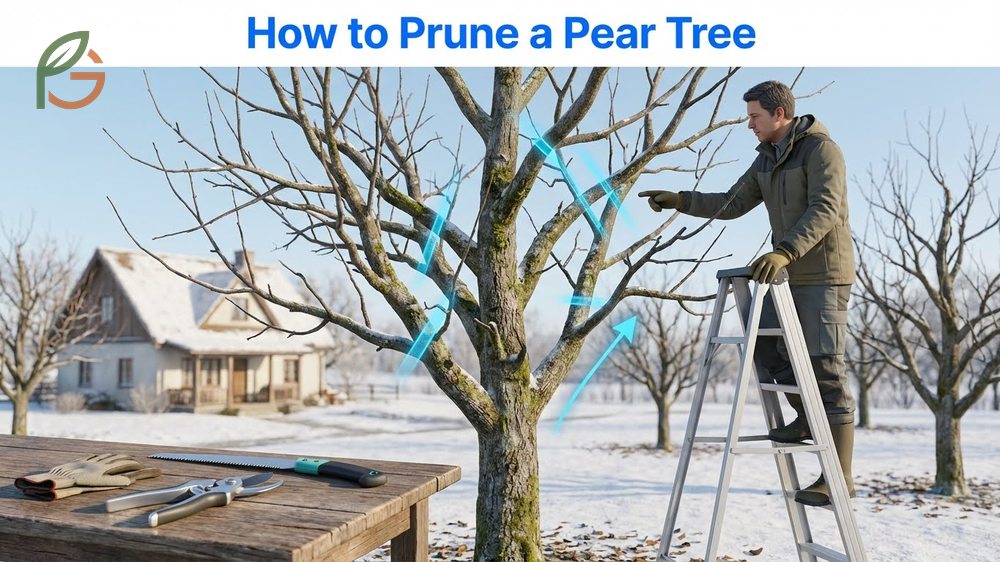
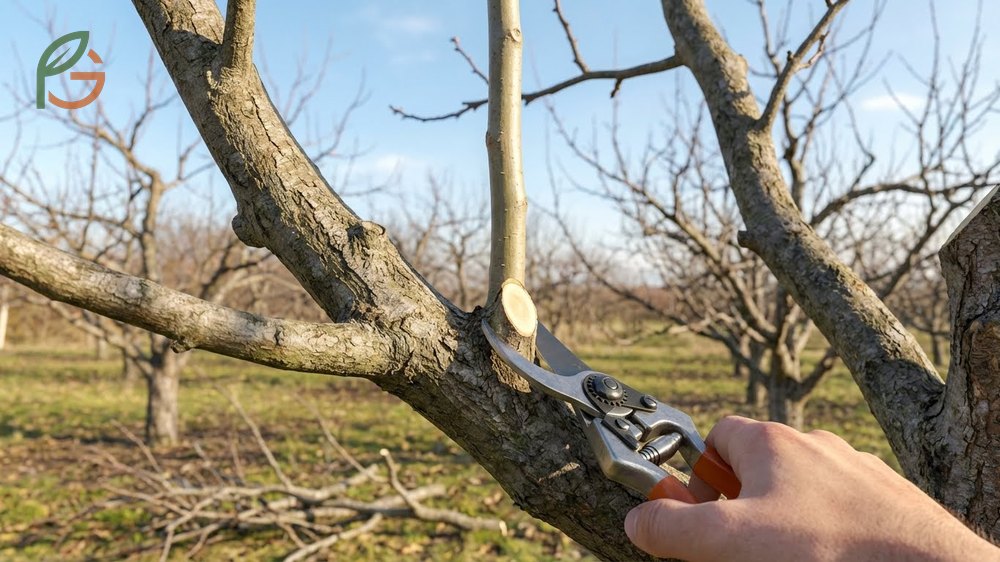
Current horticultural data shows pear trees respond best to systematic dormant-season pruning. The process begins with tool preparation and follows a specific cutting sequence from bottom to top.
Start by examining your tree’s overall structure before making any cuts. This bird’s-eye assessment helps you identify problem areas like crossing branches, crowded growth, or structural weaknesses that need addressing.
Essential Tools and Preparation
Sharp, clean cutting tools prevent disease transmission and create wounds that heal quickly. Research indicates that dull blades crush plant tissue and increase infection risk significantly.
You’ll need bypass pruning shears for branches under 3/4 inch, loppers for 3/4 to 1.5 inch branches, and a pruning saw for anything larger. Disinfect all blades between trees using 70% isopropyl alcohol or ethanol[4].
- Bypass pruning shears with sharp, clean blades for precision cuts
- Long-handled loppers for reaching higher branches and thicker wood
- Pruning saw with curved blade for branches over 1.5 inches diameter
- 70% isopropyl alcohol in spray bottle for tool disinfection
- Limb spreaders to correct narrow branch angles on young trees
Important Tool Maintenance: Don’t use a 10% bleach solution despite it being commonly mentioned—it requires a 10-minute soak and causes significant blade corrosion[4]. Alcohol wipes work instantly with no corrosion risk.
Step-by-Step Pruning Diagram
The systematic approach ensures you don’t miss critical cuts while maintaining proper tree architecture. Work from the lowest scaffold branches upward to the central leader.
Begin at the tree trunk and move outward along each branch methodically. This inside-out approach prevents you from accidentally damaging branches you plan to keep.
- Remove all dead, diseased, or damaged wood first—cut at least 8-12 inches below visible symptoms into healthy tissue[5]
- Cut away water sprouts growing vertically from branches and trunk—they won’t produce quality fruit
- Eliminate crossing or rubbing branches by removing the weaker or less favorably positioned limb
- Thin out branches growing toward the tree’s center to open the canopy for light and air
- Shorten the previous year’s growth by one-third, cutting just above an outward-facing bud[6]
- Step back frequently to assess symmetry and ensure balanced growth distribution around the trunk
- Make final adjustments to achieve a wine-glass or Christmas tree shape with evenly spaced scaffold branches
When to Prune Pear Trees
Timing determines whether your pruning stimulates growth, controls size, or invites disease. Most pear tree pruning happens during winter dormancy, but specific situations call for summer intervention.
The dormant period from late January through early March provides the ideal window because tree diseases remain inactive and wounds heal as spring growth begins[3]. Winter pruning triggers vigorous spring growth, perfect for shaping young trees or rejuvenating older ones.
Winter Pruning Timing
Winter pruning should occur after leaf fall but before bud swell, typically between November and early March depending on your climate[1]. Late winter proves safer than early winter because the tree begins active healing as temperatures warm.
Never prune in October through December—the tree lacks time to seal wounds before hard freezes arrive, increasing winter injury risk. Wait for consistently cold weather to ensure full dormancy before picking up your pruners.
Choose dry days for pruning to minimize disease spread through moisture. Wet conditions allow bacterial and fungal pathogens to colonize fresh cuts more easily.
Fire Blight Warning: If fire blight affects pear trees in your region, prune infected branches during mid-summer (mid-July to mid-August) when the disease spreads less actively[7]. Cut 8-12 inches below visible infection and disinfect tools between every cut.
Summer Pruning Exceptions
Summer pruning from July to early September slows vigorous growth and redirects energy into fruit development rather than shoot production. This technique works well for overly aggressive trees that produce excessive leafy growth.
Trained forms like espaliers, cordons, and fans require summer pruning to maintain their shape and ensure sunlight reaches developing fruit[8]. Light summer trimming won’t compromise fruit quality if done correctly.
Central Leader Pruning Method
The central leader system creates a Christmas tree shape with one dominant vertical trunk and evenly spaced horizontal scaffold branches. This structure maximizes light exposure and supports heavy fruit loads without breakage.
Studies show central leader trees require 20-40% annual growth removal[2] initially, dropping to 10-20% once proper practices establish the framework. Pear trees naturally produce fruiting spurs along these scaffold branches for years.
Establishing Scaffold Branches
Young trees need careful scaffold selection during their first three years. Choose 4-5 strong branches for the lowest tier, with the bottom branch positioned 24-36 inches above ground[9].
Select scaffolds that spiral around the trunk rather than stacking directly above one another. Space them roughly 6-8 inches apart vertically with 45-degree angles to the trunk for maximum strength.
Remove all competing branches and use limb spreaders if necessary to achieve proper angles. Branches growing at angles narrower than 45 degrees often break under heavy fruit loads.
From My Experience: My friend near Puebla, Mexico trained a young pear tree in spring 2023 using wooden clothespins as spreaders. Within 8 weeks, the branches held their 50-degree angles naturally—right in the optimal 45-60 degree range from research.
Maintaining Tree Structure
Established central leader trees need consistent annual maintenance to preserve their productive shape. Work systematically from the lowest scaffold upward, pruning each branch from trunk to tip before moving higher.
Cut back main scaffold branches by roughly one-third to an outward-facing bud, which encourages horizontal rather than vertical growth. This keeps fruit within easy picking reach while maintaining good light distribution.
Branch height should decrease progressively as you move down from the central leader—the tree should resemble a graduated pyramid. Upper branches that grow too long shade lower fruit and reduce overall productivity.
Removing Water Sprouts and Suckers
Water sprouts are vigorous vertical shoots that emerge from scaffold branches or the trunk, usually following heavy pruning or stress. These shoots produce large, widely spaced leaves but rarely develop fruit spurs.
Remove water sprouts close to their origin point without leaving stubs, which prevents regrowth and helps the tree seal the wound properly[10]. Cut during dormancy when possible, though summer removal works if sprouts appear mid-season.
Suckers emerge from the rootstock below the graft union and will produce inferior fruit if allowed to grow. Trace them to their origin and cut flush with the root or trunk, then cover the area with soil while keeping the graft exposed.
- Water sprouts grow perfectly vertical with abnormally large leaves spaced far apart
- They emerge from dormant buds on older wood following pruning wounds or winter injury
- These shoots steal energy from fruiting wood without producing quality fruit themselves
- Remove them during the first winter after they appear, cutting half at the base and tip-pruning the rest[11]
- Well-spaced water sprouts can sometimes be trained into replacement scaffolds on damaged trees
Prevention Tip: Aggressive pruning that removes more than 25% of the canopy often triggers excessive water sprout production the following season. Stick to the 10-20% annual removal guideline for mature trees to minimize this response.
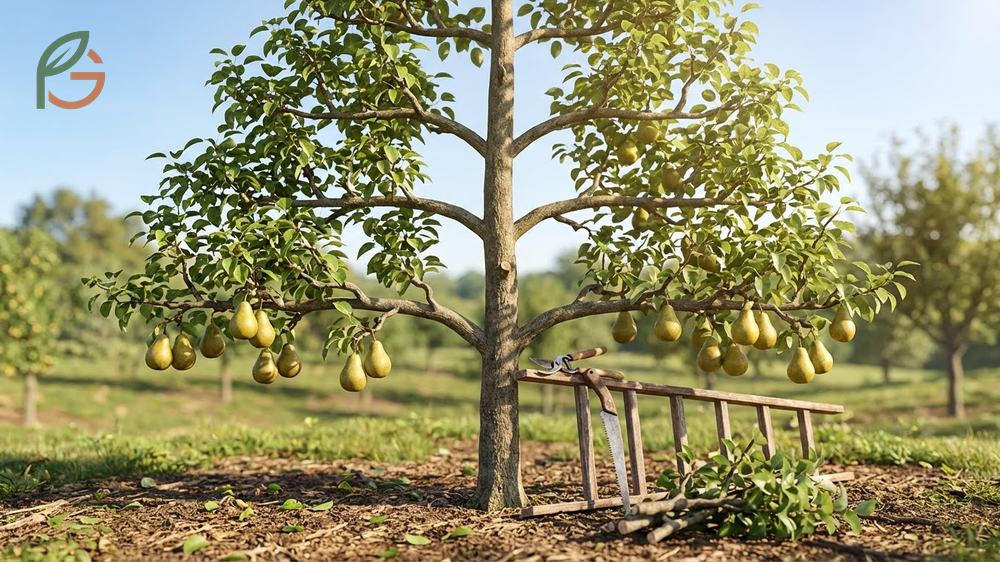
Spur Pruning for Fruit Production

Pear trees produce fruit on short, stubby growths called spurs that develop along scaffold branches and remain productive for 5-8 years. Understanding spur management separates good pruning from great pruning.
Don’t prune spur-type pear trees as aggressively as standard varieties because spurs form the primary fruiting sites from trunk outward[12]. These compact trees grow slower and develop numerous small spurs rather than long shoots.
When branches become overcrowded with spurs, thin them selectively to improve fruit size and quality. Remove spurs on the underside of branches first—they receive less sunlight and produce inferior fruit compared to top-facing spurs.
After 5 years, older spurs tend to produce smaller, lower-quality fruit[3]. Encourage new lateral branches to replace aging spurs by selective heading cuts that stimulate fresh growth.
- Fruiting spurs appear as short, knobby growths 2-4 inches long with tight bud clusters
- New spurs develop from lateral shoots that weren’t pruned the previous year
- Prune lateral shoots back to 3-4 buds to encourage spur formation rather than vegetative growth
- Thin overcrowded spur clusters to 4-6 inches apart for larger, better-quality fruit
- Leave young side shoots under 6 inches unpruned—they’ll develop fruit buds for next season[13]
Conclusion
The evidence is clear: systematic winter pruning between late January and early March, combined with proper central leader training and spur management, maximizes pear tree productivity and longevity. How to prune a pear tree successfully depends on understanding your tree’s growth patterns, choosing the right timing, and making strategic cuts that balance vegetative vigor with fruit production.
Current horticultural guidance emphasizes removing 10-20% of mature tree growth annually while maintaining clean tools and proper cutting techniques. FruitGarden provides research-backed information to help you achieve professional pruning results in your home orchard.
Frequently Asked Questions
What month is best to prune pear trees?
Late January through early March provides the optimal pruning window for most regions. This timing occurs after leaf fall but before bud swell, allowing the tree to heal wounds as spring growth begins while minimizing disease transmission risk during dormancy.
Can you prune pear trees in summer?
Yes, summer pruning from mid-July to early September works for controlling overly vigorous growth or maintaining trained forms like espaliers. This timing redirects energy into fruit development rather than vegetative shoots, though it should be lighter than winter pruning to avoid stressing the tree.
How much should I prune off a pear tree annually?
Remove 10-20% of the canopy on established trees each winter to maintain vigor without triggering excessive water sprout production. Young trees during training may require 20-40% removal initially, but this decreases as the tree matures and develops proper structure.
What is the central leader method for pear trees?
The central leader system maintains one dominant vertical trunk with evenly spaced horizontal scaffold branches creating a Christmas tree shape. This structure maximizes light penetration and supports heavy fruit loads, with the lowest scaffold positioned 24-36 inches above ground and subsequent tiers spaced 6-8 inches apart vertically.
Should I remove all water sprouts from my pear tree?
Remove most water sprouts during dormant pruning because they produce little fruit and steal energy from productive wood. However, well-positioned water sprouts can occasionally be trained into replacement scaffolds on damaged or poorly structured trees by tip-pruning to encourage branching rather than vertical growth.
How do I sanitize pruning tools between cuts?
Wipe or dip pruning tool blades in 70% isopropyl alcohol between cuts when removing diseased wood, or at minimum between different trees. Alcohol works instantly without requiring soaking time and doesn’t corrode metal like bleach solutions, making it the most practical disinfectant for field use.
What are fruiting spurs and how do I maintain them?
Fruiting spurs are short, knobby growths 2-4 inches long that produce pear blossoms and fruit for 5-8 years. Maintain them by avoiding aggressive pruning on scaffold branches, thinning overcrowded spur clusters to 4-6 inches apart, and leaving short lateral shoots under 6 inches unpruned to develop into new spurs.