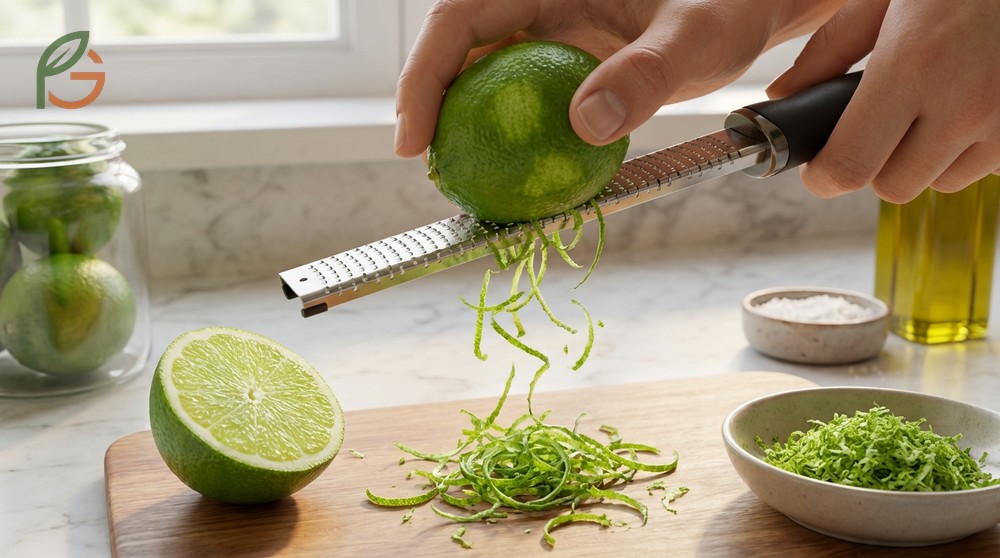
How to zest a lime requires removing only the bright green outer peel while avoiding the white pith underneath. Research shows that proper zesting technique captures aromatic oils without bitter compounds, making it essential for recipes ranging from marinades to desserts.[1] Most people don’t realize that the key difference between flavorful zest and bitter results comes down to pressure and tool selection. FruitGarden synthesizes current culinary research and home gardening expertise to help you master this fundamental citrus technique.
Quick Answer
- Use a microplane or fine grater to remove only the green outer layer, stopping when white pith appears[2]
- Apply light pressure and rotate the lime frequently to avoid digging into bitter pith[3]
- One medium lime yields approximately 2 teaspoons of fresh zest[4]
- Frozen lime zest retains 90-95% flavor for up to 6 months when stored properly[5]
How to Zest a Lime
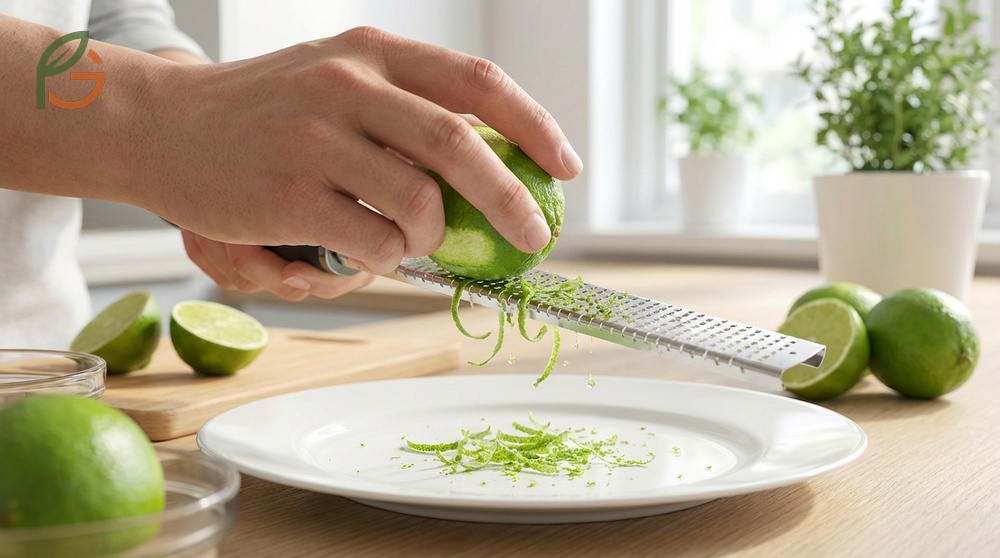
Zesting a lime extracts the flavorful oils from the colored outer peel without touching the bitter white pith beneath. This thin green layer contains concentrated citrus oils that add bright, tangy flavor to dishes without the sourness of lime juice.[1]
The technique works for all citrus fruits, but limes present unique challenges due to their smaller size and thinner peel compared to lemons or oranges. You’ll need a steady hand and the right tool to maximize zest yield while avoiding waste.
Studies demonstrate that proper zesting preserves volatile compounds responsible for lime’s distinctive aroma. When you accidentally include pith, these bitter-tasting compounds overwhelm the bright citrus notes you’re after.
Prepare Your Lime
Start by washing your lime thoroughly under running water with a vegetable brush. This removes any wax coating or pesticide residue from the peel.[6] Pat the lime completely dry with a clean towel—moisture makes the fruit slip during zesting.
Don’t cut the lime before zesting. Working with a whole lime gives you better control and prevents your fingers from getting too close to the grater’s sharp edges. You can juice the lime after you’ve removed all the zest.
Important Note: Choose limes with smooth, unblemished skin for easier zesting. Bumpy or rough peels make it harder to avoid the pith and can reduce your zest yield by 30-40%.
Recognize the Pith
The pith is the spongy white layer between the green peel and the lime’s flesh. It contains limonin and other compounds that taste bitter and can ruin your recipe’s flavor balance.[7] You’ll see it appear as white spots when you’ve zested too deeply.
The moment white appears, rotate the lime to a fresh green section. Don’t try to zest areas where you’ve already removed the outer layer—you’ll only get pith at that point.
- Your zest appears bright green or yellow-green with no white flecks
- The zested area looks smooth and glossy, not rough or torn
- You can still see a thin green layer remaining after your first pass
- The zest feels slightly oily and aromatic when rubbed between fingers
- Your grater moves smoothly without requiring heavy pressure
Zesting Lime Technique
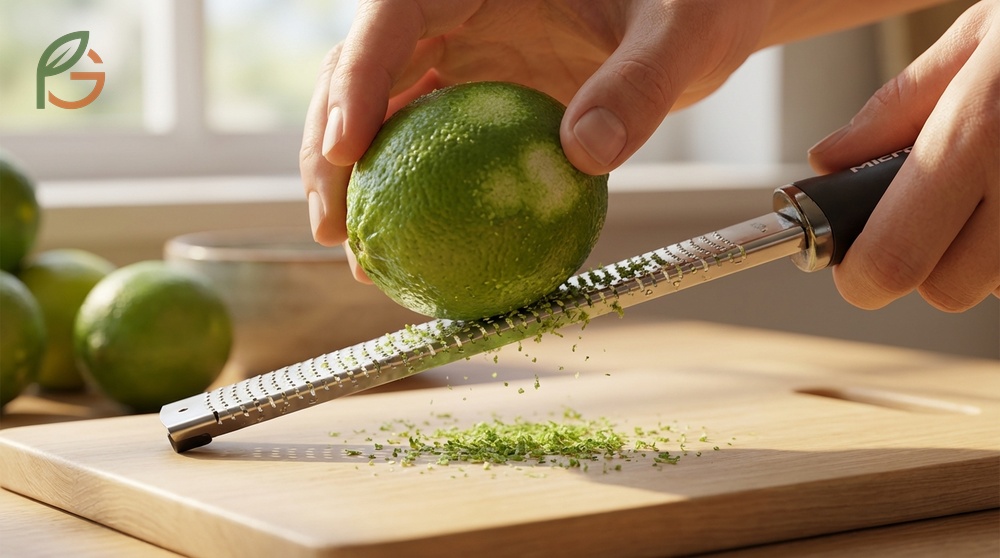
The right technique matters more than the tool you’re using. Current culinary guidance emphasizes gentle pressure and frequent rotation to maximize zest while preserving the fruit’s integrity. Most home cooks press too hard and end up with bitter pith mixed into their zest.
Professional chefs recommend zesting over a clean cutting board or plate to catch all the precious oils. The fine particles can scatter, so work in a contained area.
Microplane Method
A microplane grater produces the finest, most delicate zest—perfect for baking and cocktails. Hold the microplane at a 45-degree angle with one end resting on your work surface.[8] This angle gives you better control and leverage.
Drag the lime down across the grater’s sharp teeth using light pressure. You’re not trying to grate the lime like cheese—let the ultra-sharp blades do the work. Rotate the lime a quarter-turn after each pass to ensure you’re always working on fresh green peel.
The zest will collect on the grater’s underside. Tap the microplane gently on your work surface or scrape with a butter knife to release the accumulated zest. For recipes requiring precise measurements, scrape and measure as you go.
Box Grater Approach
Use the finest holes on your box grater for zesting—these are typically on the side labeled for hard cheeses. Research shows box graters create slightly thicker zest strands compared to microplanes, making them ideal for garnishes where you want visible citrus pieces.[9]
Hold the grater steady with one hand while moving the lime in a downward motion with light pressure. The zest collects inside the grater, so you’ll need to tap it out or use a small spatula to retrieve it.
Pro Tip: Can’t tell if you’re pressing too hard? If the lime starts leaving indentations or torn sections, you’re applying too much force. Back off and let the grater’s sharpness do the work.
- Position your tool at the correct angle (45 degrees for microplane, vertical for box grater)
- Make short, gentle strokes rather than long, heavy ones
- Rotate the lime every 2-3 strokes to access fresh peel
- Stop immediately when you see any white pith appearing
- Work around the entire lime systematically rather than random spots
- Save the ends for juicing—they’re too small to zest effectively
Zester Tool Use
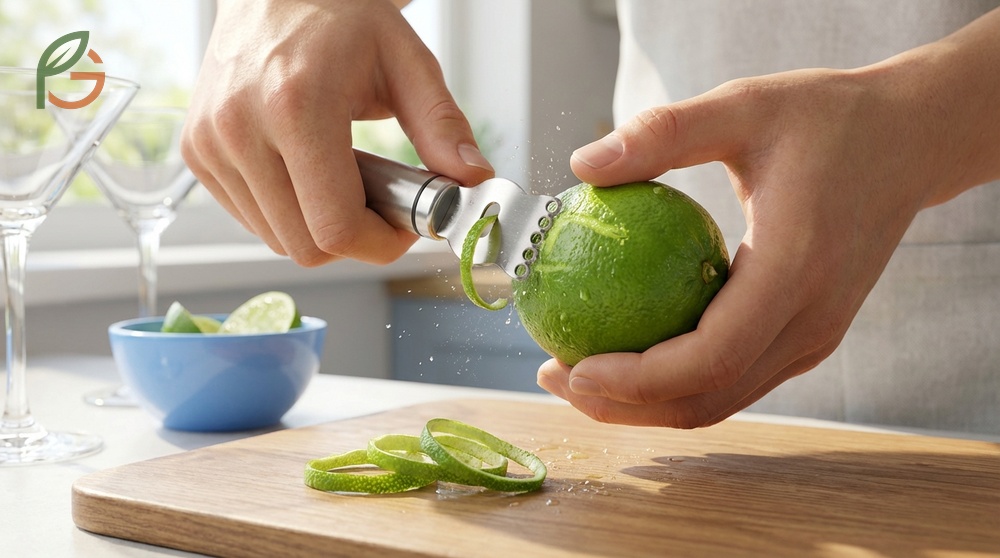
Dedicated citrus zesters create thin strips rather than fine shavings. These tools feature five small holes that cut channels into the peel, producing decorative strips perfect for cocktail garnishes.[10] The technique differs significantly from microplane or grater methods.
Hold the lime in your non-dominant hand and the channel knife in your working hand. Press the circular blades into the top of the lime and pull downward, creating a thin ribbon of peel. You’ll need multiple passes to get enough zest for recipes requiring measured amounts.
Channel knives work better for visual presentation than for baking or cooking where fine zest distributes more evenly. If you’re making a mojito or margarita garnish, this tool gives you professional-looking spirals.
This table compares four common zesting tools showing their zest texture, best uses, skill level required, and average cost
| Tool | Zest Texture | Best For | Skill Level |
|---|---|---|---|
| Microplane | Ultra-fine powder | Baking, marinades, dressings | Beginner-friendly |
| Box Grater | Fine shreds | Visible garnishes, cookies | Easy |
| Channel Knife | Thin strips | Cocktail garnishes, decorations | Intermediate |
| Vegetable Peeler | Wide strips | Candied peel, large pieces | Advanced (requires knife skills) |
When choosing a zesting tool, consider what you’ll use it for most often. Home cooks who bake frequently get the most value from a microplane, while cocktail enthusiasts might prefer a channel knife for garnish work.
Zesting Without Tool
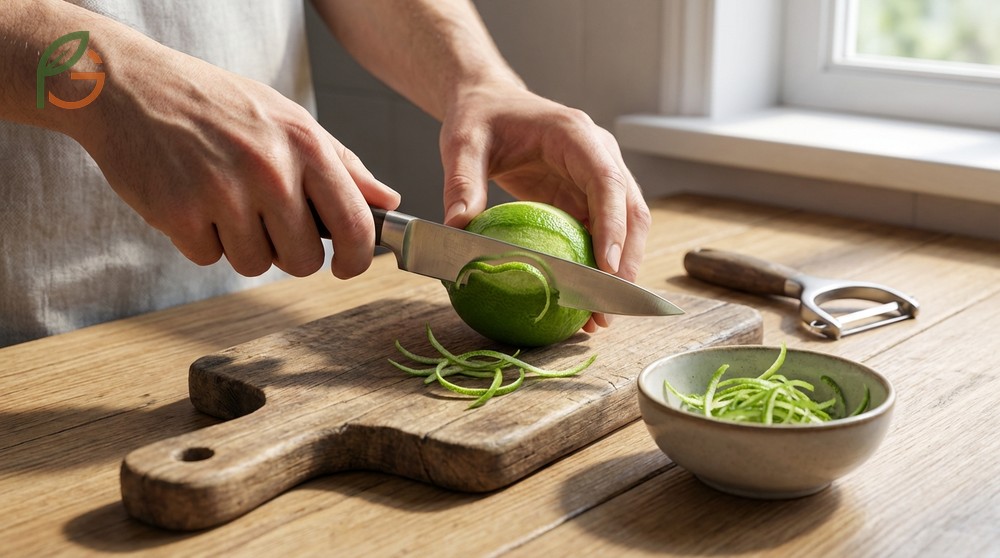
You don’t need specialized equipment to zest a lime—a sharp paring knife or vegetable peeler works in a pinch. The technique requires more knife skills and produces different results than grater-based methods, but it’s effective when you’re working with limited tools.
For the knife method, use a very sharp paring knife to shave off thin strips of green peel, cutting away from your body. Hold the lime steady on a cutting board and work slowly to avoid taking too much white pith.[4] Once you’ve removed the green strips, mince them finely with your knife.
A vegetable peeler removes wider strips that work well for infusions or candied peel. Use the same technique as peeling a potato, taking off just the colored layer. You’ll need to chop these wider pieces into smaller bits for most recipes. The advantage here is that you can see exactly what you’re removing and avoid pith more easily.
These no-tool methods won’t give you the fine, powdery texture of microplane zest. Expect chunkier pieces that take longer to release their oils into your recipe. For baked goods where texture matters, consider pulsing the chopped zest with a bit of sugar in a spice grinder to break it down further.
- Sharp paring knife (3-4 inch blade works best for control)
- Vegetable peeler with a sharp swivel blade
- Fine cheese grater if you have one for hard cheeses
- Small handheld grater designed for garlic or ginger
- Even a very fine rasp-style file from your workshop (cleaned thoroughly)
Make Lime Zest Last
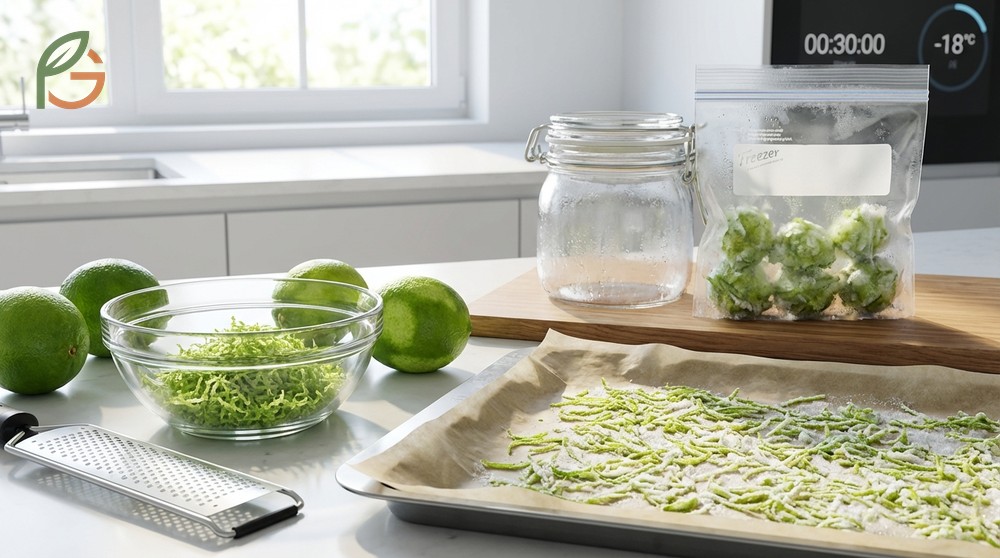
Fresh lime zest loses potency quickly due to volatile oil evaporation. If you’re not using it immediately, proper storage preserves both flavor and aroma for future recipes. Evidence shows that room-temperature zest loses 40% of its aromatic compounds within 24 hours.[5]
Freezing is your best option for long-term storage. Spread fresh zest in a thin layer on parchment paper and freeze for 30 minutes, then transfer to an airtight container or freezer bag. This prevents clumping and lets you measure out exactly what you need later. Frozen zest maintains 90-95% of its flavor for up to six months.
For short-term storage up to five days, wrap zest tightly in plastic wrap and store in your refrigerator’s crisper drawer. Adding a small piece of parchment between the zest and plastic prevents sticking. Don’t store wet zest—moisture accelerates flavor loss and can lead to mold.
Some cooks freeze zest in ice cube trays with a small amount of lime juice or neutral oil. This creates convenient portions for marinades or dressings. Each cube contains roughly one teaspoon of zest, making measurement easy when you’re cooking from frozen.
Dehydrating zest extends shelf life to 3-6 months without freezer space. Spread zest on a baking sheet and dry at 150°F (65°C) for 2-3 hours until brittle, or use a food dehydrator. Store dried zest in an airtight jar in a cool, dark place. Rehydrate in warm water for 5 minutes before using, or add directly to dishes with sufficient liquid.
Conclusion
The evidence is clear: mastering how to zest a lime comes down to three principles—use the right tool, apply gentle pressure, and stop before you hit the pith. Whether you’re using a microplane, box grater, or simple paring knife, the technique remains consistent: rotate frequently and let your tool’s sharpness do the work.
Current culinary guidance emphasizes that fresh lime zest adds complexity that bottled juice can’t replicate. The aromatic oils in that thin green layer transform ordinary dishes into memorable meals. FruitGarden provides expert resources for both growing citrus fruits and using them effectively in your kitchen—connecting your garden harvest directly to your dinner table.
Frequently Asked Questions
Can you zest a lime with a cheese grater?
Yes, the finest side of a box grater works well for zesting limes. Use the same side you’d use for hard cheeses like Parmesan, and apply light pressure to avoid reaching the bitter white pith beneath the green peel.
How much zest does one lime produce?
One medium lime typically yields about 2 teaspoons of zest when properly zested using a microplane or fine grater. Larger limes can produce up to 1 tablespoon, while smaller Key limes provide approximately 1 teaspoon each.
What happens if you accidentally zest the pith?
Pith adds bitter flavors that can overpower your recipe’s intended taste. If you’ve collected some white pith with your green zest, you can’t easily separate them. It’s better to discard the batch and start fresh rather than risk ruining an entire dish.
Should you wash limes before zesting?
Always wash limes thoroughly before zesting. Commercial limes often have wax coatings or pesticide residue on their peels. Scrub with a vegetable brush under running water, then dry completely before zesting to ensure food safety and optimal results.
Can lime zest be frozen for later use?
Frozen lime zest retains 90-95% of its flavor for up to 6 months when stored properly in an airtight container. Freeze zest in a thin layer first to prevent clumping, then transfer to a freezer bag. You can use frozen zest directly in cooked dishes without thawing.
What’s the difference between lime zest and lime peel?
Lime zest refers specifically to the thin green outer layer containing aromatic oils, while lime peel includes both the colored zest and the white pith underneath. Recipes calling for zest want only the flavorful green portion, not the bitter pith.
Is a microplane better than a regular grater for zesting?
Microplanes create finer, more delicate zest that distributes evenly in batters and doughs, making them ideal for baking. Regular box graters produce slightly larger shreds that work better for garnishes. Both avoid pith effectively when used with proper technique and light pressure.