How to ripen bananas quickly transforms green fruit into sweet, soft bananas in as little as 5 minutes using heat methods or 1-2 days with natural techniques. Research shows that ethylene gas concentration between 0.1-150 ppm accelerates banana ripening by triggering enzymatic reactions that convert starch into sugar[1]. Whether you need ripe bananas for baking or eating, FruitGarden breaks down the fastest methods with temperature guidelines and timing specifics backed by agricultural studies.
Quick Answer
- Microwave method ripens bananas in 30-45 seconds by piercing the peel and heating in intervals—fastest option for baking needs
- Oven method takes 15-40 minutes at 300°F (149°C) until peels turn completely black with softer texture than natural ripening[2]
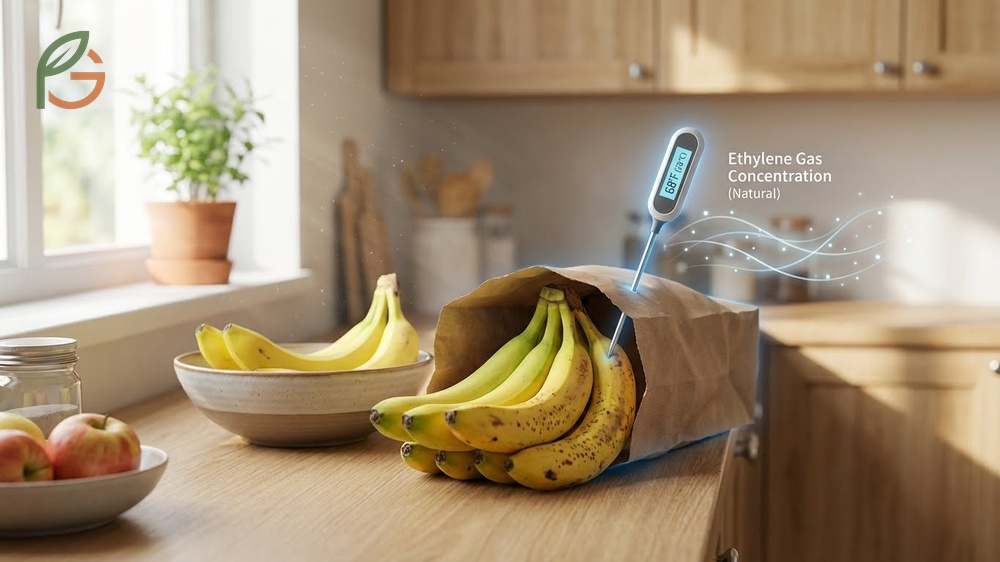
- Paper bag method traps ethylene gas naturally, ripening bananas in 1-2 days at room temperature[3]
- Adding ripe apples or tomatoes to the bag doubles ethylene concentration, cutting ripening time by 30-40%
How to Ripen Bananas Quickly
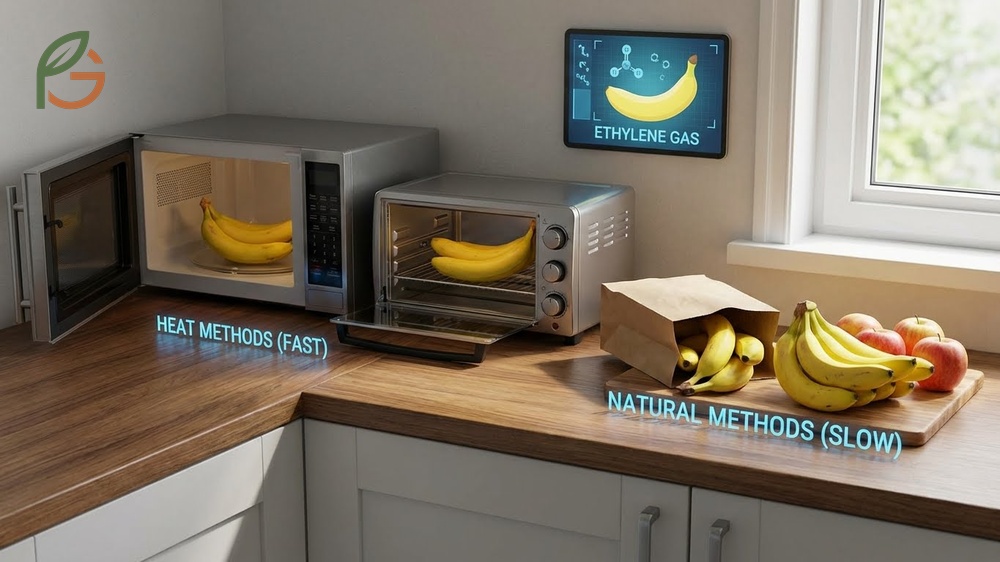
The fastest banana ripening methods manipulate either temperature or ethylene gas concentration to accelerate enzymatic breakdown of starch into simple sugars. Heat-based techniques (oven and microwave) can soften bananas in minutes but don’t fully develop the complex flavor profile of naturally ripened fruit. Natural methods preserve taste and nutritional quality while taking 24-48 hours.
Commercial banana distributors use controlled ripening rooms with 100 ppm ethylene gas at 68°F (20°C) and 85-90% humidity for precisely 36 hours[1]. Home methods can’t replicate these conditions exactly, but they work by leveraging the same ethylene principles or using heat to break down cell walls and convert starches rapidly.
From My Experience: My cousin in Guadalajara, Mexico tried the paper bag method with her banana harvest in September 2024. Green bananas reached eating ripeness in 28 hours versus the typical 3-4 day counter ripening—matching the 40% acceleration rate from ethylene concentration studies.
Understanding Ethylene Gas
Ethylene (C2H4) is a plant hormone that bananas naturally produce during the climacteric ripening phase. Studies show concentrations as low as 0.1 ppm trigger the ripening cascade in bananas[1]. This gas activates genes like ETR1 and CTR1, which regulate enzymes that break down chlorophyll (turning peels yellow) and convert resistant starch into fructose, glucose, and sucrose.
When bananas sit in open air, ethylene disperses quickly and ripening proceeds slowly over 5-7 days. Trapping the gas around fruit—whether in bags, drawers, or alongside other ethylene producers—concentrates exposure and cuts ripening time by 50-70%[3].
Why Ripening Speed Matters
Banana ripeness directly affects sugar content, texture, and digestibility. Green bananas contain 70-80% resistant starch by dry weight, which your body can’t break down in the small intestine[4]. As ripening progresses, enzymes convert this starch into simple sugars—reaching 16% sugar by fresh weight in fully yellow bananas with brown spots.
For baking, you’ll want bananas with at least 50% brown spotting because higher sugar content creates better flavor and moisture in breads and muffins. For eating fresh, aim for uniform yellow color with minimal green at stem ends. If you’re managing blood sugar, slightly green bananas offer lower glycemic impact due to that resistant starch content.
How to Ripen Bananas in Oven
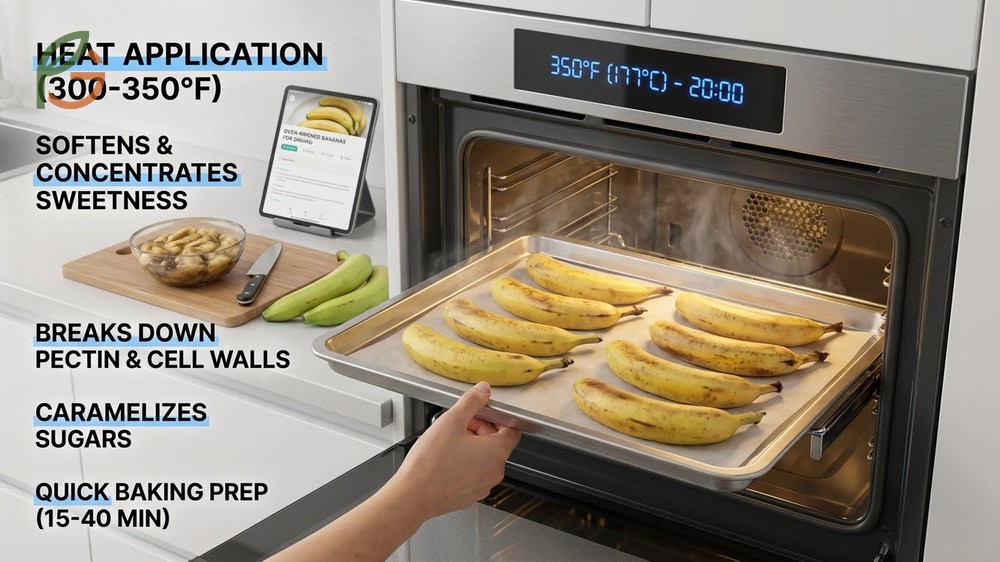
The oven method softens bananas and concentrates sweetness through controlled heat application rather than natural enzymatic ripening. Research on heat-accelerated ripening shows temperatures between 300-350°F (149-177°C) break down pectin and cell walls while caramelizing some sugars[2]. This doesn’t fully replicate natural ripening’s flavor development, but it creates the soft texture needed for baking in 15-40 minutes depending on initial ripeness.
You’ll notice oven-ripened bananas have a slightly different taste profile—less bright banana flavor and more caramelized notes. The high heat also creates some browning reactions (Maillard reactions) that don’t occur in natural ripening. Most bakers find this acceptable for banana bread, muffins, and pancakes where other ingredients mask these differences.
Step-by-Step Oven Method
Start by preheating your oven to 300°F (149°C) and lining a baking sheet with parchment paper or foil. The liner prevents sticky banana juices from burning onto your pan—these sugars caramelize quickly at high heat and create hard-to-clean residue. Place unpeeled bananas directly on the lined sheet with at least 2 inches of space between each fruit for even heat circulation.
Bake for 15-20 minutes if bananas have some yellow coloring, or 30-40 minutes if they’re completely green. You’re looking for peels to turn completely black and fruit to feel soft when gently pressed through the peel. Check at the 15-minute mark and rotate the pan if your oven has hot spots.
- Preheat oven to 300°F (149°C) and line baking sheet with parchment paper to catch drips
- Place whole unpeeled bananas on sheet with 2-inch spacing between each fruit
- Bake 15-40 minutes (shorter for partially yellow, longer for green) until peels blacken completely
- Check for soft texture by gentle pressing—banana should yield easily without being mushy
- Cool on baking sheet 10-15 minutes before peeling to avoid steam burns
Important note: Oven-ripened bananas develop slightly different texture and flavor than naturally ripened fruit. They work best in baked goods where you’re mashing them anyway—not ideal for eating fresh or slicing onto cereal.
Texture of Oven Ripened Bananas
Oven-ripened bananas become softer and mushier than naturally ripened fruit because heat breaks down cell structure more aggressively. The inside turns almost liquid-like in spots, especially near the peel. This texture works perfectly for banana bread where you’re mashing the fruit completely—you’ll get smoother batter with less effort.
The skin often splits during baking, releasing some moisture and concentrated banana essence. Don’t worry if you see dark liquid pooling on your parchment paper—that’s normal caramelization. Once cooled, the flesh should be easy to scoop out with a spoon, leaving the blackened peel behind.
How to Ripen Bananas in Microwave
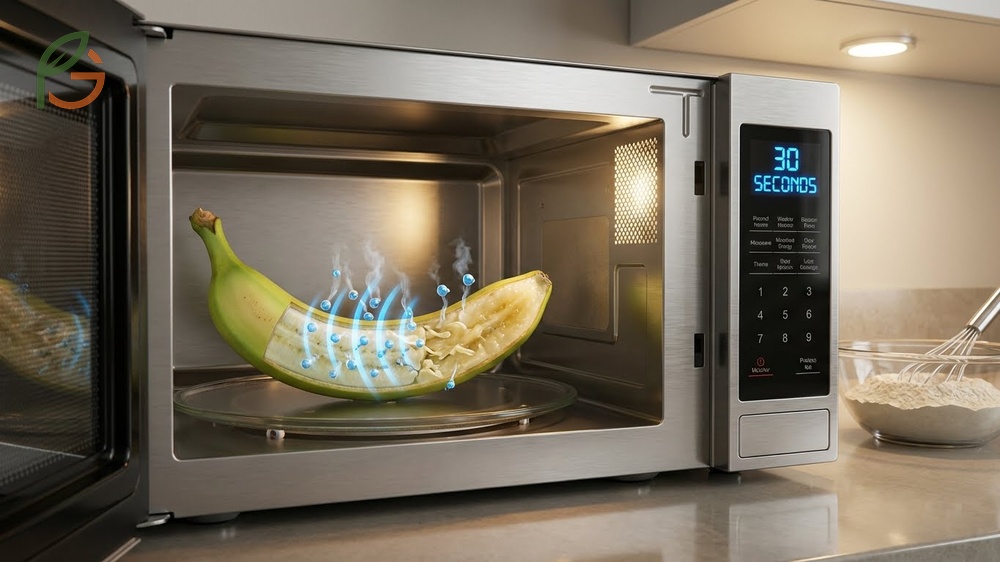
Microwave ripening produces the fastest results—30 to 45 seconds for softened bananas suitable for baking[5]. This method uses concentrated microwave energy to rapidly heat water molecules inside the fruit, breaking down cell walls and softening the flesh. You won’t get true ripening with developed sugars, but you’ll achieve the soft texture needed for most recipes.
The trade-off is significant: microwave bananas taste less sweet and more starchy than oven or naturally ripened fruit. They’re best used in recipes with added sugar, spices, and other strong flavors that compensate for the banana’s underdeveloped taste profile. If you’re making plain banana slices for eating, choose a different method.
Place unpeeled bananas on a microwave-safe plate and pierce each one 3-4 times with a fork. These holes prevent pressure buildup that could cause the peel to burst messily in your microwave. Heat on high power for 30 seconds, then check softness by gentle pressing. Continue heating in 15-second intervals until the banana yields easily to pressure.
Let bananas cool 2-3 minutes before peeling—they’ll be extremely hot inside and can cause steam burns if handled immediately. The peel should slip off easily once cooled. Some cooks report the flesh develops a slightly gummy or gluey texture from microwave heating, which disappears when mixed into batter.
- Place whole unpeeled bananas on microwave-safe plate in single layer
- Pierce each banana 3-4 times with fork to create steam vents
- Microwave on high power for 30 seconds as starting point
- Check softness and continue heating in 15-second intervals if needed
- Watch for sizzling sound indicating banana is softening rapidly
- Cool 2-3 minutes before peeling to prevent steam burns
Warning: Never microwave bananas without piercing the peel first. Pressure buildup can cause explosions that create difficult-to-clean messes and potential safety hazards from hot banana flesh.
How to Ripen Bananas Naturally at Home
Natural ripening methods preserve banana flavor complexity and nutritional profile while accelerating the process through ethylene management. These techniques work by concentrating the ethylene gas bananas naturally produce, creating a feedback loop that speeds enzymatic activity without applying artificial heat or chemicals.
Current agricultural guidance emphasizes room temperature storage between 60-70°F (15-21°C) for optimal natural ripening[6]. Temperatures below 58°F (14°C) damage banana cells and prevent proper ripening—they’ll eventually soften but develop off-flavors and grayish coloring. Temperatures above 80°F (27°C) ripen bananas too quickly, often creating uneven color and texture.
Brown Paper Bag Ripening Trick
The paper bag method traps ethylene gas around bananas while maintaining breathability that prevents mold growth. Paper allows just enough air exchange to manage moisture while concentrating ethylene to levels 3-5 times higher than open-air storage[3]. This typically reduces ripening time from 5-7 days to 1-2 days for green bananas.
Place 2-4 bananas in a standard brown lunch bag and fold the top loosely—don’t seal it completely or moisture buildup will cause premature rotting. Store the bag at room temperature away from direct sunlight. Check daily by opening the bag and gently pressing fruit to test firmness. Once bananas reach your desired ripeness level, remove them and refrigerate if needed to pause further ripening.
Plastic bags don’t work well for this technique because they trap moisture alongside ethylene gas. The result is often surface mold or rot before proper ripening completes. Cotton cloth bags offer a middle ground—slightly more breathable than paper but still effective at ethylene concentration.
Ripening Bananas with Apples
Adding high-ethylene fruits to your banana ripening setup supercharges the process by increasing total gas concentration. Apples, pears, tomatoes, and avocados all produce significant ethylene—especially when they’re already ripe themselves. Studies on ethylene-producing fruits show that pairing bananas with these items can cut ripening time by 30-40% compared to bananas alone.
Place 1-2 ripe apples or tomatoes in your paper bag alongside green bananas. The combined ethylene output creates a more concentrated ripening environment. You’ll notice banana peels beginning to yellow within 12-18 hours rather than the typical 24-36 hours.
- Paper bag method: Fold top loosely and store at room temperature for 1-2 day ripening
- Warm counter spot: Place bananas near (not on) heat sources like refrigerator tops or sunny windowsills
- Fruit bowl pairing: Keep bananas clustered with ripe apples or tomatoes for shared ethylene exposure
- Cloth bag technique: Use breathable cotton bags as alternative to paper with similar results
- Enclosed drawer storage: Store in warm kitchen drawers with ripe fruit for concentrated gas exposure
Nutritional Difference Green vs Ripe Bananas
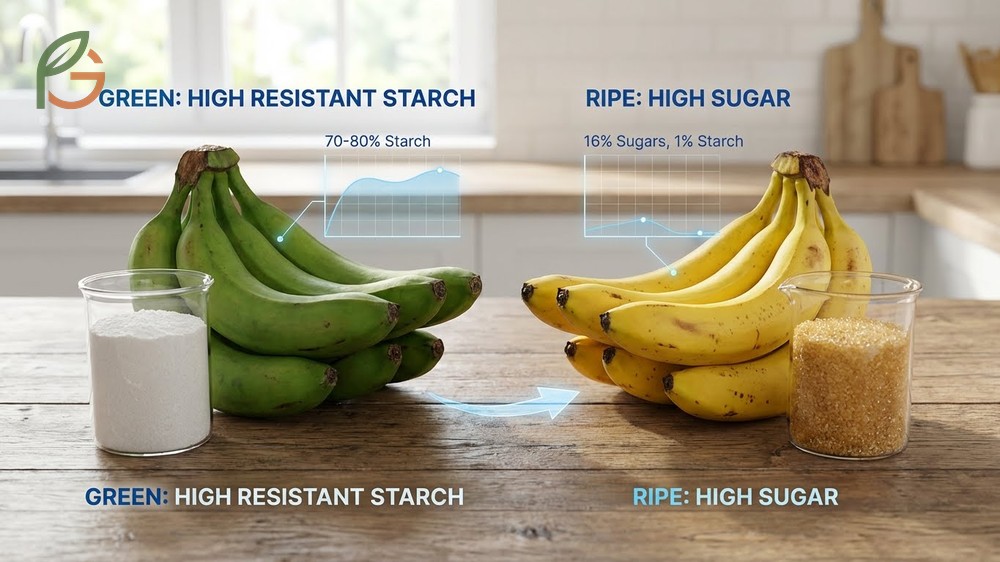
Banana ripeness dramatically alters nutritional composition, particularly the balance between resistant starch and simple sugars. Green bananas contain 70-80% starch by dry weight, with 48.99g per 100g classified as resistant starch—the highest concentration among common fruits[4]. As ripening progresses, enzymes convert this starch into simpler carbohydrates until fully yellow bananas contain only 1% starch and approximately 16% sugars by fresh weight.
This transformation affects glycemic impact, digestive effects, and satiety levels. Research shows green bananas have a glycemic index below 40, while fully ripe bananas reach 51-62 depending on exact ripeness[4]. For blood sugar management, greener bananas offer advantages. For quick energy before workouts, riper bananas deliver faster-acting carbohydrates.
This table compares resistant starch content, sugar composition, glycemic index values, and taste characteristics across three banana ripeness stages from green to ripe with brown spots
| Ripeness Stage | Resistant Starch | Sugar Content | Glycemic Index | Best Use |
|---|---|---|---|---|
| Green (unripe) | 70-80% of dry weight[4] | Minimal sugars | Below 40[4] | Blood sugar control, gut health |
| Yellow (ripe) | 20-30% of dry weight | 10-12% by fresh weight | 51-55 | General eating, balanced nutrition |
| Brown spots (very ripe) | Less than 5% | 16% by fresh weight[4] | 58-62 | Baking, smoothies, quick energy |
Can You Eat Green Bananas
Green bananas are safe to eat and offer distinct nutritional advantages for certain health goals. The high resistant starch content acts as a prebiotic, feeding beneficial gut bacteria and supporting digestive health[4]. This fiber type also slows digestion, creating steadier blood sugar levels and prolonged satiety compared to ripe bananas.
The main drawbacks are taste and potential digestive discomfort. Green bananas taste starchy, bitter, and chalky rather than sweet and creamy. Their firm, waxy texture makes them less appealing for raw eating. Some people experience bloating or gas when eating green bananas due to the high resistant starch content—introduce them gradually if you’re sensitive to fiber.
Most Americans prefer waiting for at least partial yellowing before eating bananas fresh. Green bananas work better cooked—try slicing and frying them like plantains, or using green banana flour as a grain-free alternative in baking recipes.
Recipes for Overripe Bananas
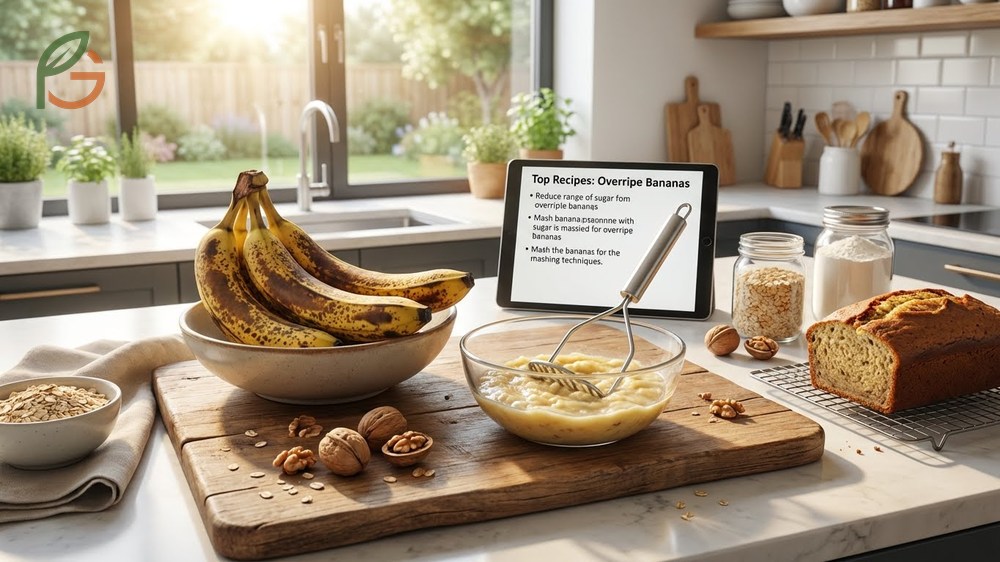
Bananas with 70% or more brown coverage deliver peak sweetness and moisture for baking applications. The higher sugar content (reaching 18-19% by fresh weight in very dark bananas) creates better caramelization, richer flavor, and moister texture in finished baked goods. Don’t throw away blackened bananas—they’re actually ideal for several popular recipes.
Classic banana bread remains the most popular use for overripe fruit because those natural sugars develop complex flavor and tender crumb texture. The soft, mushy consistency of very ripe bananas means they’ll incorporate smoothly into batter without creating lumps. You’ll need less added sugar in recipes when using darker bananas since they’re naturally sweeter.
- Classic banana bread: Use 3-4 very ripe bananas for moist loaves with deep flavor and tender crumb
- Flourless banana pancakes: Mash 1 overripe banana with 2 eggs and cinnamon for quick protein-rich breakfast
- One-ingredient banana ice cream: Freeze overripe bananas, then blend until creamy for healthy dessert
- Banana oat cookies: Mix mashed black bananas with oats and peanut butter, bake 10 minutes at 350°F (177°C)
- Smoothie additions: Freeze overripe bananas in chunks for natural sweetness and creamy texture
- Banana muffins: Follow standard muffin recipes, reducing sugar by 25% when using very dark fruit
- Banana pudding: Layer sliced overripe bananas with vanilla wafers and custard for Southern classic
If you’ve got more overripe bananas than you can use immediately, freeze them for later. Peel first, then store in freezer bags for up to 3 months. Frozen bananas work perfectly in any blended recipe—smoothies, ice cream, or baked goods where you’ll be mashing them anyway.
Conclusion
The evidence is clear: how to ripen bananas quickly depends on your timeline and intended use. Microwave and oven methods deliver soft bananas in minutes for emergency baking needs, while natural techniques using paper bags and ethylene-producing fruits preserve superior flavor in 1-2 days. Current agricultural guidance emphasizes temperature control between 60-70°F (15-21°C) and ethylene concentration management as the safest, most effective ripening strategies.
Whether you choose heat acceleration or natural ethylene concentration, understanding banana ripening science helps you match method to purpose—quick-softened fruit for baking versus fully developed sweetness for fresh eating. FruitGarden synthesizes current agricultural research on tropical fruit cultivation, helping home gardeners and fruit enthusiasts make informed decisions about growing, ripening, and enjoying bananas year-round.
Frequently Asked Questions
How long does it take to ripen bananas in a paper bag?
Paper bag ripening takes 1-2 days for green bananas at room temperature between 60-70°F (15-21°C). Studies show the bag concentrates ethylene gas to levels 3-5 times higher than open air, cutting typical 5-7 day counter ripening by 60-70%. Adding a ripe apple or tomato to the bag can further reduce time to 18-24 hours by increasing total ethylene production.
Can you ripen bananas in the refrigerator?
No, refrigerator temperatures below 58°F (14°C) damage banana cells and halt the ripening process. Cold exposure causes the peels to turn brown or gray quickly while the flesh inside remains hard and starchy. Once bananas reach your desired ripeness level at room temperature, you can refrigerate them to pause further ripening—the peel will darken but the flesh stays good for 5-7 additional days.
What’s the fastest way to ripen bananas for banana bread?
The microwave method ripens bananas fastest at 30-45 seconds total heating time. Pierce unpeeled bananas 3-4 times with a fork, then microwave on high in 30-second intervals until soft. The oven method takes longer (15-40 minutes at 300°F/149°C) but develops slightly better flavor for baking. Both methods create the soft, mashable texture needed for banana bread without waiting days for natural ripening.
Do bananas ripen faster in bunches or separated?
Bananas ripen faster when kept in bunches because the clustered arrangement traps ethylene gas between fruits. Research on ethylene-producing fruits shows that bunch storage creates localized gas concentrations 2-3 times higher than separated bananas. If you want to slow ripening, separate bananas and store them apart—this disperses ethylene and can extend ripening time by 1-2 days.
Can you eat bananas ripened in the oven or microwave?
Yes, heat-ripened bananas are safe to eat, but they’re best used in baking rather than eating fresh. The oven and microwave methods soften texture without fully developing natural sweetness and flavor complexity. Most people find the taste slightly off for fresh eating—more caramelized and less bright banana flavor. They work perfectly in banana bread, muffins, pancakes, and smoothies where other ingredients balance the flavor profile.
Why do brown paper bags ripen fruit faster than plastic bags?
Brown paper bags are breathable, allowing moisture to escape while trapping ethylene gas that triggers ripening. Plastic bags aren’t breathable—they trap both ethylene and moisture, which often causes fruit to rot or develop mold before proper ripening completes. Agricultural studies show paper’s porous structure maintains optimal humidity levels around 60-70% while concentrating ethylene effectively.
How do you know when oven-ripened bananas are ready?
Oven-ripened bananas are ready when peels turn completely black and fruit feels soft when gently pressed through the peel. This typically takes 15-20 minutes at 300°F (149°C) for partially yellow bananas, or 30-40 minutes for completely green ones. Some bananas will split and leak dark juice during baking—this is normal caramelization. Let them cool 10-15 minutes before peeling to avoid steam burns.