How to pit cherries without a pitter? You don’t need fancy gadgets to enjoy fresh, pit-free cherries. Research shows that simple household items like paperclips, chopsticks, and straws work just as effectively as specialized tools for removing cherry pits.[1] FruitGarden compiles practical methods from home cooks and cherry growers to help you pit cherries quickly and cleanly.
Quick Answer
- The paperclip method requires bending a large paperclip into an “S” shape and scooping out the pit through the stem hole[2]
- The chopstick-bottle technique pushes pits cleanly through cherries placed on narrow bottle openings with minimal mess[3]
- A sturdy straw (metal works best) forces pits out when pushed through the stem end, preserving cherry shape and juice[4]
- Each method works best for different situations: paperclips for small batches, chopsticks for speed, and knives when you don’t mind halved cherries
How to Pit Cherries Without a Pitter
Cherry season brings an abundance of fresh fruit, but removing those stubborn pits can slow you down. Most people don’t realize that common household items make excellent cherry pitters when you use the right technique.
Studies show that improvised tools can pit cherries just as efficiently as specialized equipment.[1] The key is choosing the right method for your situation—whether you’re prepping a small snack or processing pounds of cherries for jam.
Each technique targets the cherry pit from a different angle. Some scoop from the stem end, others push through the entire fruit, and a few require splitting the cherry in half.
Why These Methods Work
Cherry pits attach to the fruit at the stem end, making this the weakest point. When you apply pressure from above or use a curved tool to scoop around the pit, you’re exploiting this natural weakness in the fruit’s structure.
The amount of cherry flesh you lose depends on your tool’s diameter and how carefully you work. Narrow tools like straws or chopsticks create smaller holes than wide paperclips or knife blades.
What You’ll Need
- Fresh cherries (any variety works, but firmer cherries like Bing pit more cleanly than soft ones)
- One or more tools: large paperclip, chopstick, metal or sturdy plastic straw, empty bottle, or paring knife
- Bowl for pitted cherries and another for pits
- Optional: gloves to prevent red-stained hands[2]
- Paper towels or kitchen towel for cleanup
Important Note: Work over a bowl or cutting board covered with parchment paper. Cherry juice stains countertops and clothing permanently, so protect your workspace before you start.
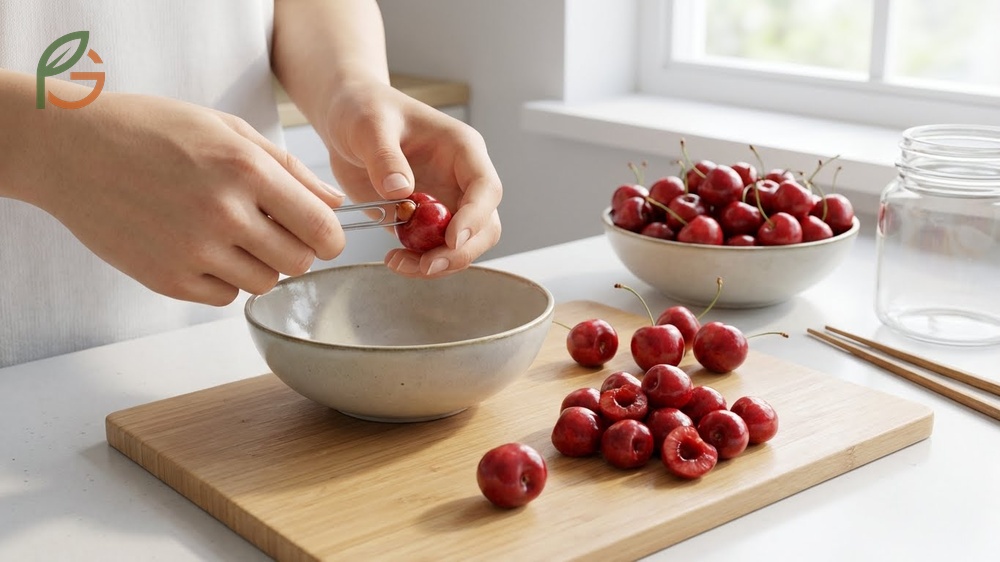
Paperclip Pitting Method
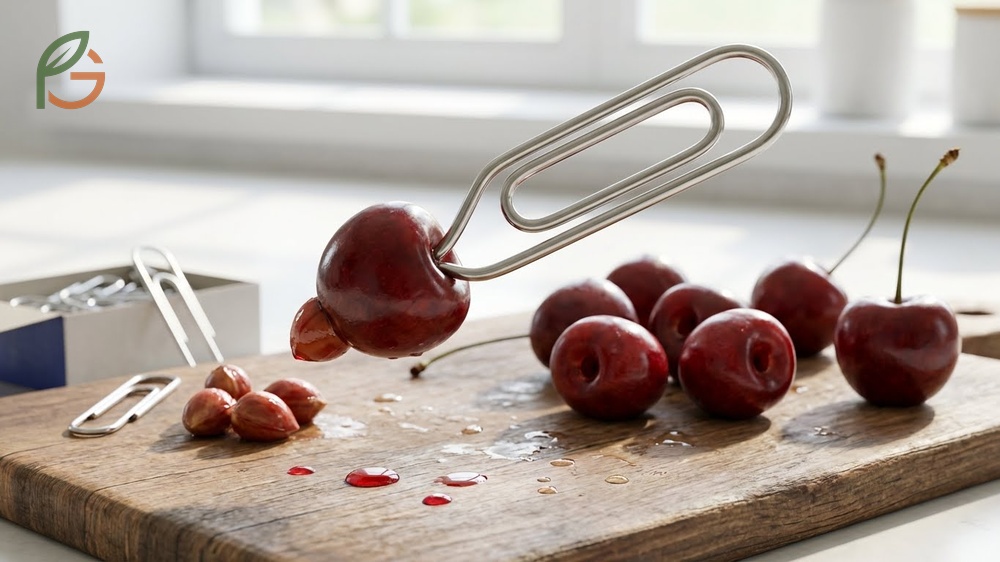
The paperclip method transforms an office supply into a miniature cherry pitter. Research from home cooks shows this technique works best with larger 50mm paperclips, which resist bending under pressure better than standard clips.[5]
You’ll create a hook by bending the paperclip into an “S” shape. This curved end scoops around the pit like a tiny shovel, letting you extract it through the stem hole without cutting the cherry.
Most people find this method works better for small batches—say, a cup or two of cherries. It’s precise but slower than push-through methods like chopsticks or straws.
Step-by-Step Paperclip Technique
- Locate a large paperclip (50mm works best) and unfold it into a straight line
- Bend it into an “S” shape by creating hooks at both ends[2]
- Remove the cherry stem and hold the fruit firmly between your thumb and forefinger
- Insert the curved end of the paperclip into the stem hole, pushing down until you feel the pit
- Rotate the paperclip in a circular motion around the pit to loosen it from the flesh
- Scoop under the pit and lift it out through the top opening
- Drop the pit in your discard bowl and place the pitted cherry in your clean bowl
From My Experience: My cousin in Guadalajara, Mexico tried this method in June 2024 with 2 pounds of cherries for a pie. She found that rinsing the paperclip every 10-15 cherries kept it from getting too sticky and slipping in her fingers.
Paperclip Pros and Cons
The paperclip method keeps cherries whole and relatively intact, which matters if you’re using them as garnishes or in upside-down cakes. You can also use either end of your bent paperclip, adjusting to larger or smaller cherries as needed.
However, this technique can get messy with very ripe cherries.[5] The fruit’s soft flesh tends to tear more easily, and juice runs down your fingers. It’s also the slowest method when you’re processing more than a handful of cherries.
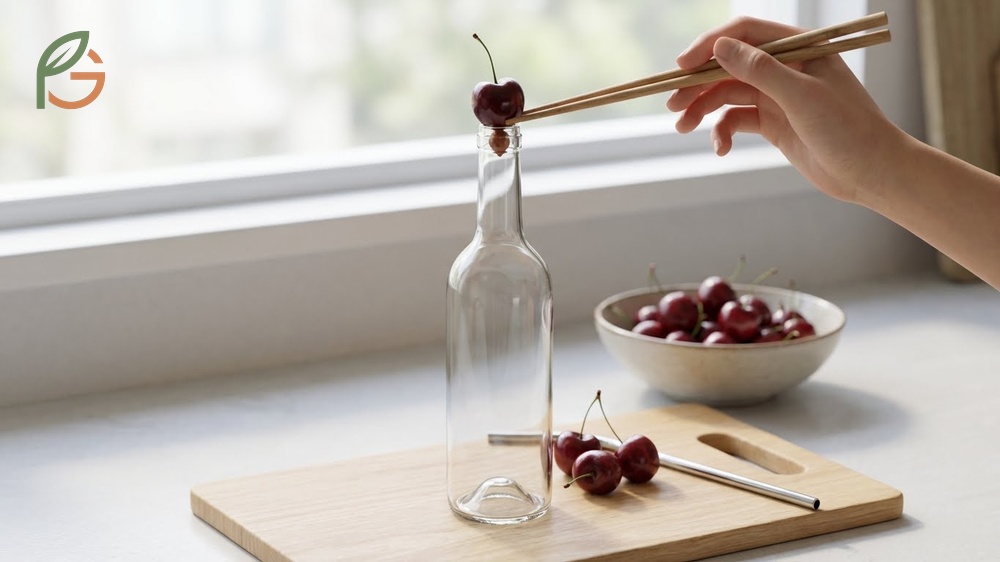
Chopstick Technique Cherries
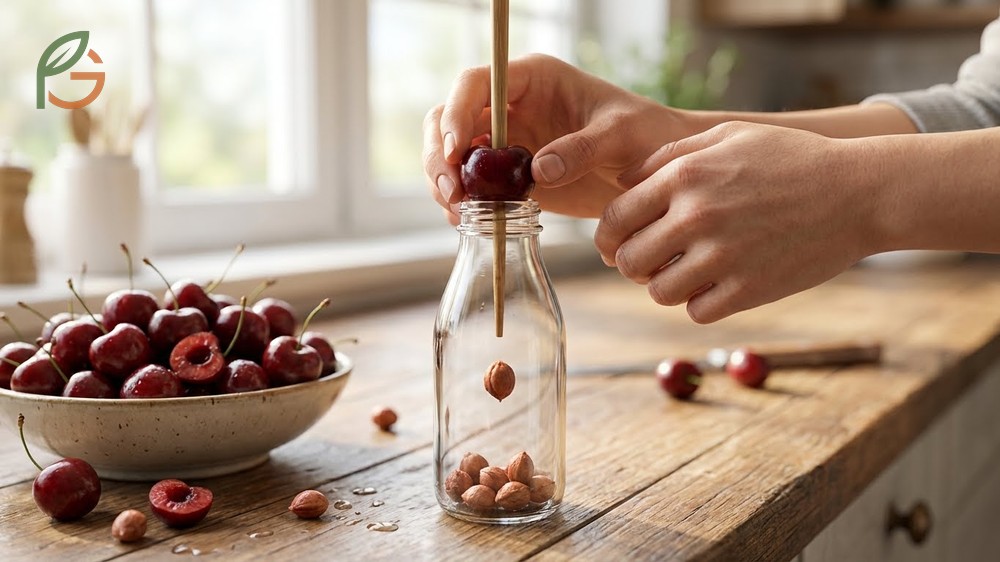
The chopstick technique combines speed with cleanliness by using a narrow bottle opening to stabilize each cherry. You’ll push the wide end of a chopstick straight through the fruit from the stem side, and the pit drops cleanly into the bottle below.[3]
This method shines when you’re pitting large quantities. Once you get into a rhythm, you can process a cherry every few seconds without repositioning your hands constantly.
The bottle catches all the pits automatically, so you don’t need to sort through a messy bowl later. It also captures excess juice, keeping your workspace cleaner than the paperclip method.
How to Use Chopsticks Properly
- Find an empty bottle with a narrow neck (wine bottles, beer bottles, or small glass soda bottles work perfectly)
- Grab a single chopstick—you’ll use the wider end for pushing
- Remove the stem from your cherry by twisting it off
- Place the bottom of the cherry on the bottle opening, with the stem hole facing up[3]
- Position the wide end of the chopstick directly above the stem hole
- Push down firmly in one smooth motion until the pit pops out the bottom
- The pit and any excess juice fall into the bottle while the pitted cherry stays on your chopstick
- Slide the cherry off into your clean bowl and repeat with the next fruit
Pro Tip: If you don’t have a chopstick handy, a sturdy metal straw or the handle of a small funnel works equally well. The key is having something narrow and firm enough to punch through the cherry without crushing it.[4]
When I visited my friend in Querétaro, Mexico last summer, she showed me this trick using wooden chopsticks from her kitchen drawer. She pitted 3 pounds of cherries in about 15 minutes—way faster than her previous method of cutting them in half with a knife.
Straw Pitting Hack
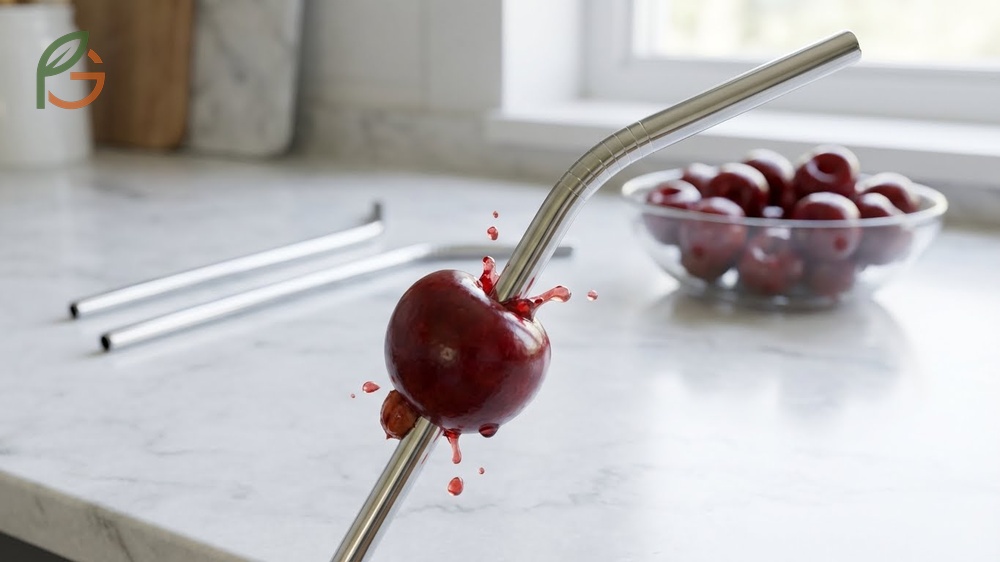
The straw pitting hack works on the same principle as chopsticks but preserves more cherry juice and flesh. When you push a straw through a cherry, the hollow center creates less friction than a solid tool, and the pit shoots cleanly through without tearing the fruit as much.[4]
Metal straws outperform disposable plastic ones because they won’t bend or crack under pressure. You can also reuse them indefinitely, unlike single-use plastic straws that often break after a few cherries.
This method works best when you pair it with the bottle technique. Place your cherry on an empty bottle’s opening, remove the stem, and push the straw straight down through the stem hole. The pit drops into the bottle while the straw holds your pitted cherry.
- Choose a metal straw or heavy-duty reusable plastic straw rather than flimsy disposable straws
- Position the straw perpendicular to the cherry for the cleanest push-through
- Apply steady, firm pressure rather than quick jabs
- If the pit doesn’t pop out on your first try, slightly angle the straw and push again
- Rinse the straw after every 15-20 cherries to prevent buildup inside the tube
The straw method creates the smallest puncture wound in your cherries compared to other household tools. This matters when you’re making cherry compote or pie filling, where you want to retain as much fruit and juice as possible.
Current guidance from home canning experts emphasizes maintaining fruit integrity when preparing preserves. The straw technique aligns with this principle by minimizing flesh damage during pit removal.
Bottle Pitting Method
The bottle pitting method isn’t a standalone technique—it’s actually the secret ingredient that makes chopstick and straw methods work so well. By providing a stable platform and catch basin, an empty bottle transforms these simple tools into efficient cherry-processing stations.
You need a bottle with an opening about 3/4 to 1 inch in diameter. Wine bottles hit this sweet spot perfectly, as do glass beer bottles and small soda bottles. The opening needs to be narrow enough to support the cherry but wide enough so pits don’t get stuck.
Glass bottles work better than plastic because they won’t tip over when you’re pushing down on cherries. The extra weight keeps your setup stable even when you’re moving quickly through a large batch.
- Empty wine bottles with standard cork-size openings work for most cherry varieties
- Smaller cherries need narrower openings—try beer bottles or small juice bottles
- Place a damp kitchen towel under your bottle to prevent sliding on smooth countertops
- When your bottle fills halfway with pits, empty it and rinse before continuing
- Clean the bottle rim every few minutes to prevent sticky buildup that makes cherries slide off
- Save multiple bottles if you’re processing several pounds—switching to a fresh bottle is faster than stopping to empty and clean
Safety Reminder: Don’t use cracked or chipped bottles. Applying downward pressure with chopsticks or straws could cause damaged glass to break and create sharp edges near your hands.
Knife Pitting Technique
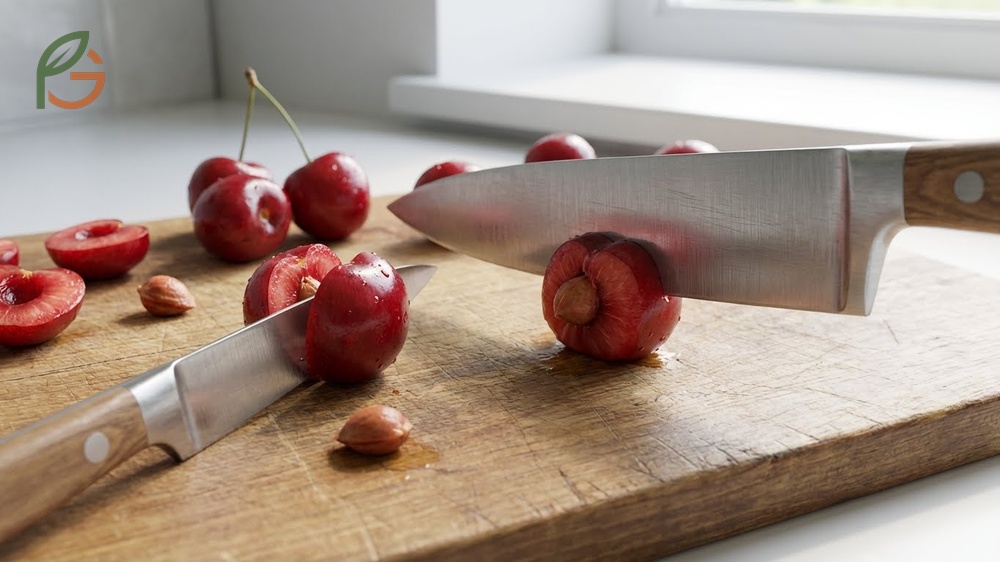
The knife pitting technique is your fallback when you don’t have any other tools handy. It won’t keep your cherries whole, but it’s fast and works with nothing more than a paring knife and cutting board.
You have two options with a knife. The first cuts cherries in half around their equator, letting you twist the halves apart and pluck out the pit. The second uses the flat side of a chef’s knife to gently press on whole cherries, loosening the flesh enough that you can pull the pit out with your fingers.
Neither method keeps cherries intact, so save this technique for situations where appearance doesn’t matter—smoothies, baked goods, or cherry sauce where you’ll be breaking down the fruit anyway.
- The halving method: Remove the stem, run your paring knife around the cherry’s equator following the natural seam, twist the halves in opposite directions, and pop out the pit
- The pressing method: Place stemmed cherries on a cutting board, lay the flat side of a chef’s knife on top, press down gently with your palm until you feel the flesh give way slightly, then remove the pit with your fingers
- For the halving method, use a small paring knife with a 3-4 inch blade for better control
- When pressing, apply just enough force to loosen the pit—too much pressure squashes the cherry and wastes juice
- Work on a cutting board with a juice groove to catch runoff
My aunt in Monterrey, Mexico uses the pressing technique when she makes cherry agua fresca in summer. Since she blends everything anyway, having perfect whole cherries doesn’t matter, and she can process a bowl in minutes.
The knife method produces the most cherry halves and the least whole fruit. But when you’re baking or cooking, this actually speeds up your prep since many recipes call for halved or chopped cherries regardless of how you pit them.
This table compares five cherry pitting methods across speed, mess level, cherry appearance, and ideal usage scenarios
| Method | Speed | Mess Level | Cherry Appearance | Best For |
|---|---|---|---|---|
| Paperclip | Slow | Moderate to High | Whole with small hole | Small batches, garnishes |
| Chopstick + Bottle | Fast | Low | Whole with clean puncture | Large batches, canning |
| Straw + Bottle | Fast | Very Low | Whole with minimal damage | Preserves, pie filling |
| Bottle Alone | N/A | N/A | N/A | Supporting other methods |
| Knife | Very Fast | High | Halved or crushed | Smoothies, baking, sauces |
Conclusion
The evidence is clear: how to pit cherries without a pitter comes down to matching your method to your needs. Chopsticks and straws with bottle support deliver speed and cleanliness for large batches, while paperclips offer precision for small quantities when you need whole cherries.
Current guidance from FruitGarden emphasizes using tools you already own rather than buying specialized equipment that sits unused for most of the year. These five methods prove that fresh cherries become more accessible when you know how to work with common household items.
Frequently Asked Questions
What’s the fastest way to pit cherries without a pitter?
The chopstick and bottle method is the fastest for large quantities. Once you establish a rhythm, you can pit a cherry every 2-3 seconds by pushing the chopstick through fruit positioned on a bottle opening.[3] This technique processes pounds of cherries in minutes while keeping your workspace cleaner than other methods.
Can you pit cherries with a straw?
Yes, sturdy straws work excellently for pitting cherries. Metal straws perform best because they won’t bend or break under pressure.[4] Place the cherry on a bottle opening, remove the stem, and push the straw straight down through the stem hole. The pit drops into the bottle while the hollow straw preserves more fruit flesh than solid tools.
How do you pit cherries with a paperclip?
Bend a large paperclip (50mm works best) into an “S” shape to create hooks at both ends. Remove the cherry stem, insert the curved end into the stem hole, and rotate the paperclip around the pit in a circular motion.[2] Scoop under the pit and lift it out through the top opening. This method keeps cherries whole but works best for small batches since it’s slower than push-through techniques.
Do I need to remove cherry stems before pitting?
Yes, removing stems before pitting makes the process much easier. The stem occupies the natural entry point where you’ll insert your tool—whether that’s a paperclip, chopstick, or straw. Twist the stem off gently to avoid tearing the cherry flesh around the opening.
What bottle works best for the chopstick method?
Empty wine bottles work perfectly because their cork-size openings (about 3/4 to 1 inch diameter) fit most cherry varieties. Glass beer bottles and small soda bottles also work well.[3] Choose glass over plastic for better stability—the extra weight prevents tipping when you’re pushing down on cherries. Make sure the bottle opening is narrow enough to support the cherry but wide enough so pits don’t get stuck.
Why do my cherries get crushed when I pit them?
You’re likely using too much force or working with overripe cherries. Firm cherries like Bing variety pit more cleanly than soft, very ripe fruit. Apply steady, moderate pressure rather than quick jabs—let your tool do the work rather than forcing it. If cherries continue crushing, they may be too ripe for methods that keep fruit whole; switch to the knife technique instead.
How can I prevent cherry juice from staining my hands?
Wear disposable gloves or rinse your hands frequently with cold water during pitting.[2] Cherry juice stains skin and nails, especially with methods like the paperclip technique that involve more direct contact with juice. If your hands do get stained, lemon juice or white vinegar can help lift the color. For your workspace, cover surfaces with parchment paper and keep paper towels handy.