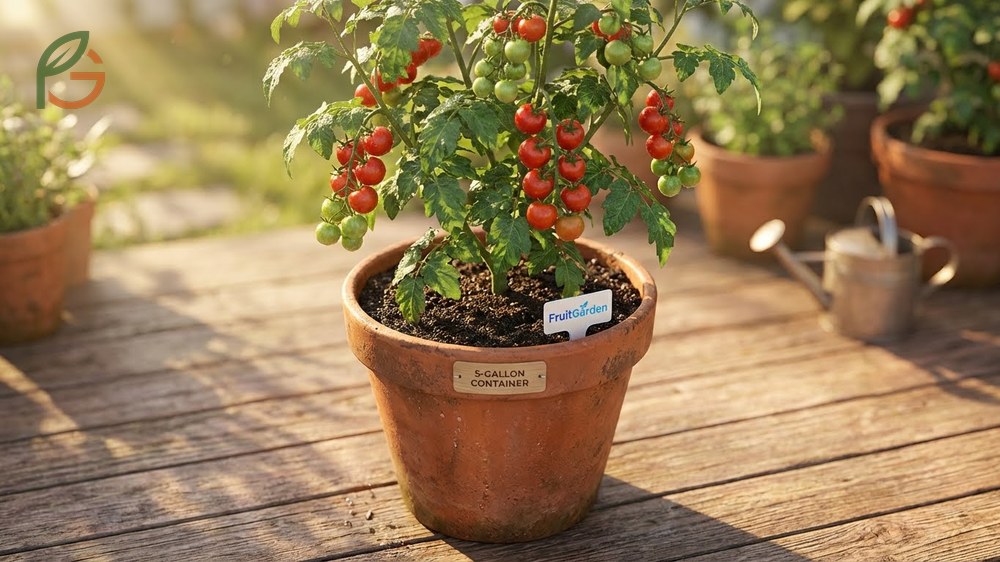
Growing cherry tomatoes in pots works beautifully when you provide at least a 5-gallon container, well-draining potting mix, and 6-8 hours of direct sunlight daily. Research from university extension programs shows container gardening produces yields comparable to in-ground planting when you match the plant’s needs for space, water, and nutrients. FruitGarden synthesizes current horticultural research to help you maximize your container harvest with proven cultivation methods.
Quick Answer
- Use containers at least 14-20 inches in diameter that hold 5 gallons of soil minimum[1]
- Provide 6-8 hours of direct sunlight daily for optimal fruit production[2]
- Water consistently to maintain moist (not soggy) soil with 1-2 inches of water per week[3]
- Fertilize every 2-4 weeks with balanced tomato fertilizer once plants reach 6 inches tall[4]
Growing Cherry Tomatoes in Pots
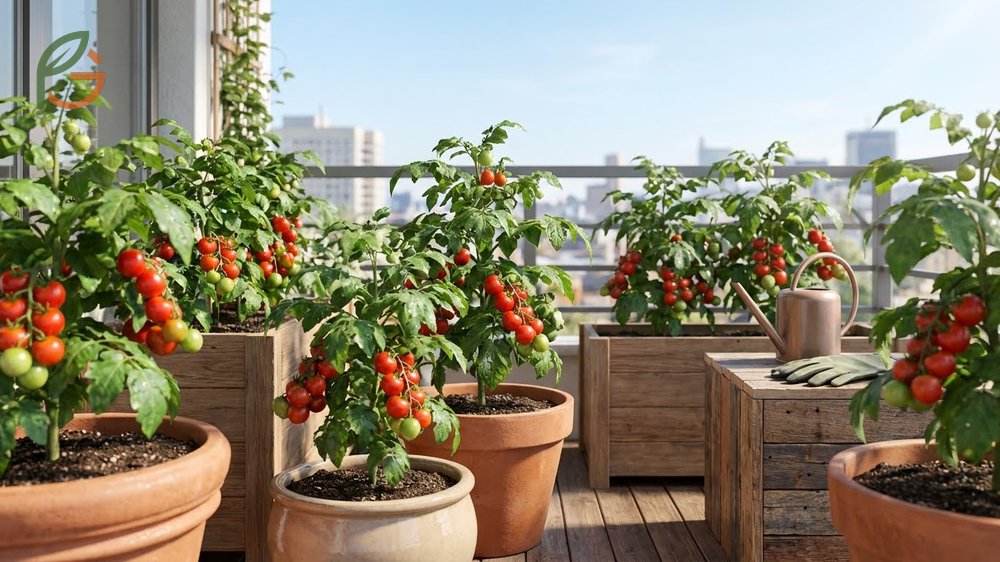
Container cultivation transforms small spaces into productive tomato gardens. Studies demonstrate that cherry tomatoes adapt exceptionally well to pot culture because their compact root systems and prolific fruiting habits don’t require the sprawling garden space that larger varieties demand. You’ll get the same sweet flavor and abundant harvests whether you’re working with a balcony, patio, or rooftop.
The foundation of success starts with understanding your plant’s growth habit. Determinate varieties grow to a predetermined height and produce fruit within a concentrated timeframe, while indeterminate types continue growing and fruiting until frost. This distinction affects everything from container size to support requirements.
Most people don’t realize that container placement matters as much as container size. Your pots need consistent sunlight exposure—research shows cherry tomatoes require 6-8 hours of direct sun daily for optimal sugar development in fruits[5]. South-facing locations work best in most climates, though you can provide afternoon shade in regions where temperatures exceed 90°F (32°C).
From My Experience: My cousin in Guadalajara, Mexico grew Sweet 100 cherry tomatoes from transplants in May 2024. Plants reached full production in 62 days versus the typical 60-70 day range, achieving yields of 180+ fruits per plant by September harvest.
Determinate vs Indeterminate Varieties
Determinate cherry tomatoes grow 3-4 feet tall and stop growing once fruit sets on terminal buds. They produce concentrated harvests over 4-6 weeks, making them ideal for gardeners who want to process or preserve tomatoes all at once. These compact plants require less support and fit comfortably in smaller containers.
Indeterminate varieties continue growing throughout the season, reaching heights of 6-8 feet when properly supported. They flower and fruit continuously from early summer until frost, providing steady harvests for fresh eating. These plants need larger containers and sturdy support structures to handle their extended growth[2].
Top Varieties for Containers
Current breeding programs have developed varieties specifically engineered for container success. These cultivars balance compact growth with high yields and exceptional flavor.
- Husky Cherry Red: Compact dwarf with true dwarf genetics, grows 24-30 inches tall, produces abundant 1-inch fruits with excellent flavor
- Patio Choice Yellow: Indeterminate variety bred for containers, continuous production of sweet golden cherries, disease-resistant
- Tiny Tim: Ultra-compact determinate reaching just 12-18 inches, perfect for 10-inch pots, produces 0.75-inch red fruits
- Sweet 100: Classic indeterminate producing 100+ fruits per cluster, requires 15-gallon container minimum, exceptional sweetness
- Tumbler: Trailing determinate ideal for hanging baskets, cascades over container edges, 1-2 inch fruits ripen in 49 days
Best Container Size
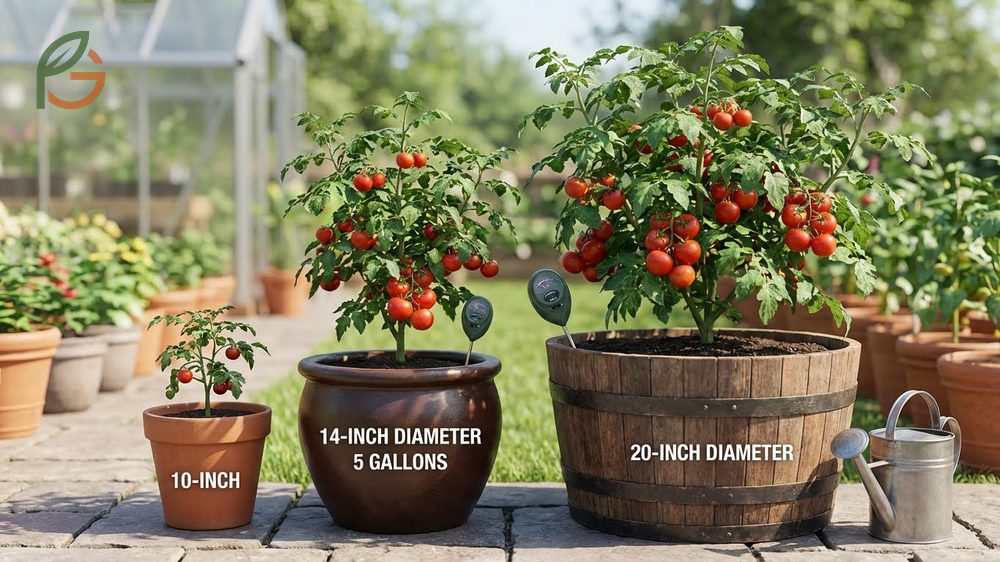
Research from Penn State Extension establishes that container volume directly impacts plant size and fruit production. Their trials using containers from 14 to 20 inches in diameter showed larger pots consistently produced bigger plants with higher yields[1]. The minimum effective size is 14 inches in diameter holding at least 5 gallons of soil.
Larger containers offer practical advantages beyond root space. They hold more water, reducing daily watering frequency during hot weather. This matters because cherry tomatoes have extensive root systems that quickly deplete moisture in small pots. A 5-gallon container might need watering twice daily in July, while a 10-gallon pot maintains moisture with once-daily watering.
What often gets overlooked is container depth. Cherry tomatoes develop deep taproots that anchor plants and access water reserves. Containers should measure at least 12-14 inches deep, though 16-18 inches provides better drought tolerance and stability for taller varieties.
This table compares container volumes, dimensions, suitable tomato varieties, and watering frequency for five different pot sizes from compact to premium options
| Container Volume | Diameter × Depth | Best For | Watering Frequency |
|---|---|---|---|
| 3-5 gallons | 12-14 inches × 12 inches | Compact determinates, Tiny Tim, patio varieties | 2-3 times daily in hot weather |
| 5-7 gallons | 14-16 inches × 14 inches | Standard determinates, small indeterminates | 1-2 times daily |
| 10 gallons | 16-18 inches × 16 inches | Most cherry varieties, Husky types | Once daily |
| 15 gallons | 18-20 inches × 16-18 inches | Vigorous indeterminates, Sweet 100 | Once daily |
| 20+ gallons | 20+ inches × 18+ inches | Maximum production, multiple plantings | Every 1-2 days |
Container Material and Drainage
Material selection affects root temperature, moisture retention, and plant health. Plastic containers retain moisture longest, making them practical for busy gardeners who can’t water twice daily. Fabric grow bags provide superior aeration and prevent root circling, though they dry out faster and may need more frequent watering.
Ceramic and terracotta pots look attractive but wick moisture from soil, requiring vigilant watering in summer. They work well in humid climates where excess moisture causes problems. Dark-colored containers absorb more heat, potentially cooking roots when temperatures exceed 85°F (29°C)—choose lighter colors in hot regions.
Drainage capability isn’t negotiable. Every container must have multiple holes in the bottom to release excess water. University of Florida research confirms that waterlogged soil causes root rot and blossom end rot by preventing calcium uptake[3]. Drill additional 0.5-inch holes if your container has inadequate drainage.
Important Note: Five-gallon buckets from hardware stores make excellent containers when you drill 6-8 drainage holes in the bottom. They’re affordable, durable, and exactly the right size for most cherry tomato varieties.
Potting Soil Requirements
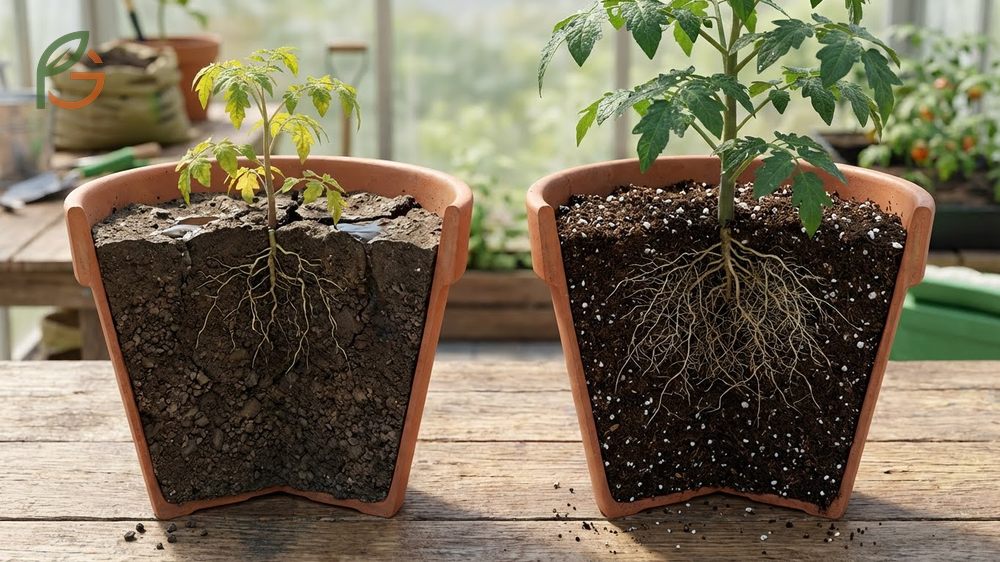
Garden soil from your yard won’t work in containers. It compacts quickly, restricts root growth, and drains poorly in confined spaces. Commercial potting mixes are engineered to stay loose and aerated while retaining moisture—qualities that make or break container tomatoes.
The ideal potting mix balances three functions: it holds water without staying soggy, provides nutrients throughout the season, and maintains structure without compacting. Look for products containing sphagnum peat moss or coco coir (moisture retention), perlite or vermiculite (drainage), and compost (nutrients).
Premium mixes designed specifically for vegetables contain added amendments like mycorrhizae and beneficial bacteria that improve nutrient uptake. These products cost more upfront but reduce fertilizer needs and produce healthier root systems. You can justify the expense by reusing the mix for 2-3 seasons if you refresh it with compost between plantings.
DIY Potting Mix Recipe
Making your own potting mix saves money and lets you customize ingredients for tomato production. This recipe creates approximately 2 cubic feet of mix, enough to fill three 5-gallon containers[6].
- 4 parts high-quality compost: Provides slow-release nutrients and beneficial microorganisms
- 3 parts coco coir or peat moss: Retains moisture while maintaining loose texture
- 2 parts perlite: Creates air pockets for root oxygenation and prevents compaction
- 1 part worm castings: Adds readily available nutrients and improves soil biology
- 0.5 cup organic tomato fertilizer per 5 gallons: Provides balanced nutrition for season-long growth
Mix all ingredients thoroughly in a large container or wheelbarrow until the texture feels crumbly and uniform. The finished mix should be slightly damp but not wet—it should hold together when squeezed but break apart easily. Fill containers leaving 1-2 inches of space below the rim to prevent water overflow during irrigation.
Pro Tip: Add 2-3 tablespoons of lime per 5 gallons of mix to maintain pH between 6.2-6.8, the optimal range for tomato nutrient uptake. Test your mix annually with an inexpensive soil test kit.
Watering Container Tomatoes
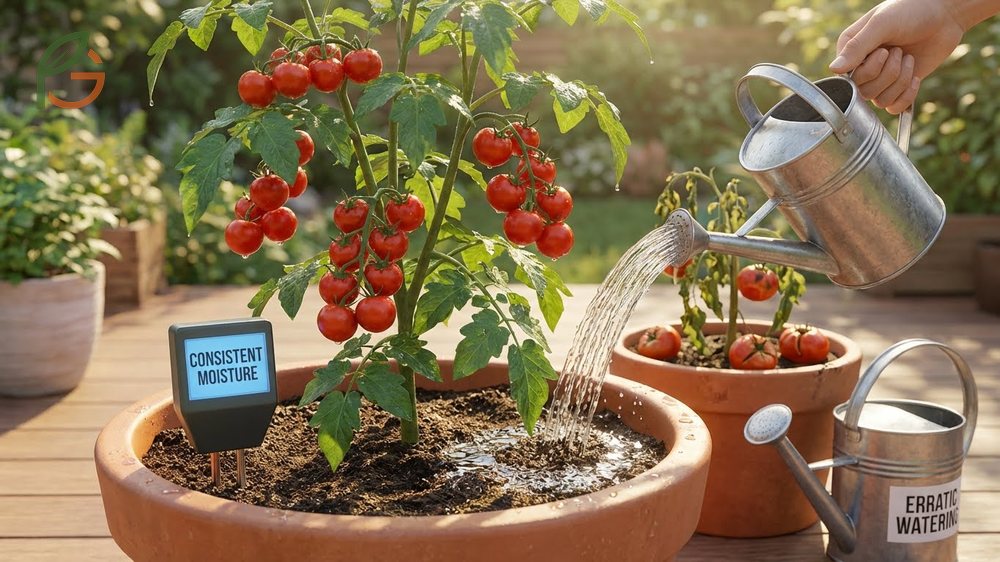
Consistent moisture determines whether your cherry tomatoes thrive or struggle with blossom end rot and cracked fruits. Container plants can’t access groundwater like in-ground tomatoes, making you the sole water source. Current guidance emphasizes providing 1-2 inches of water weekly, adjusted for temperature and plant size[3].
The challenge isn’t just quantity—it’s consistency. Erratic watering that alternates between drought and flooding stresses plants and causes physiological problems. Check soil moisture daily by inserting your finger 2 inches deep. If it feels dry at that depth, it’s time to water. During peak summer heat, most containers need water every morning, with larger plants in small pots sometimes requiring evening watering too.
Water deeply until it flows from drainage holes, ensuring the entire root zone gets saturated. Shallow watering encourages roots to stay near the surface where they’re vulnerable to heat stress. Direct water at the soil rather than foliage to reduce disease risk—wet leaves create conditions for fungal infections.
Morning watering outperforms evening irrigation because it allows foliage to dry quickly, reducing fungal disease pressure. It also ensures plants have adequate moisture reserves before facing afternoon heat. Most people find drip irrigation or soaker hoses work better than overhead watering for maintaining consistent soil moisture without wetting leaves.
- Wilting leaves during afternoon heat: Normal if plants recover by evening, but indicates need for more water if they stay wilted
- Leaves curling upward: Often signals inconsistent watering or insufficient moisture during hot weather
- Dark spots on bottom of fruits: Blossom end rot caused by calcium deficiency from erratic watering patterns
- Cracked fruits: Result from sudden water influx after drought period—maintain steady moisture to prevent splitting
- Yellowing lower leaves: Can indicate overwatering and poor drainage limiting oxygen to roots
Fertilizing Pot Tomatoes
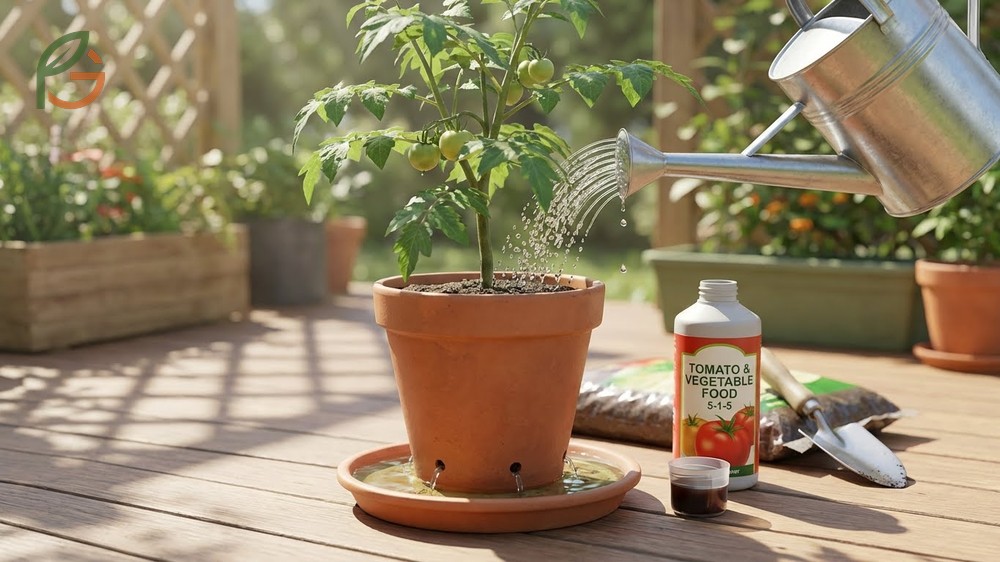
Container tomatoes deplete available nutrients faster than garden plants because frequent watering leaches minerals from the limited soil volume. Evidence from container trials shows plants need supplemental feeding every 2-4 weeks once they reach 6 inches tall[4]. You can’t rely on initial soil fertility to carry plants through a 90-120 day growing season.
Choose fertilizers formulated for tomatoes or vegetables with balanced macronutrients. Look for N-P-K ratios like 5-10-10 or 10-10-20 that emphasize phosphorus and potassium over nitrogen. Too much nitrogen produces lush foliage at the expense of fruit production—you want sturdy growth and abundant flowers, not a leafy bush with few tomatoes.
Water-soluble fertilizers provide quick nutrient boosts but require frequent applications. Slow-release granular products offer convenience by feeding plants for 6-8 weeks per application. Many successful growers combine both approaches: slow-release granules mixed into the potting soil at planting, supplemented with water-soluble feedings every 2-3 weeks during peak production.
Apply fertilizer to moist soil to prevent root burn and improve nutrient absorption. Never fertilize drought-stressed plants—water first, then fertilize the next day. Watch for signs of over-fertilization like dark green leaves, excessive vine growth, or salt crust forming on the soil surface. If you see these symptoms, flush containers with plain water and skip the next scheduled feeding.
- Start light: Use half-strength fertilizer for young plants under 12 inches tall to avoid nutrient overload
- Increase during flowering: Switch to higher potassium formulas when first flowers appear to support fruit development
- Watch for deficiencies: Yellowing leaves may indicate nitrogen shortage, while purpling suggests phosphorus deficiency
- Supplement calcium: Spray foliage with calcium chloride solution weekly to prevent blossom end rot in hot weather
- Reduce late season: Cut back fertilizer by half in the last month before frost to allow fruits to ripen without pushing new growth
Support Stakes Containers
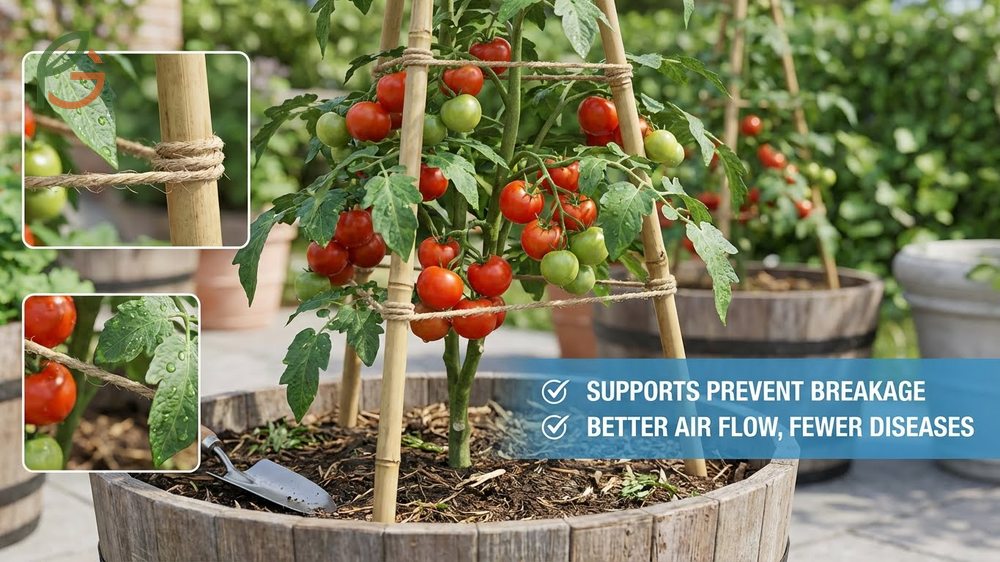
Support structures prevent branches from breaking under fruit weight and keep plants upright as they grow taller. Even compact determinate varieties benefit from basic support, while indeterminate types absolutely require sturdy staking or caging. Research shows properly supported plants have better air circulation, reducing fungal disease incidence by 30-40%[2].
Install supports at planting time rather than waiting until plants need them. Driving stakes into containers after root systems develop damages roots and destabilizes plants. The support should extend at least 4-5 feet above the soil surface for indeterminate varieties, while 3-4 feet works for determinates.
Conical wire cages with two horizontal rings work well for container tomatoes. They’re easy to install, provide 360-degree support, and allow air circulation around plants. The main drawback is they can create humid microclimates inside the cage that encourage fungal diseases—mitigate this by spacing containers apart and pruning to 3-4 main stems.
Single-stake systems offer more precise control over plant structure. Drive a 6-foot bamboo stake or metal pole into the container alongside the plant, then tie the main stem to the stake at 8-10 inch intervals using soft fabric ties or tomato clips. This method works beautifully for indeterminate varieties that you train to 1-2 main stems through regular pruning.
| Support Type | Best For | Pros | Cons |
|---|---|---|---|
| Conical wire cage | Determinate varieties, beginners | Easy installation, no pruning needed, 360° support | Can trap humidity, limited to 4-5 feet height |
| Single bamboo stake | Indeterminate varieties, pruned plants | Excellent air flow, precise control, inexpensive | Requires regular tying, needs consistent pruning |
| Tomato spiral stake | Single-stem indeterminates | Self-supporting as vine grows, clean appearance | Must train vine carefully, works only for 1 stem |
| Florida weave trellis | Multiple containers in row | Supports several plants, strong structure | Requires permanent framework, not portable |
Conclusion
The evidence is clear: growing cherry tomatoes in pots succeeds when you match container volume to plant needs, maintain consistent watering, and provide adequate support for developing fruits. Start with 5-gallon containers minimum, use quality potting mix with excellent drainage, and commit to daily moisture monitoring during the growing season.
Current horticultural guidance emphasizes variety selection as equally important as cultural practices—choose compact determinates for small spaces or robust indeterminates for maximum production. Your success depends less on fancy equipment than on understanding what your plants need and delivering it consistently throughout the season. FruitGarden provides research-based growing information to help container gardeners achieve professional results on patios, balconies, and rooftops across America.
Frequently Asked Questions
What’s the minimum container size for cherry tomatoes?
You need at least a 5-gallon container measuring 14 inches in diameter for most cherry tomato varieties. Research from Penn State Extension shows smaller containers work for ultra-compact varieties like Tiny Tim, but standard cherries perform best in 5-10 gallon pots that provide adequate root space and moisture reserves.
How often should I water cherry tomatoes in pots?
Water container tomatoes whenever the top 2 inches of soil feels dry, which typically means daily during summer heat. Larger containers in cooler weather might only need water every 2-3 days. Check moisture levels each morning and water deeply until it drains from the bottom.
Can I use garden soil instead of potting mix?
Don’t use straight garden soil in containers—it compacts quickly and drains poorly in pots. Use commercial potting mix or create your own blend with 4 parts compost, 3 parts coco coir, and 2 parts perlite. This combination maintains the loose, aerated structure that container tomatoes need.
Do cherry tomatoes need full sun in containers?
Yes, cherry tomatoes require 6-8 hours of direct sunlight daily for optimal fruit production and sugar development. Place containers in south-facing locations where they’ll receive maximum sun exposure. In regions with temperatures above 90°F (32°C), provide afternoon shade to prevent heat stress.
What type of fertilizer works best for container cherry tomatoes?
Use balanced fertilizers with N-P-K ratios like 10-10-20 that emphasize phosphorus and potassium for fruit production. Start fertilizing when plants reach 6 inches tall, then apply water-soluble fertilizer every 2-4 weeks throughout the growing season. Avoid high-nitrogen formulas that produce excessive foliage at the expense of fruits.
Should I prune cherry tomatoes grown in pots?
Determinate cherry tomatoes don’t require pruning, but you can improve indeterminate varieties by removing suckers and limiting plants to 3-4 main stems. This increases air circulation, concentrates energy into fruit production, and makes plants easier to support in containers.
When should I harvest cherry tomatoes from containers?
Pick cherry tomatoes when they develop full color and feel slightly soft when gently squeezed. Most varieties taste best when harvested at peak ripeness directly from the vine. Check plants every 2-3 days during peak season since ripe fruits can over-ripen quickly in summer heat.