How to grow cherry tomatoes successfully requires choosing the right variety, providing 6-8 hours of sunlight daily, and maintaining consistent watering throughout the growing season[1]. Research shows these compact plants thrive in both gardens and containers, producing abundant harvests within 55-70 days from transplanting[2]. FruitGarden combines university extension research with practical growing techniques to help you achieve maximum yields from your cherry tomato plants.
Quick Answer
- Start seeds indoors 10-12 weeks before your last frost date or purchase transplants for faster results[3]
- Plant in locations receiving 6-8 hours of direct sunlight with well-draining soil at pH 6.0-6.8[1]
- Space plants 18-24 inches apart and provide support structures since indeterminate varieties reach 6-8 feet tall[4]
- Water consistently providing 1-2 inches per week, adjusting based on temperature and soil conditions[5]
How to Grow Cherry Tomatoes
Cherry tomatoes rank among the easiest vegetables for beginners because they’re forgiving with watering schedules and produce reliable harvests even in less-than-perfect conditions. Most varieties mature in 55-70 days after transplanting, giving you fresh tomatoes throughout summer and early fall[2]. The key to success lies in understanding whether you’re growing determinate varieties that stop at 3-4 feet or indeterminate types that can reach 6-8 feet or more[4].
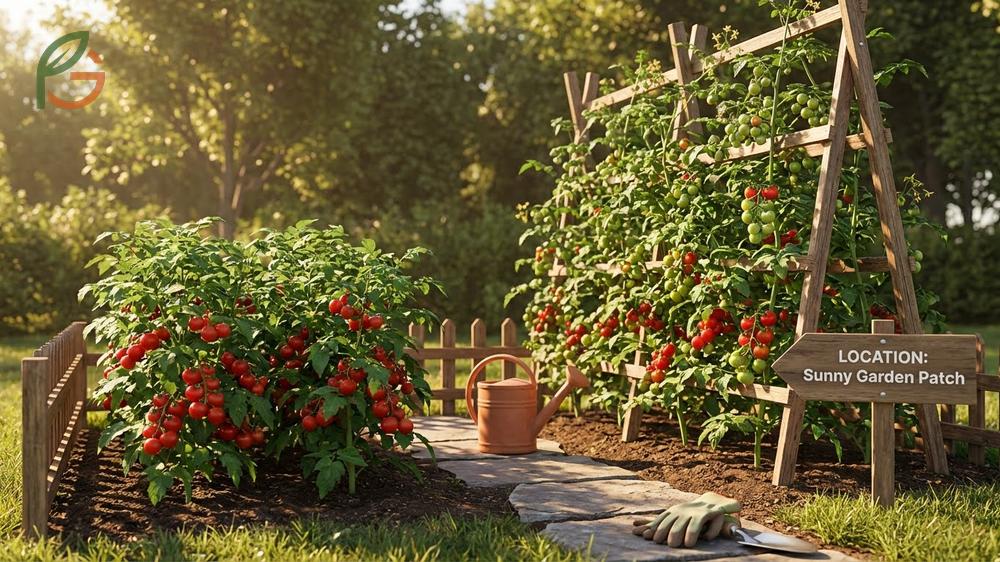
Location matters more than any other factor when growing cherry tomatoes. Pick a spot with full sun exposure—that’s 6-8 hours minimum of direct sunlight[1]. Soil should drain well and have a slightly acidic pH between 6.0 and 6.8, which you can achieve by amending with compost or well-rotted manure before planting.
Space your plants 18-24 inches apart to allow proper air circulation, which prevents fungal diseases that thrive in crowded conditions. Plant seedlings deep, burying the stem up to the first set of true leaves—this encourages stronger root development along the buried stem. If you’re like most American gardeners, you’ll find that cherry tomatoes outperform larger slicing varieties in terms of total yield per square foot of garden space.
Starting from Seeds vs. Transplants
Growing from transplants gives you a significant head start over seeds. When you buy transplants, you skip the indoor seed-starting phase that requires grow lights, heat mats, and careful timing[6]. Seeds need to start indoors 10-12 weeks before your last frost date, planted 1/4 inch deep in quality seed-starting mix[3].
Seeds make economic sense if you’re planting 10 or more plants or growing rare heirloom varieties not available as transplants. For smaller gardens, transplants save you 6-8 weeks of growing time, getting you tomatoes in July instead of August[6].
From My Experience: My cousin in Guadalajara, Mexico started Sungold cherry tomatoes from seed in March 2024. Seeds germinated in 7 days versus the typical 5-10 day range, achieving 90% success rate on a sunny windowsill without grow lights.
Ideal Planting Conditions
Wait until nighttime temperatures consistently stay above 50°F (10°C) before transplanting seedlings outdoors. Cold soil stunts root growth and can trigger blossom end rot later in the season. Warm soil at 60-70°F (15-21°C) promotes rapid establishment and vigorous early growth.
Prepare your planting site by working 2-3 inches of compost into the top 8-10 inches of soil. This improves drainage in clay soils and water retention in sandy conditions. At planting time, remove the lower leaves from transplants and bury two-thirds of the stem underground—roots will form along the entire buried portion.
- Quality transplants with dark green leaves and sturdy stems, avoiding leggy or yellowing plants
- Support structures like cages or stakes installed at planting time to avoid root damage later
- Organic mulch applied 2-3 inches deep after soil warms to retain moisture and suppress weeds
- Balanced fertilizer or compost worked into planting holes for initial nutrient supply
- Water supply capable of delivering 1-2 inches per week through drip irrigation or soaker hoses
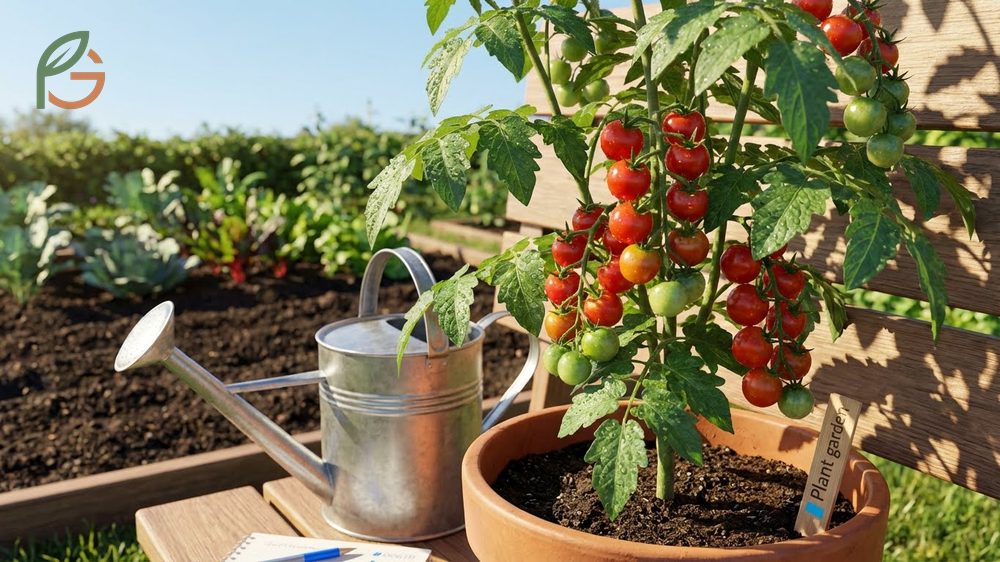
Growing Cherry Tomatoes in Pots
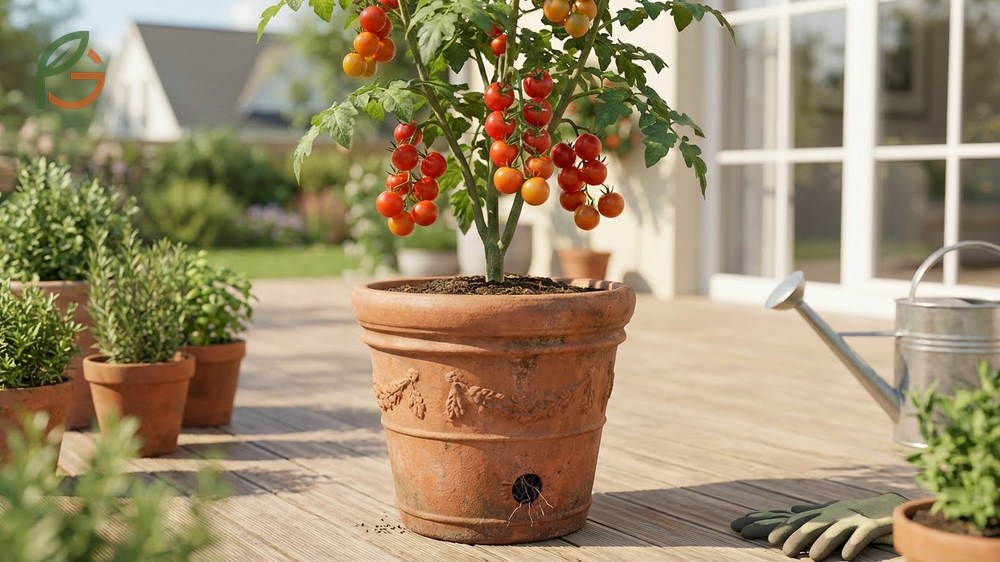
Container growing works exceptionally well for cherry tomatoes because their compact root systems adapt to confined spaces better than large beefsteak varieties. Research shows that roots typically extend 2-3 feet deep in garden soil but adjust to available container depth without compromising fruit production[4]. Container tomatoes give you flexibility to move plants toward sunlight and bring them under cover during severe weather.
The biggest advantage of pot growing is control over soil quality and drainage. You’re not limited by your yard’s native soil, which might be heavy clay or nutritionally depleted. Containers also warm up faster in spring, letting you start the growing season 1-2 weeks earlier than in-ground gardens.
Container Selection
Use containers at least 5 gallons in volume for determinate varieties and 7-10 gallons for indeterminate types. Larger containers hold more soil, which means more stable moisture levels and less frequent watering during hot weather. Drainage holes are non-negotiable—without them, waterlogged soil leads to root rot within days.
Choose pots made from breathable materials like fabric grow bags or unglazed terra cotta for improved air circulation to roots. Plastic containers work fine but heat up more in direct sun, potentially stressing plants during heatwaves. Dark-colored pots absorb excessive heat, so consider light colors or shade the pot’s sides with reflective material.
Important Note: Container tomatoes dry out significantly faster than garden plants. During hot summer weather above 85°F (29°C), you’ll need to water daily or even twice daily to prevent wilting and fruit cracking from moisture stress[7].
Fertilizing Container Tomatoes
Container plants can’t access nutrients from surrounding soil like garden tomatoes do, making regular fertilization critical for sustained production. Start applying water-soluble fertilizer 2 weeks after transplanting[8]. Before flowering begins, use a balanced 20-20-20 formula to promote strong vegetative growth.
Once flowers appear, switch to a high-potassium formula like 9-15-30 to support fruit development[8]. Apply fertilizer every 1-2 weeks, following package directions carefully—over-fertilization produces lush foliage at the expense of fruit production[9]. Always water the soil before fertilizing to prevent root burn and improve nutrient uptake.
- Fill containers with quality potting mix, never garden soil which compacts and drains poorly
- Add slow-release fertilizer pellets at planting for steady baseline nutrition throughout the season
- Monitor soil moisture daily by checking 2 inches below the surface with your finger
- Rotate containers weekly if one side receives more sun to encourage balanced growth
- Repot plants into larger containers mid-season if roots become crowded and growth slows
When to Pick Cherry Tomatoes
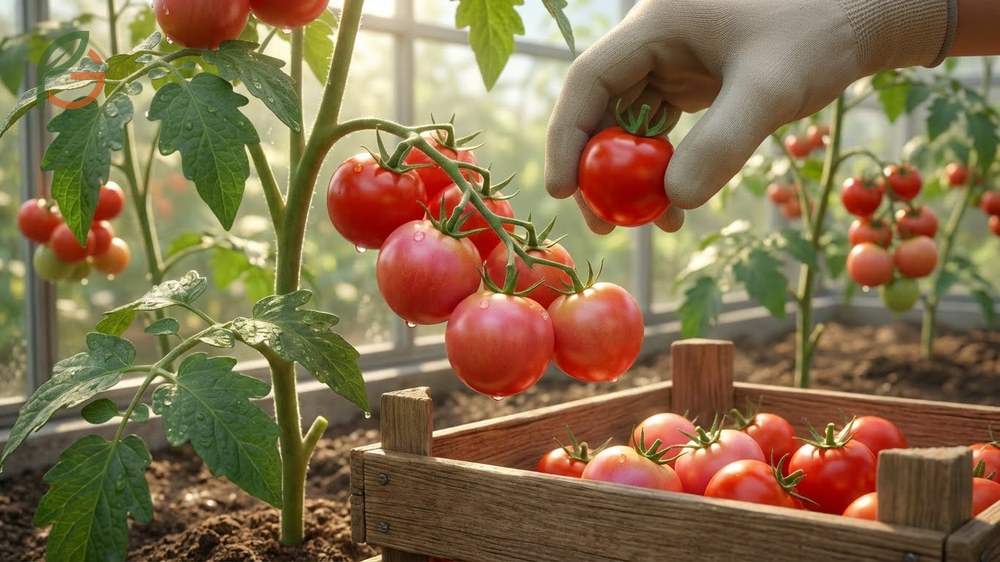
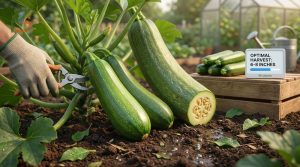
Harvest timing dramatically affects flavor, texture, and shelf life. The optimal harvest window for cherry tomatoes is when fruits show 30-60% pink or red coloration—this is called the “pink stage”[10]. Tomatoes picked at this stage ripen perfectly indoors while avoiding splitting, sun scald, and insect damage that occurs when fruits hang too long on plants.
Fully ripe cherry tomatoes come off the vine with almost no pressure when you lift and gently twist them. They should feel slightly soft when squeezed but not mushy. Most gardeners harvest every 1-2 days during peak season to catch fruits at perfect ripeness[2].
Watch for these ripeness indicators beyond color change. The fruit’s skin develops a slight sheen when sugars peak, and the stem attachment point weakens naturally as the tomato matures. Popular varieties like Sungold need approximately 57 days from transplanting before the first harvest, while Sunrise Bumblebee requires closer to 70 days[2].
Heavy rain triggers fruit splitting in thin-skinned cherry varieties. When the forecast calls for significant rainfall, harvest all ripe and near-ripe tomatoes preemptively. These fruits will finish ripening on your kitchen counter within 2-3 days at room temperature out of direct sunlight.
From My Experience: My friend in Monterrey, Mexico harvests her Sweet 100s at the breaker stage in July when heat exceeds 95°F (35°C). She finds this prevents sun scald damage that ruined 40% of her fruit when she waited for vine-ripening during the previous summer’s heatwave.
Harvest Tip: At season’s end when frost threatens, pick all sized fruits regardless of color. Even green tomatoes that have reached full size will ripen indoors, though flavor won’t match vine-ripened quality. Store them at room temperature around 65-70°F (18-21°C) for best results.
How to Prune Cherry Tomato Plants

Pruning cherry tomato plants improves air circulation, reduces disease pressure, and channels the plant’s energy toward fruit production rather than excessive foliage. The primary pruning target is suckers—those shoots that emerge at the junction between the main stem and fruiting branches[11]. Suckers are weak stems that won’t bear fruit and drain resources from productive branches.
Start pruning when plants reach 12-18 inches tall and suckers become clearly visible. Pinch off suckers when they’re 2-4 inches long by grasping them between your thumb and forefinger and bending them sideways until they snap off cleanly. Prune in the morning after dew dries but before afternoon heat, allowing wounds to heal quickly.
For indeterminate varieties, limit plants to 1-2 main stems by removing all other suckers throughout the season. This single or double-stem training maximizes fruit size and ripening speed. Determinate varieties need less aggressive pruning—just remove lower leaves that touch the ground and any obviously damaged or diseased foliage.
Stop removing suckers about 4 weeks before your first expected fall frost. This allows the plant to focus energy on ripening existing fruit rather than producing new growth that won’t mature before cold weather arrives.
- Remove bottom 6-8 inches of foliage once plants establish to prevent soil-borne diseases from splashing onto leaves
- Sanitize pruning shears with rubbing alcohol between plants to avoid spreading diseases like bacterial wilt
- Avoid pruning during wet conditions when wounds heal slowly and fungal spores spread easily
- Leave some foliage to shade developing fruit and prevent sun scald during hot weather
- Check plants twice weekly during rapid growth periods since suckers can appear and reach 6 inches within days
Supporting Cherry Tomato Vines
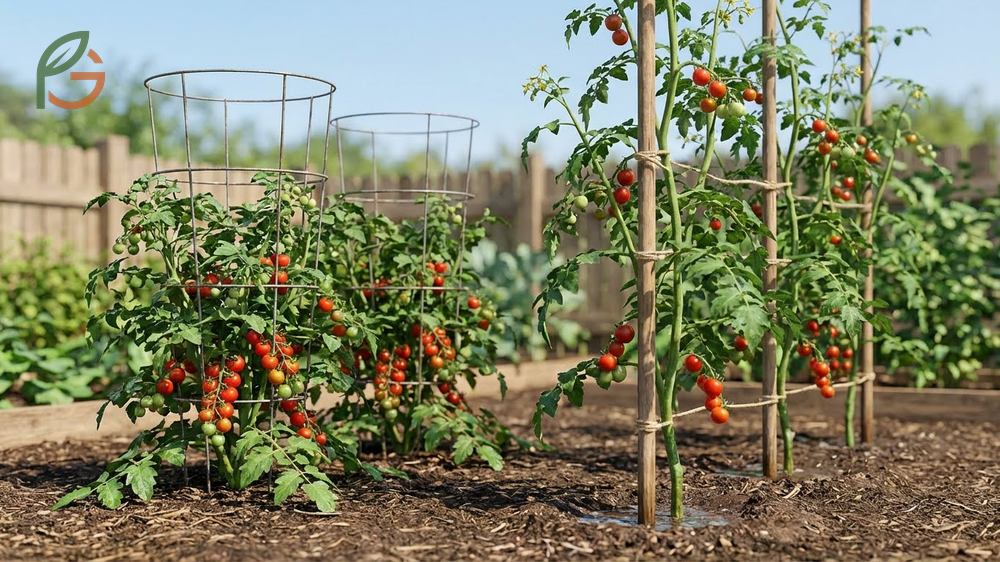
Staking or caging cherry tomato plants prevents sprawling growth that leads to fruit rot, pest damage, and inefficient garden space use. Support structures should be installed at planting time—adding stakes later risks damaging established root systems. Standard tomato cages work well for determinate varieties, but indeterminate types quickly outgrow typical 4-foot cages and need taller supports[12].
Single-stake systems using 6-8 foot wooden or metal stakes work effectively for pruned plants with 1-2 main stems. Drive stakes at least 12 inches into the ground and position them 5 inches from the plant stem[11]. Tie the main stem to the stake every 8 inches using soft material like strips of cloth or Velcro plant ties—never wire or thin string that cuts into stems.
Florida weave systems support entire rows efficiently. Install sturdy posts every 4-5 feet along the row, then weave twine horizontally between posts on alternating sides of plants every 8-10 inches of height. This method works brilliantly when you’re growing 10 or more plants in a row since it provides continuous support without individual stakes.
From My Experience: When my uncle in Querétaro, Mexico switched from 4-foot cages to 7-foot stakes in 2023, his Black Cherry variety produced 60% more fruit per plant. The taller support prevented branches from collapsing under heavy fruit loads that plagued his previous harvests.
This table compares different support methods for cherry tomato plants including stakes, cages, and trellises across cost, best uses, and installation timing
| Support Type | Best For | Height Needed | Installation Time |
|---|---|---|---|
| Single Stake | Pruned plants, 1-2 main stems | 6-8 feet for indeterminate varieties | At planting |
| Tomato Cage | Determinate varieties, minimal pruning | 4-5 feet for compact growth | At planting |
| Florida Weave | Rows of 10+ plants, efficient spacing | 5-7 feet posts with horizontal twine | Posts at planting, twine added as plants grow |
| Trellis Panel | Container plants, vertical gardens | 6 feet minimum for climbing support | Before planting |
Tomato Hornworm Control

Tomato hornworms are among the most destructive pests you’ll encounter, capable of defoliating an entire plant within 2-3 days if left unchecked. These large green caterpillars grow up to 4 inches long and blend perfectly with tomato foliage, making them difficult to spot until significant damage occurs. Look for missing leaves, black droppings on lower foliage, and stripped stems as telltale signs of hornworm activity.
Handpicking remains the most effective control method for small infestations. Check plants every 2-3 days, inspecting both leaf tops and undersides in early morning or late evening when hornworms are most active[13]. Drop collected hornworms into soapy water or feed them to chickens if you keep a backyard flock—hornworms don’t bite or sting, though their appearance can be intimidating.
For severe infestations, apply Bacillus thuringiensis (Bt), a natural bacterial insecticide that paralyzes hornworm digestive systems without harming beneficial insects[13]. Bt works best on young caterpillars under 2 inches long and must be reapplied every 5-7 days. Spray both leaf tops and bottoms in early morning or late afternoon, and it’s safe to use up to harvest day as long as you wash fruit thoroughly.
Prevention strategies significantly reduce hornworm problems. Plant companion plants like marigolds and basil near tomatoes—their strong scents repel the hawk moths that lay hornworm eggs[14]. Dill serves as an excellent trap crop, attracting hornworms away from tomatoes and concentrating them where they’re easy to remove. Till your garden in fall to expose overwintering pupae to freezing temperatures and predators.
- Basil repels hornworm moths with its strong aroma while improving tomato flavor when planted 12 inches away
- Marigolds (especially French varieties) deter whiteflies and attract parasitic wasps that control aphids
- Garlic, onions, and chives repel aphids and hornworms through their pungent sulfur compounds
- Nasturtiums act as trap crops drawing aphids away from tomatoes to sacrificial plants
- Parsley and dill attract beneficial insects like ladybugs and lacewings while serving as hornworm trap crops
Natural Predator Alert: If you spot a hornworm covered with white rice-like cocoons on its back, don’t remove it. These cocoons are parasitic wasp larvae that will kill the hornworm and produce more wasps to control future pests. Leave these parasitized hornworms in place to support beneficial insect populations.
Conclusion
The evidence is clear: how to grow cherry tomatoes successfully depends on three critical factors—providing consistent water and sunlight, choosing appropriate support structures for your variety type, and staying ahead of common pests like hornworms through regular monitoring. Cherry tomatoes outperform larger varieties in reliability and total yield, making them ideal for gardeners at every skill level.
Current growing practices emphasize preventive care over reactive treatments, meaning daily observation catches problems before they escalate. Whether you’re growing in containers on a balcony or in large garden beds, the fundamentals remain identical—full sun exposure, well-draining soil, proper support, and attentive watering. Start with reliable varieties like Sungold or Sweet 100, and you’ll enjoy abundant harvests from mid-summer through the first frost.
Frequently Asked Questions
How long does it take for cherry tomatoes to grow from seed?
Cherry tomatoes take 10-12 weeks to grow from seed to transplant-ready seedlings, then another 55-70 days from transplanting until first harvest. Total time from seed to ripe fruit ranges from 75-95 days depending on variety and growing conditions. Starting seeds indoors 10-12 weeks before your last frost date ensures plants are ready when outdoor temperatures permit transplanting.
Can you grow cherry tomatoes indoors year-round?
Yes, but indoor cherry tomato plants require full-spectrum grow lights providing 12-16 hours of light daily to produce fruit. Place lights 6-12 inches above plants and maintain temperatures between 65-75°F (18-24°C). Compact determinate varieties like Tiny Tim work best indoors, and you’ll need to hand-pollinate flowers by gently shaking plants daily since there aren’t natural pollinators indoors.
Why are my cherry tomato plants tall but not producing fruit?
Excessive nitrogen fertilizer causes lush foliage growth at the expense of fruit production. Switch to a low-nitrogen, high-potassium formula like 5-10-10 to promote flowering and fruiting. Other causes include insufficient sunlight (needs 6-8 hours daily), temperatures consistently above 90°F (32°C) or below 55°F (13°C), or overwatering which encourages vegetative growth over reproduction.
What’s the difference between determinate and indeterminate cherry tomatoes?
Determinate varieties grow to 3-4 feet tall, produce all their fruit within 2-3 weeks, then stop growing—ideal for canning and processing. Indeterminate types continue growing 6-8 feet or taller throughout the season, producing fruit continuously until frost kills the plant. Most popular cherry varieties like Sungold and Sweet 100 are indeterminate and require taller support structures plus regular pruning.
How often should I water cherry tomato plants in containers?
Container cherry tomatoes need watering when the top 2 inches of soil feels dry to touch. During cool spring weather, this means every 3-4 days, but hot summer temperatures above 85°F (29°C) require daily watering or even twice daily for smaller pots. Always water deeply until it drains from the bottom holes rather than frequent shallow watering that encourages weak surface roots.
Should I remove the bottom leaves from cherry tomato plants?
Yes, remove the bottom 6-8 inches of foliage once plants establish to prevent soil-borne diseases from splashing onto leaves during watering or rain. This pruning improves air circulation around the plant base and makes it easier to spot pest problems early. Use clean pruning shears and do this gradually over several days rather than removing all bottom leaves at once which can stress the plant.
What causes cherry tomatoes to split and crack on the vine?
Fruit splitting occurs when plants receive irregular watering—extended dry periods followed by heavy rain or excessive irrigation cause the fruit to absorb water faster than the skin can expand. Maintain consistent soil moisture with 1-2 inches of water weekly, and mulch around plants to stabilize moisture levels. Harvest fruits at the pink stage before heavy rain if splitting is a recurring problem in your garden.